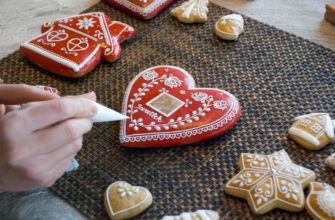
In the world of baking, there’s an intricate dance of flavors and textures that takes place within the humble realm of cookies. These delectable treats, with their melt-in-your-mouth goodness, have the power to transport us back to childhood memories of warm kitchens and sweet aromas.
Today, we embark on a journey to unravel the secrets behind one of the most beloved cookie varieties – those crisscrossed wonders that never fail to captivate our taste buds. Mastering the art of creating perfectly crosshatched cookies requires more than just a dash of skill; it involves a delicate balance of precision and finesse, a symphony of ingredients and techniques.
Revolutionize Your Health & Lifestyle!
Dive into the world of Ketogenic Diet. Learn how to lose weight effectively while enjoying your meals. It's not just a diet; it's a lifestyle change.
Learn MoreWith this comprehensive guide, we will delve into the realm of crisscrossed cookies, sharing with you expert insights and invaluable tips that will elevate your baking prowess to new heights. From understanding the science behind the ideal cookie dough consistency to mastering the art of achieving picture-perfect shapes, our curated collection of techniques will empower you to create cookies that are not only visually stunning but also delightfully delicious.
- Mastering Crisscrossed Cookies: Expert Techniques for Perfect Results
- Savvy Cookie Bakers Share Their Secrets for the Crossed Pattern
- Choosing the Right Dough Consistency
- Mastering the Technique of Crosshatch Patterns
- Achieving Optimal Baking Time and Temperature
- Ingredients and Tools for Flawless Cross Pattern Cookies
- Essential Ingredients for Irresistible Crisscrossed Cookies
- Must-Have Tools for Precise Crosshatching
- Questions and answers
Mastering Crisscrossed Cookies: Expert Techniques for Perfect Results
Unlocking the secrets to creating flawlessly crisscrossed cookies requires a mastery of expert techniques. By utilizing a combination of refined skills and well-honed methods, you can achieve truly perfect results that will impress both your taste buds and your guests.
Begin by incorporating precision and finesse into your cookie dough preparation. Pay careful attention to the temperature of your ingredients, ensuring that your butter is perfectly softened and your eggs are at room temperature. This will allow for optimal blending and result in a smoother, more consistent dough.
Furthermore, take the time to properly measure your ingredients, using a kitchen scale for heightened accuracy. Weighing your flour, sugar, and other dry components will help maintain the proper ratios and ensure a uniform texture in your cookies.
Once your dough is mixed to perfection, it’s time to focus on shaping your crisscrossed cookies. Start by using a cookie scoop or ice cream scoop to portion out equal-sized balls of dough. This will not only ensure consistent cookie sizes but also make the shaping process more manageable.
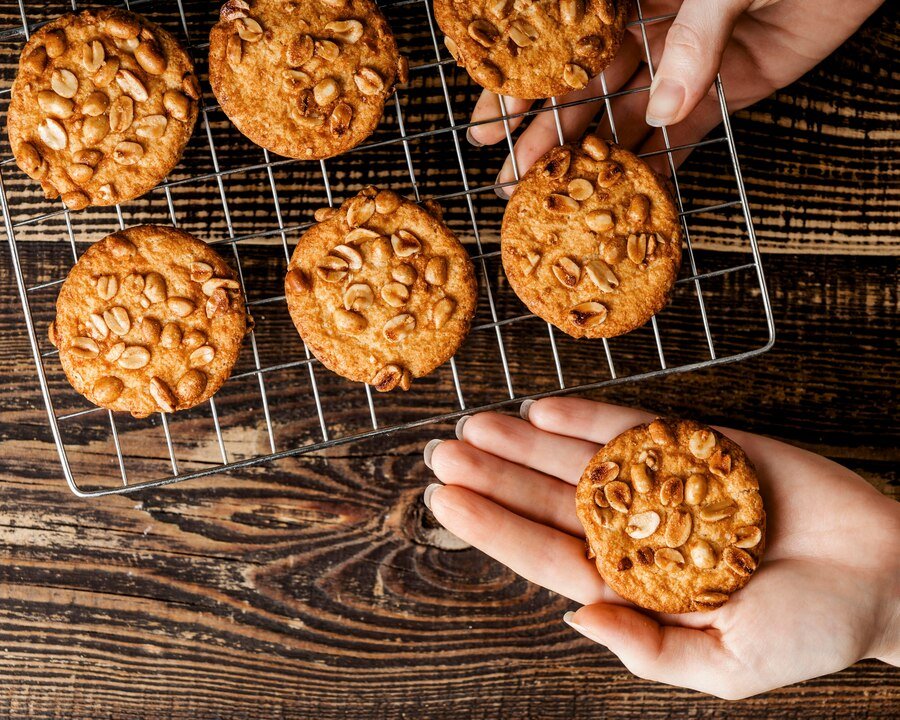
To create the iconic crisscross pattern on your cookies, don’t hesitate to get a little creative. Experiment with different fork patterns, applying gentle pressure as you press down on each ball of dough. The combination of horizontal and vertical lines will give your cookies an eye-catching appearance, elevating them from ordinary treats to visually stunning delights.
Lastly, pay careful attention to baking times and temperatures. Every oven is different, so make sure to adjust accordingly. Keep a close eye on your cookies as they bake, removing them from the oven when they are golden brown around the edges but still slightly soft in the center. This will ensure a perfect balance of texture and taste.
By following these expert techniques, you’ll master the art of crisscrossed cookies with ease. Each batch will showcase your newfound skills, leaving your friends and family in awe of your baking prowess. So roll up your sleeves, grab your ingredients, and embark on a delicious journey towards cookie perfection.
Experienced cookie connoisseurs unveil their tried-and-true techniques for achieving the coveted crossed pattern. Unlock the wisdom of skilled bakers as they reveal their insider tips for creating beautifully decorated confections that will impress even the most discerning sweet tooth.
Discover the trade secrets of adept cookie artisans who have perfected the art of creating intricate crisscross designs. Unveiling their mastery, these talented bakers divulge their unique methods and tricks for achieving seamless patterns that are both visually stunning and irresistibly delicious.
Uncover the hidden secrets to creating perfectly crossed cookies as seasoned experts share their expertise. Delve into the various techniques employed by knowledgeable bakers, from strategic dough manipulation to skillful pattern execution, and learn how to elevate your cookie baking game to new heights.
Explore the nuanced approaches embraced by seasoned cookie enthusiasts who have honed their skills in achieving flawlessly crossed patterns. With an eye for detail and a passion for precision, these savvy bakers will guide you through the process, empowering you to create impressive cookies that are both aesthetically pleasing and delectable.
Enter the realm of the cross-pattern masters as they divulge their secret tricks to ensure your crisscrossed cookies are a triumph. These astute bakers will demonstrate how utilizing the right techniques, tools, and mindset are essential to unleashing your inner cookie artist and achieving flawlessly executed designs that will leave a lasting impression.
Choosing the Right Dough Consistency
In the realm of crisscrossed cookies, achieving the perfect dough consistency is a crucial element that can make or break your baking endeavors. The texture of the dough plays a significant role in the final outcome of your cookies, determining their appearance, flavor, and overall success. The key lies in striking a balance between smoothness and firmness, allowing the dough to hold its shape while providing a delightful melt-in-your-mouth experience.
Smoothness
When it comes to the smoothness of the dough, you want it to be velvety and supple, almost like silk gliding through your fingers. This is achieved by using the right amount of fat, such as butter or shortening, which helps to create a tender and smooth texture. Incorporating the fat into the dry ingredients with a gentle hand ensures even distribution, resulting in a cohesive dough that rolls out effortlessly.
Firmness
In contrast to smoothness, the dough should also possess a certain level of firmness. This is necessary to maintain the shape of the crisscross pattern during baking and to prevent the cookies from spreading excessively. Achieving the ideal level of firmness requires proper hydration through the inclusion of liquid ingredients and careful measurement of flour. Too much liquid can make the dough sticky and difficult to handle, while too little can result in a dry and crumbly texture. Striking the right balance is key to achieving the perfect dough consistency.
Customizing Consistency
Experimentation is an essential part of finding the right dough consistency for your crisscrossed cookies. Different recipes may call for slight variations in texture depending on personal preference or desired outcome. Pay attention to the specific instructions provided in the recipe and make adjustments accordingly. Adding a teaspoon of water or milk at a time, or incorporating additional flour gradually, can help you achieve the desired smoothness and firmness for your cookie dough.
In summary, choosing the right dough consistency for crisscrossed cookies is a delicate balance between smoothness and firmness. The dough should be smooth like silk, yet firm enough to hold its shape. The careful incorporation of fat and hydration, along with experimentation and adjustment, will enable you to find the perfect dough consistency for your cookie baking adventures.
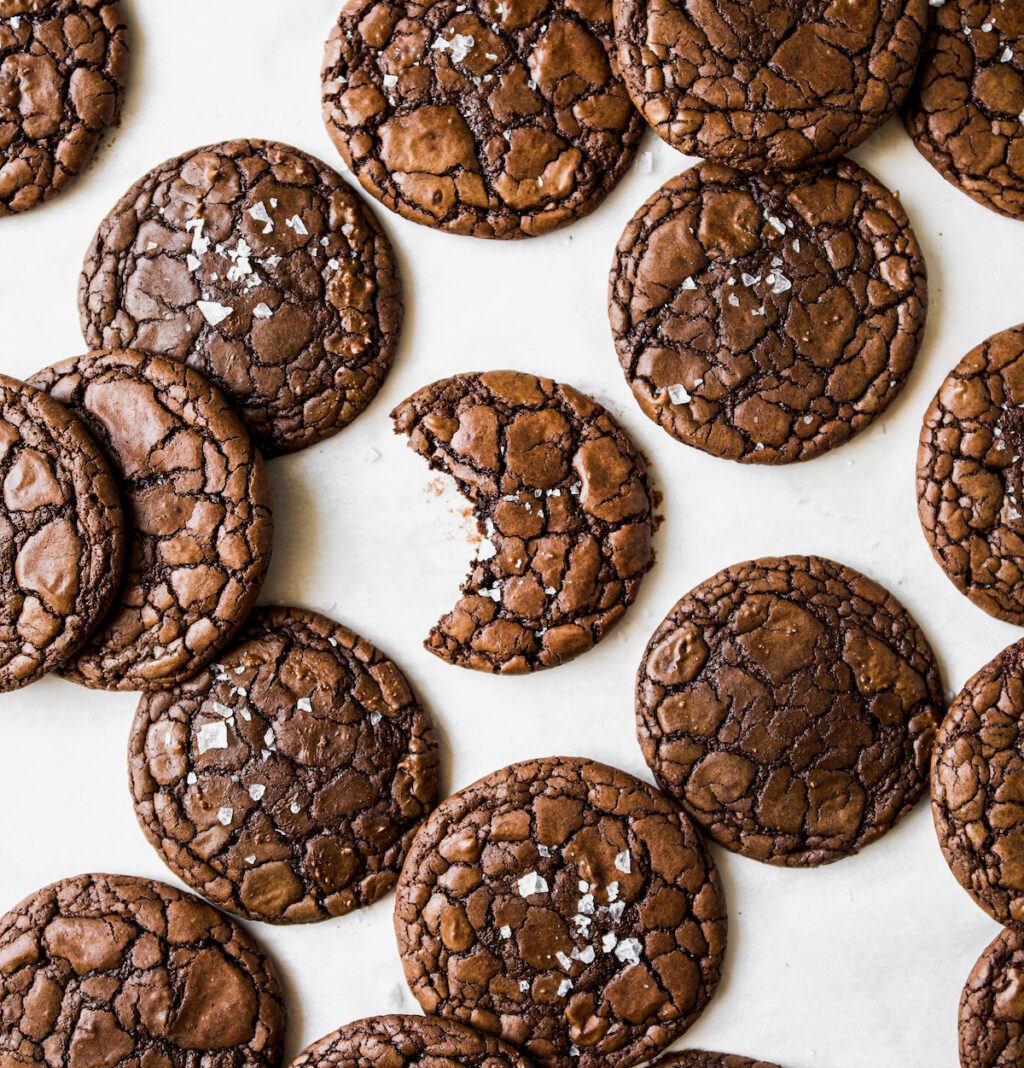
Mastering the Technique of Crosshatch Patterns
The art of creating crosshatch patterns is a crucial skill that every baking enthusiast should strive to master. This technique involves a meticulous crisscross pattern that adds visual appeal and texture to various baked goods. By understanding the intricacies and implementing expert tips and tricks, you can elevate your baking creations to new heights.
Enhancing Visual Appeal:
One of the key benefits of incorporating crosshatch patterns into your baked goods is the enhanced visual appeal they provide. Rather than relying solely on the taste of your treats, these patterns introduce a delightful element of artistry. The intersecting lines create a mesmerizing effect, highlighting the craftsmanship behind your baked creations.
Adding Texture and Depth:
The technique of crosshatch patterns not only enhances visual appeal but also adds texture and depth to your baked goods. As you carefully weave the lines in a crisscross manner, the resulting pattern elevates the sensory experience. Each bite becomes a sensory delight as your teeth glide through the slightly raised portions, enhancing the overall enjoyment of your treats.
Mastering the Technique:
To create impeccable crosshatch patterns, a steady hand and precision are essential. Start by using a sharp tool, such as a knife or a pastry cutter, to carefully score the dough. Make sure to apply consistent pressure to achieve uniform lines. Experiment with different depths and angles to find the perfect balance for your desired outcome.
Implementing Creative Variations:
While classic crosshatch patterns are undoubtedly stunning, don’t be afraid to add your own twist to this technique. Experiment with different shapes, such as diagonal lines, to create unique patterns. You can also incorporate colored dough or sprinkles to further enhance the visual impact. Let your creativity flow and have fun while mastering the art of crosshatch patterns!
In conclusion, mastering the technique of crosshatch patterns allows you to take your baking skills to the next level. The visual appeal, added texture, and creative possibilities make this skill a valuable addition to any baker’s repertoire. With practice and attention to detail, you can become an expert in creating stunning crosshatch patterns that will impress both your eyes and taste buds.
Achieving Optimal Baking Time and Temperature
To achieve the perfect baking time and temperature, it is important to understand the characteristics of your cookie dough. Different types of dough require different baking conditions. Factors such as the dough’s moisture level, fat content, and thickness will influence the baking time and temperature required to achieve the desired results.
A good starting point is to follow the recipe instructions provided. These guidelines often offer a suggested baking time and temperature that have been tested and proven to work well with the specific cookie dough. However, it’s important to remember that these instructions are just a starting point, and you may need to make adjustments based on your oven’s performance and your desired outcome.
Keep in mind that every oven is different, so it’s essential to get to know your oven’s quirks and idiosyncrasies. Invest in an oven thermometer to ensure that the temperature displayed on your oven is accurate. Sometimes, ovens can have variations in temperature, making it necessary to adjust the baking time accordingly. Take note of how your cookies turn out when baked exactly as directed, and make adjustments in subsequent batches as needed.
Another factor to consider is the size and thickness of your cookies. Thicker cookies will require a longer baking time, while thinner ones may bake more quickly. Experiment with different sizes and shapes to find the perfect combination of baking time and temperature for your specific cookie dough.
Lastly, keep a close eye on your cookies as they bake. Pay attention to their color and texture. If they start to brown too quickly, you may need to reduce the oven temperature slightly or decrease the baking time. On the other hand, if they appear pale and undercooked, you might need to increase the temperature or extend the baking time.
| Baking Temperature | Baking Time |
|---|---|
| 325°F (163°C) | 12-14 minutes |
| 350°F (177°C) | 10-12 minutes |
| 375°F (190°C) | 8-10 minutes |
In conclusion, achieving optimal baking time and temperature for crisscrossed cookies involves understanding the characteristics of your dough, making necessary adjustments based on your oven’s performance, and closely monitoring the cookies as they bake. With a little experimentation and attention to detail, you’ll be well on your way to baking picture-perfect cookies every time.
Ingredients and Tools for Flawless Cross Pattern Cookies
In order to achieve the perfect crisscrossed pattern on your cookies, it is crucial to have the right combination of ingredients and tools. These elements work together to create the ideal texture, appearance, and taste that make these cookies stand out. Here are the key ingredients and tools you will need to master the art of crisscrossed cookie perfection:
- Flour: The primary ingredient in any cookie recipe, flour provides structure and stability to the dough. It is important to use the right type of flour, such as all-purpose or pastry flour, to achieve the desired texture.
- Sugar: Both granulated and brown sugar are typically used in crisscrossed cookies. Granulated sugar adds sweetness and helps with browning, while brown sugar adds moisture and a hint of caramel flavor.
- Butter: Butter plays a crucial role in creating a rich and buttery flavor in the cookies. It also contributes to the texture, providing a delicate and crumbly bite.
- Eggs: Eggs act as a binding agent and add moisture to the dough. They also contribute to the structure and texture of the cookies.
- Baking powder or baking soda: These leavening agents help the cookies rise and create a soft and tender texture. Choose the appropriate one based on the recipe.
- Salt: A small amount of salt enhances the flavors and balances the sweetness of the cookies.
- Vanilla extract: Adding a splash of vanilla extract enhances the overall flavor profile of the cookies, adding a hint of warmth and sweetness.
- Chocolate chips, nuts, or other mix-ins: While not necessary, adding chocolate chips, nuts, or other mix-ins can take your crisscrossed cookies to the next level, adding texture and flavor.
In addition to the ingredients, having the right tools can greatly assist in achieving the perfect crisscrossed cookie perfection. Here are some essential tools you should have:
- Mixing bowls: Different-sized mixing bowls come in handy when combining the ingredients and preparing the dough.
- Measuring cups and spoons: Accurately measuring the ingredients is crucial for consistent results. Invest in a set of measuring cups and spoons for precision.
- Spatula or wooden spoon: Use a spatula or wooden spoon to mix the ingredients together evenly without overmixing the dough.
- Baking sheets: Non-stick baking sheets or parchment paper ensure that the cookies don’t stick to the surface while baking. They also promote even browning.
- Cookie scoop or spoon: To achieve uniform cookie sizes, a cookie scoop or spoon is essential. This ensures even baking and consistent results.
- Fork or cookie stamp: A fork or cookie stamp is used to create the classic crisscross pattern on the cookies. This gives them their signature appearance.
- Cooling rack: Once the cookies are baked, transferring them to a cooling rack allows them to cool evenly and prevents them from becoming soggy on the bottom.
By having the right ingredients and tools on hand, you are well-equipped to create crisscrossed cookies that are flawless in both taste and appearance. Experiment with different recipes, flavors, and techniques to find the perfect combination that suits your preferences. Happy baking!
Essential Ingredients for Irresistible Crisscrossed Cookies
When it comes to baking delicious crisscrossed cookies that are impossible to resist, the key lies in carefully selecting the right ingredients. By using the perfect combination of high-quality components, you can elevate your cookies to a whole new level of culinary delight.
The Flour: Flour serves as the foundation for any cookie dough, providing structure and texture. Opt for a good quality all-purpose flour that is finely milled to ensure a smooth and consistent dough. You can also experiment with different types of flours like whole wheat or almond flour to add unique flavors and textures to your cookies.
The Sweeteners: Sweeteners give cookies the sweet taste that we all love. While traditional white sugar is an excellent choice, you can also try using alternatives like brown sugar, honey, or maple syrup for a richer, more complex flavor profile. Don’t forget to use a pinch of salt to enhance the sweetness and balance the flavors.
The Fats: Fat is essential for tender and moist cookies. Butter is a classic choice that lends a rich, buttery flavor, but you can also experiment with other fats like vegetable shortening or coconut oil for a unique twist. Be sure to use unsalted butter to have control over the salt levels in your dough.
The Eggs: Eggs play a crucial role in binding the dough together and adding moisture. Choose large eggs of the highest quality, as they will contribute to the overall texture and richness of your crisscrossed cookies. For a vegan alternative, you can use substitutes like applesauce or mashed bananas.
The Flavors: To make your crisscrossed cookies truly irresistible, don’t forget to add delicious flavorings such as vanilla extract, almond extract, or spices like cinnamon or nutmeg. These aromatic additions will enhance the taste and aroma of your cookies, making them utterly mouthwatering.
The Mix-ins: Lastly, feel free to get creative and add your favorite mix-ins to the dough. Chocolate chips, chopped nuts, dried fruits, or even a hint of citrus zest can take your crisscrossed cookies to new heights of flavor complexity.
In conclusion, the essential ingredients for irresistible crisscrossed cookies are carefully chosen flour, sweeteners, fats, eggs, flavorings, and mix-ins. By utilizing high-quality components and experimenting with different variations, you can create cookies that are not only visually appealing but also incredibly flavorful and impossible to resist.
Must-Have Tools for Precise Crosshatching
To achieve perfect crosshatching on your cookies, having the right tools is essential. These indispensable items will help you create beautiful and precise patterns without any hassle. Explore the must-have tools below that will make your crosshatching process a breeze.
- A high-quality ruler: A ruler is a fundamental tool for creating clean and accurate lines. Look for a ruler with clear markings and a non-slip surface to ensure precise measurements.
- A sharp scoring knife: A sharp scoring knife or a scoring blade is crucial for making distinct and fine lines. This tool allows you to effortlessly score the dough without tearing or smudging, resulting in crisp and defined crosshatching patterns.
- Decorating combs: Decorating combs or texture combs are specially designed for creating various patterns, including crosshatching. These combs typically have different tooth sizes and patterns, allowing you to experiment with different crosshatching designs on your cookies.
- Pastry brushes: Pastry brushes are versatile tools that come in handy when applying an egg wash or a glaze to your cookies before crosshatching. These brushes ensure an even and thin layer of wash, enhancing the appearance of the final crosshatched design.
- Parchment paper or silicone baking mats: Using parchment paper or silicone baking mats keeps your cookies from sticking to the baking sheet, preventing any disruption to the crosshatching pattern during the baking process. These non-stick surfaces also make it easier to transfer the dough onto the baking sheet without distorting the crosshatched lines.
Investing in these must-have tools will elevate your cookie crosshatching game, enabling you to achieve precise and professional-looking patterns every time. With the right tools at your disposal, you can create crosshatched cookies that are not only visually appealing but also a delight to bite into!
Questions and answers
What are some expert tips for making crisscrossed cookies?
Some expert tips for making crisscrossed cookies include making sure the dough is well-chilled before baking, using a fork to create the signature crisscross pattern, and using a combination of butter and shortening for a tender texture.
Why is it important to chill the dough before baking crisscrossed cookies?
Chilling the dough before baking crisscrossed cookies is important for several reasons. It helps the cookies retain their shape during baking, prevents excessive spreading, and allows the flavors to meld together for a more delicious end result.
Can I use only butter instead of a combination of butter and shortening for crisscrossed cookies?
While you can use only butter for crisscrossed cookies, using a combination of butter and shortening can result in a better texture. Butter adds richness and flavor, while shortening helps create a tender and crisp cookie. However, feel free to experiment and adjust based on your personal preference.
What is the best way to create the crisscross pattern on the cookies?
The best way to create the crisscross pattern on the cookies is by using a fork. Gently press the fork down on each cookie dough ball, first in one direction, and then in the opposite direction, to create a crisscross shape. Make sure to coat the fork in flour or sugar to prevent sticking.
How long should I bake the crisscrossed cookies and at what temperature?
The baking time and temperature for crisscrossed cookies may vary depending on the recipe. However, a general guideline is to bake them at 350°F (175°C) for about 10-12 minutes, or until the edges turn golden brown. Keep an eye on them while baking to ensure they don’t overcook.
How do I make perfect crisscrossed cookies?
To make perfect crisscrossed cookies, start by rolling your cookie dough into balls. Then, use a fork to press down on each ball and create a crisscross pattern. Make sure to dip the fork in flour to prevent sticking. Bake the cookies according to the recipe instructions, and you’ll have perfectly crisscrossed cookies!
What is the benefit of making crisscrossed cookies?
Making crisscrossed cookies not only adds a decorative touch, but it also helps to flatten the cookies and create a more even texture. This pattern also allows the cookies to bake more evenly and ensures that they cook through in the center. So, by making crisscrossed cookies, you can achieve both visual appeal and delicious results.
What can I do to prevent my crisscrossed cookies from spreading too much?
If your crisscrossed cookies are spreading too much during baking, there are a few things you can try. First, make sure your butter is at the right temperature. Softened but still slightly cool butter is ideal for preventing excessive spreading. You can also try chilling the dough in the refrigerator for 15-30 minutes before baking. Lastly, double-check that you are using the correct amount of flour in your recipe, as too little flour can lead to spreading.
Can I use a different pattern instead of a crisscross for my cookies?
Absolutely! While the crisscross pattern is classic and traditional for certain types of cookies, you can certainly experiment with different patterns. Some popular alternatives include using the tines of a fork to create a grid pattern or using a cookie stamp to imprint a design. Get creative and have fun with different patterns to make your cookies unique!
How long should I let my crisscrossed cookies cool before serving?
It’s important to let your crisscrossed cookies cool completely before serving to ensure that they maintain their shape and texture. Allow the cookies to cool on the baking sheet for about 5 minutes, then transfer them to a wire rack to cool completely. This usually takes around 20-30 minutes. Patience is key when it comes to enjoying perfectly cooled crisscrossed cookies!