Are you looking to give your living space a fresh new look? Well, you don’t have to spend a fortune to transform your home into a stylish and inviting haven. With a little creativity and resourcefulness, you can easily revamp your space without emptying your wallet. Whether you’re a seasoned decorator or a novice DIY enthusiast, these 10 clever and cost-effective ideas will inspire you to enhance the aesthetics of your room in no time.
When it comes to home décor, simplicity can be a powerful tool. By embracing minimalism and incorporating thoughtful details, you can create a space that exudes elegance and sophistication. Think of how a strategically placed indoor plant or a curated gallery wall can add bursts of color and personality to your room, without overwhelming the overall design. By making conscious choices and focusing on quality over quantity, you can give your space a modern and polished feel without spending a fortune.
Revolutionize Your Health & Lifestyle!
Dive into the world of Ketogenic Diet. Learn how to lose weight effectively while enjoying your meals. It's not just a diet; it's a lifestyle change.
Learn MoreIf you’re looking to add a touch of whimsy and charm to your living space, why not explore the world of upcycling? Repurposing old items and transforming them into unique and functional pieces is not only environmentally friendly, but it also allows you to express your individuality. From turning vintage suitcases into stylish storage solutions to transforming mason jars into eclectic candle holders, the possibilities are endless. With a little bit of imagination and a few basic tools, you can breathe new life into forgotten treasures and create one-of-a-kind statement pieces.
For those who crave a touch of luxury but are working with a tight budget, don’t fret! There are plenty of affordable ways to add a glamorous touch to your room without breaking the bank. From incorporating metallic accents and plush textures to experimenting with lighting and mirrors, you can create an opulent atmosphere that rivals the most lavish of interiors. Don’t be afraid to mix and match materials and styles to create a look that is uniquely yours. After all, true style is not about how much money you spend, but rather how you choose to express your personality through your surroundings.
- Repurpose Old Items: Creative Ways to Use What You Already Have
- Turn Unused Mason Jars into Charming Vases
- Transform Wooden Crates into Stylish Storage Solutions
- Create a Unique Gallery Wall with Old Frames
- Add a Touch of Nature: Bring the Outdoors In
- DIY Terrariums: Build Your Own Mini Garden
- Decorate with Potted Plants: Easy Care and Gorgeous Greenery
- Hang a Macrame Plant Hanger for Boho Vibes
- Upcycle with Paint: Give Your Furniture a Fresh New Look
- Revamp an Old Dresser with a Vibrant Coat of Paint
- Transform a Dull Table into a Statement Piece with Chalk Paint
- Add a Pop of Color to Your Chairs with Spray Paint
- Questions and answers
Repurpose Old Items: Creative Ways to Use What You Already Have
:strip_icc()/199644499_486608345955189_3012398494429630658_n-38e53648a0174246b37a47be3d1516d5.jpg)
Discover ingenious techniques to give new life to your unused possessions by repurposing them creatively. Finding creative ways to use old items not only adds a unique touch to your room decor but also helps you reduce waste and save money. In this section, we will explore innovative ideas for repurposing various items that you already have on hand.
1. Revamp Your Old Mason Jars: Don’t throw away those empty mason jars! Instead, transform them into stylish storage containers or chic candle holders. Paint them in vibrant colors or wrap them with twine to add a rustic touch. These repurposed mason jars can be used to store small accessories, as flower vases, or even as organizers for your stationery.
2. Turn Old Picture Frames into Art Displays: Give your old picture frames a new purpose by turning them into unique art displays. Remove the glass and backing, and use twine or wire to create a grid-like pattern across the frame. You can then use clips or clothespins to hang photos, Polaroids, or postcards. This DIY art display adds a personalized and dynamic element to your room decor.
3. Repurpose Vintage Suitcases: If you have vintage suitcases gathering dust in your attic, repurpose them into stylish and functional pieces. Stack them to create a unique side table or coffee table. You can also attach legs to one suitcase, creating a standalone storage piece with a vintage charm. The compartments in vintage suitcases can be used to store blankets, books, or other items.
4. Transform Old T-Shirts into Wall Art: Give your favorite old t-shirts a second life by transforming them into wall art. Stretch the t-shirt over a canvas or frame, securing it with staples or double-sided tape. You can create a collection of t-shirt wall art, showcasing your favorite band logos, quotes, or patterns.
5. Utilize Empty Wine Bottles: Don’t throw away those empty wine bottles! Clean them thoroughly and repurpose them into decorative vases or candle holders. Paint them in metallic or pastel colors to match your room’s color scheme. Cluster a few bottles together for an elegant centerpiece or scatter them around the room for a touch of sophistication.
By repurposing old items, you can add a personal touch to your room decor while also embracing sustainability and resourcefulness. These creative ideas allow you to transform what you already have into new and functional pieces, making your space unique without breaking your budget.
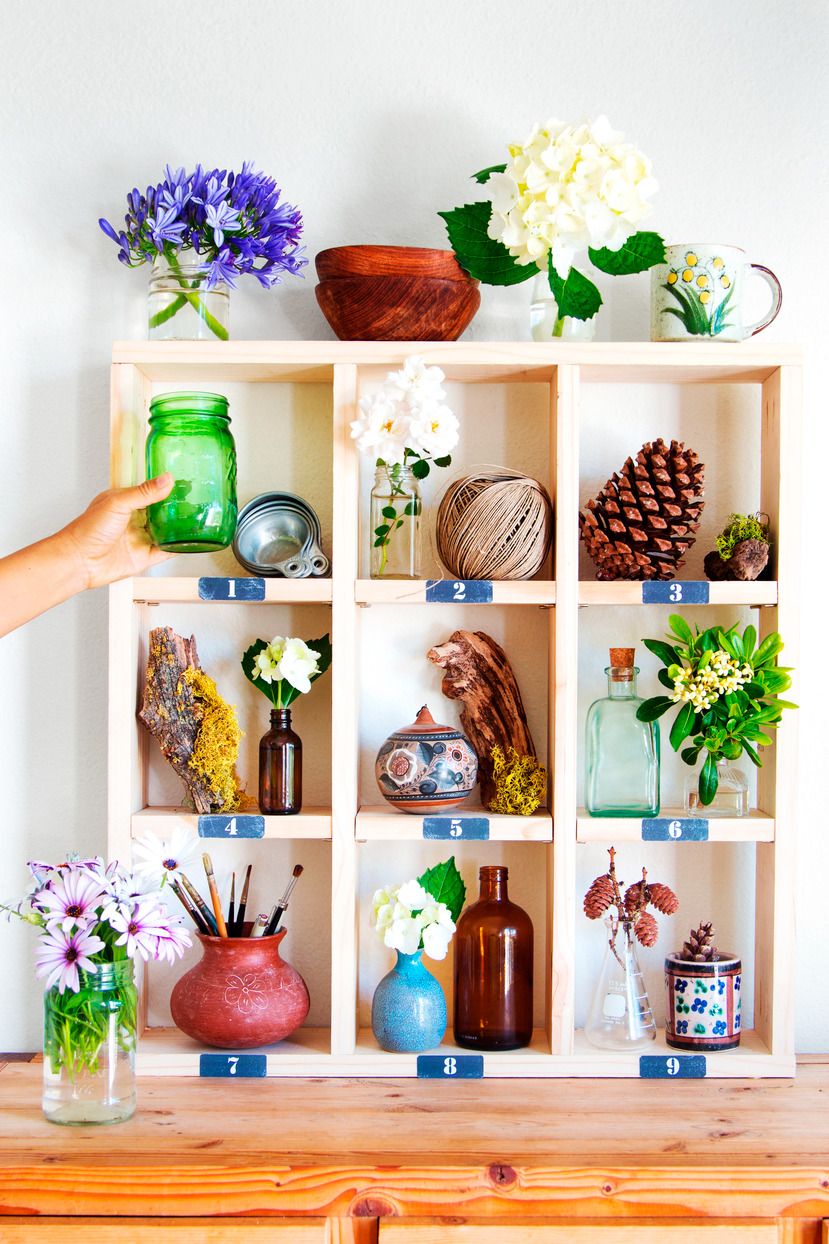
Turn Unused Mason Jars into Charming Vases

Embrace creativity and repurpose those forgotten mason jars into beautiful vases that add a touch of charm and elegance to your living space. With just a few simple steps, you can transform these jars into unique decorative pieces that showcase your individual style and taste.
Start by selecting mason jars of various sizes and shapes, depending on your preference and the space you want to decorate. Whether you have a vintage-inspired or a modern-themed room, there is a mason jar vase design that suits your needs.
Once you have the jars ready, it’s time to get creative with the arrangements. Fill the jars with water and add freshly cut flowers from your garden or opt for artificial flowers that match your room’s color scheme. Experiment with different flower combinations and heights to create visually striking displays.
To enhance the charm of your mason jar vases, consider adding some decorative elements. Wrap the jars with twine or lace, securing them with glue or a few natural-looking beads. Embellish with ribbons or small charms for an extra touch of elegance. Don’t be afraid to mix and match materials to achieve a unique and personalized look.
For a more rustic feel, you can paint the mason jar vases with pastel or metallic colors. Apply a coat of primer before painting to ensure a smooth and even finish. Use a brush or sponge to create different textures or even try your hand at creating intricate designs. Once the paint is dry, seal it with a clear varnish for added durability.
Arrange your mason jar vases on a shelf, mantel, or even as a centerpiece on your dining table. Play around with different heights and groupings to create a visually appealing arrangement. Remember, the possibilities are endless when it comes to decorating with mason jars, so let your imagination run wild and transform your unused jars into charming vases that breathe new life into your space.
Transform Wooden Crates into Stylish Storage Solutions
Get ready to turn ordinary wooden crates into functional and chic storage solutions. In this section, we will explore creative ideas on how to repurpose wooden crates and elevate their design to add style and organization to your space. By using simple techniques and materials, you can transform these crates into unique storage pieces that suit your personal taste and enhance the aesthetics of your home.
|
|
1. Rustic Bookshelf: Transform a couple of wooden crates into a rustic bookshelf by stacking them vertically or horizontally. Add some paint or stain to give them a weathered look, and voila! You have a trendy storage solution for your books, magazines, and decorative items. |
|
|
2. Rolling Storage Ottoman: Turn a large wooden crate into a versatile storage ottoman by attaching four wheels to its bottom. Add a comfy cushion to the top, and you’ll have a stylish piece of furniture that also provides hidden storage space for blankets, pillows, or your favorite board games. |
|
|
3. Floating Wall Shelves: Create unique and functional floating shelves by mounting wooden crates onto your wall. Paint them in contrasting colors or leave them in their natural state for a rustic feel. These shelves not only offer storage space but also serve as eye-catching wall decor. |


These are just a few examples of how you can transform wooden crates into stylish storage solutions. The possibilities are endless, and the best part is that you don’t have to break the bank to achieve a trendy and organized living space. So get creative, repurpose those wooden crates, and enjoy the satisfaction of creating functional and stylish storage solutions with your own hands!
Create a Unique Gallery Wall with Old Frames
Looking to add a touch of personality to your living space without breaking the bank? Consider creating a unique gallery wall using old frames. This budget-friendly DIY project allows you to transform your space with a display of art, photos, and other meaningful items that reflect your style and taste.
Instead of spending money on expensive artwork or new frames, repurpose your old frames to create a one-of-a-kind gallery wall. Not only does this project give your space a personal touch, but it also helps to reduce waste and breathe new life into forgotten items.
- Start by collecting a variety of old frames in different shapes, sizes, and finishes. They could be thrifted, found in your attic, or even sourced from friends and family.
- Next, prepare the frames by cleaning them and removing any unwanted artwork or photographs. You can also repaint or refinish the frames to match your desired aesthetic.
- Once the frames are ready, consider the layout for your gallery wall. You can experiment with arranging the frames on the floor to find a composition that pleases your eye.
- When you’re satisfied with the arrangement, take measurements and mark the desired placement of each frame on the wall using a pencil or painter’s tape.
- Before hanging the frames, ensure they are secure by using nails, screws, or adhesive hooks depending on the weight of the frame.
- Once the frames are in place, it’s time to add the artwork or photographs to complete your gallery wall. Mix and match different pieces to create a visually appealing and cohesive display.
- Consider incorporating other decorative elements such as mirrors, small plants, or trinkets to add depth and interest to your gallery wall.
- Finally, step back and admire your unique creation. Your gallery wall will not only add character and charm to your space but also serve as a conversation starter for guests.
Creating a unique gallery wall with old frames is a cost-effective and creative way to showcase your personal style. Get started on this DIY project today and transform your space into a curated haven of memories and art.
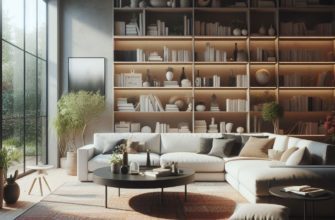
Add a Touch of Nature: Bring the Outdoors In
One way to enhance the ambiance of your living space is by incorporating elements of nature into your room decor. By bringing the outdoors in, you can create a tranquil and refreshing environment that promotes relaxation and connection with nature. Embracing the beauty of the natural world can be achieved through various creative and affordable DIY projects that will transform your space into a serene oasis.
1. Plant Wall: Create a stunning and vibrant focal point in your room by installing a plant wall. Use a variety of indoor plants, such as ferns, succulents, and ivy, to add freshness and greenery to your walls. Not only will this create a visually appealing display, but it will also purify the air and promote a healthier living environment.
2. Natural Materials: Incorporate natural materials into your room decor to evoke a sense of rustic charm and organic beauty. Utilize materials like reclaimed wood, jute, and cork for items such as wall art, shelving, and furniture accents. These materials provide a warm and earthy feel to your space, enhancing the overall aesthetic.
3. Botanical Prints: Incorporate botanical prints into your room decor to bring the essence of nature indoors. Choose artwork or fabrics featuring floral patterns or nature-inspired designs. These prints can be used for pillows, curtains, or framed artwork to add a pop of color and botanical charm to your space.
4. Natural Light: Maximize the amount of natural light in your room by incorporating sheer curtains or blinds that allow sunlight to filter through. Natural light not only illuminates your space but also enhances the connection between indoor and outdoor environments, creating a seamless transition.
5. Terrariums: Create your own mini ecosystems by assembling terrariums with a variety of plants, rocks, and decorative elements. These compact and low-maintenance gardens bring a touch of nature to any tabletop or shelf, making them perfect for small spaces.
6. Woven Accents: Add texture and warmth to your room decor by incorporating woven accents. Use macrame plant hangers, woven baskets, or tapestries to add a bohemian touch and evoke a cozy, nature-inspired atmosphere.
7. Natural Fragrances: Fill your space with the soothing scents of nature by using essential oils or natural candles. Opt for fragrances like lavender, eucalyptus, or citrus to create a calming and energizing environment that mimics the outdoors.
8. Nature-Inspired Color Palette: Choose a color palette inspired by nature to create a harmonious and calming atmosphere. Earth tones like greens, browns, and blues evoke a sense of tranquility and connection with the natural world.
9. Hanging Plants: Utilize hanging pot holders or macrame plant hangers to display cascading indoor plants. This not only adds visual interest and dimension to your space but also optimizes the use of vertical space.
10. Nature-Inspired Art: Incorporate artwork that captures the beauty of the outdoors. Choose paintings, photographs, or prints featuring landscapes, wildlife, or botanical imagery. These pieces of art serve as a focal point and create a sense of serenity and wonder in your room.
By adding a touch of nature to your room decor, you can create a peaceful sanctuary that allows you to reconnect with the beauty of the outdoors. These simple and affordable DIY ideas will transform your space into a haven of tranquility, promoting relaxation and rejuvenation.
DIY Terrariums: Build Your Own Mini Garden
Transform your living space into a captivating oasis by creating your very own DIY terrariums. These unique and enchanting mini gardens can add a touch of nature and serenity to any room. Whether you have a green thumb or are new to gardening, building your own terrarium is a fun and rewarding project that can be done on a budget.
Creating a terrarium allows you to unleash your creativity and personalize your space. You can choose from a variety of containers, such as glass jars or vases, to house your miniature garden. Additionally, you can handpick a selection of plants that thrive in enclosed environments, such as succulents or air plants, to bring life and vibrant colors to your terrarium.
Building a terrarium is not only aesthetically pleasing, but it also serves as a natural air purifier. The plants inside absorb toxins and release fresh oxygen, improving the air quality in your home. Moreover, terrariums require minimal maintenance and can be watered infrequently, making them perfect for busy individuals or those new to gardening.
- Choose a container: Select a container that suits the style and size you envision for your terrarium. A glass jar, a hanging ornament, or a unique vintage container can all work as excellent options.
- Layer the base: Begin by adding a layer of rocks or pebbles to the bottom of your container. This layer will ensure proper drainage and prevent water from saturating the soil.
- Add activated charcoal: Sprinkle a small amount of activated charcoal over the rock layer. This will help keep the terrarium fresh by absorbing any excess moisture or odors.
- Layer the soil: Next, add a layer of potting soil over the charcoal. Ensure that the soil is level and allows enough depth for the roots of your chosen plants.
- Arrange your plants: Carefully plant your selected greenery, taking into consideration their size and growth patterns. Use a small gardening tool or your fingers to create holes for the plants and gently place them into the soil.
- Add decorative elements: Enhance the visual appeal of your terrarium by incorporating decorative elements. This can include small figurines, decorative stones, or even miniature fairy lights.
- Water sparingly: After assembling your terrarium, water it lightly using a spray bottle or a small watering can. Be cautious not to over-water, as it can lead to root rot. Monitor the moisture levels and adjust watering as needed.
By following these simple steps, you can create your own unique and mesmerizing DIY terrarium that will bring joy and tranquility to your living space. With a little creativity, a pinch of greenery, and a sprinkle of personal touch, you can transform an ordinary room into a lush and enchanting oasis.
Decorate with Potted Plants: Easy Care and Gorgeous Greenery
Incorporating potted plants into your home decor is a simple and cost-effective way to enhance the aesthetic appeal of any living space. Not only do they bring a touch of natural beauty indoors, but they also provide numerous benefits for your well-being. With minimal effort and attention, these leafy companions can effortlessly transform your environment into a serene oasis.
Adding potted plants to your decor can instantly breathe life into any room. Whether you choose to place them on a windowsill, on a side table, or hang them from the ceiling, the presence of lush greenery can create a calm and refreshing ambiance. The vibrant colors and textures of various plant species can also complement your existing decor, adding depth and visual interest to your space.
Moreover, potted plants are not only visually appealing but also offer health benefits. They release oxygen, improve air quality, and can even help reduce stress levels. Studies have shown that being in close proximity to plants promotes a sense of tranquility and relaxation, making them ideal additions to spaces where we often seek solace, such as bedrooms and living rooms.
When choosing potted plants for your decor, it’s important to consider their care requirements. Opt for varieties that are easy to maintain and require minimal attention, especially if you’re new to plant parenting. Succulents, for example, are known for their resilience and ability to thrive even in low-light conditions, while snake plants and pothos are excellent choices for those who may forget to water regularly. Additionally, consider the size and shape of the plants to ensure they harmonize with the existing layout of your space.
In conclusion, incorporating potted plants into your home decor is a versatile and budget-friendly way to add beauty and freshness to your living environment. By carefully selecting plant varieties and paying attention to their care needs, you can effortlessly create a visually appealing and tranquil space that promotes both your aesthetic and well-being goals.
Hang a Macrame Plant Hanger for Boho Vibes
Bring a touch of bohemian style to your space by hanging a macrame plant hanger. These beautiful and intricate designs can instantly elevate the ambiance of any room, creating a relaxed and earthy vibe. Crafted from natural fibers such as cotton or jute, macrame plant hangers are both eco-friendly and visually appealing.
Not only do macrame plant hangers add a unique touch to your decor, but they also serve a practical purpose. By suspending your potted plants, you can create more space and prevent clutter. Whether you have a small apartment or a spacious home, a macrame plant hanger allows you to make the most of your vertical space.
With a range of designs and techniques to choose from, you can personalize your macrame plant hanger to suit your style. From simple knots to intricate patterns, you can create a hanger that complements your existing decor or becomes a statement piece on its own. Additionally, macrame plant hangers can be easily customized by incorporating colorful beads or feathers.
When it comes to selecting the perfect plant to showcase in your macrame hanger, consider low-maintenance options such as succulents or hanging plants. These types of plants not only thrive in indoor environments, but their trailing vines or compact leaves will beautifully cascade down the macrame design, enhancing its natural and bohemian aesthetic.
Creating a macrame plant hanger is a cost-effective DIY project that requires only a few materials and basic knotting techniques. With a little patience and creativity, you can transform your space with this simple yet stunning addition. So why not embrace your inner bohemian spirit and hang a macrame plant hanger to infuse boho vibes into your home?
Upcycle with Paint: Give Your Furniture a Fresh New Look
Revitalize your furniture and bring new life to your space by upcycling with paint. This creative and budget-friendly technique allows you to transform your old and tired furniture into stunning statement pieces. With a fresh coat of paint and a little bit of creativity, you can give your furniture a fresh new look that reflects your personal style.
Painting your furniture is a simple and effective way to breathe new life into your space. Whether you have a worn-out dresser, a tired bookshelf, or outdated chairs, a few coats of paint can completely transform them. You can choose to repaint your furniture in a single color for a clean and modern look, or you can get creative and experiment with different patterns and designs.
One of the advantages of upcycling with paint is the ability to customize your furniture to match your unique style. You can choose from a wide variety of paint colors and finishes, allowing you to create a piece that perfectly complements your existing decor. Add a pop of color with a bold and vibrant shade, or opt for a distressed finish for a rustic and vintage vibe.
Before you start painting, make sure to properly prepare your furniture. Clean the surface of any dirt or grime and lightly sand it to create a smooth base for the paint. Use a primer to ensure better adhesion and durability of the paint. Additionally, consider adding a protective topcoat to safeguard the painted surface from scratches and stains.
Upcycling with paint not only allows you to give your furniture a new look but it also promotes sustainability by reducing waste. Instead of discarding old furniture, you can transform it into something beautiful and functional. Not only will you save money by upcycling, but you will also be contributing to a greener and more eco-friendly lifestyle.
So, next time you’re looking to update your space on a budget, consider upcycling your furniture with paint. With a little creativity and some elbow grease, you can achieve a fresh and stylish look that will impress your friends and guests.
Revamp an Old Dresser with a Vibrant Coat of Paint
Give new life to an old dresser by adding a pop of color with a fresh coat of vibrant paint. Transforming your furniture doesn’t have to be difficult or expensive. With a little creativity and some budget-friendly materials, you can completely revamp the look of your room with this simple DIY project.
Instead of settling for the same old boring dresser, why not add a touch of personality and style to your space? By choosing a vibrant color, you can easily turn your dresser into a focal point that adds energy and excitement to the room. Whether you prefer a bold and vibrant hue or a softer, more subtle shade, the choice is yours.
Before you begin, it’s important to prepare your dresser properly. Remove any hardware, such as knobs or handles, and sand the surface to create a smooth and even base for the paint. Make sure to clean the dresser thoroughly to remove any dirt or debris that may interfere with the painting process.
Once your dresser is prepped, it’s time to select your paint color. Consider the overall color scheme of your room and choose a shade that complements the existing decor. You may also consider using multiple colors for a fun and eclectic look. Don’t be afraid to experiment and let your creativity shine through.
When applying the paint, start with a primer to ensure even coverage and adhesion. Allow the primer to dry completely before moving on to the main coat of paint. Use a paintbrush or roller to apply the paint evenly, making sure to cover all surfaces and edges. Apply multiple coats if necessary, allowing each coat to dry before adding the next.
After the paint has dried, you can add a finishing touch to your dresser by replacing the hardware with something new and stylish. Consider unique knobs or handles that match your chosen color scheme or add a touch of contrast. This small detail can make a big difference in the overall look and feel of your revamped dresser.
With a vibrant coat of paint and a little bit of creativity, you can transform an old dresser into a stunning statement piece. By breathing new life into your furniture, you can update your space without breaking the bank. So go ahead and get started on this easy and affordable DIY project that will completely revamp your room.
Transform a Dull Table into a Statement Piece with Chalk Paint
Elevate the look of your space by giving a tired and dull table a stunning makeover with the help of chalk paint. This simple and cost-effective DIY technique will breathe new life into your furniture, making it a standout piece in your room.
Chalk paint is a versatile and easy-to-use paint that provides a matte and velvety finish, perfect for transforming any surface into a unique work of art. Whether you have an old wooden table or a plain side table, using chalk paint can instantly upgrade its appearance and give it a touch of personal style.
- Choose your desired chalk paint color: Select a color that complements your room’s overall aesthetic. From soft pastels to vibrant hues, there are numerous options available to suit your taste and existing decor.
- Prepare the table: Clean the table surface thoroughly to remove any dirt or debris. Sand the surface lightly to create a smooth base for the paint to adhere to. Ensure the table is dry before proceeding.
- Apply the chalk paint: Use a paintbrush or roller to apply the chalk paint evenly across the entire table surface. Apply multiple coats if needed, allowing each coat to dry completely before adding the next layer.
- Create a distressed look (optional): If you desire a vintage or distressed look, lightly sand certain areas of the table after the paint has dried. This will reveal some of the original wood underneath, adding character to your piece.
- Seal the paint: Once the paint is completely dry, protect your newly painted table by applying a clear wax or polyurethane sealer. This will ensure the longevity of your paint job and make the surface easier to clean.
- Add decorative elements: To add even more personality to your table, consider incorporating decorative elements such as stencils, decals, or metallic accents. These finishing touches will make your transformed table truly unique and eye-catching.
By following these simple steps and using chalk paint, you can effortlessly turn a dull table into a stunning statement piece that enhances the overall aesthetic of your space. This budget-friendly DIY project allows you to showcase your creativity and style, resulting in a stylish and personalized furniture piece that will impress all who see it.
Add a Pop of Color to Your Chairs with Spray Paint
Are you tired of the plain and boring look of your chairs? Looking for a budget-friendly way to transform them without breaking the bank? Look no further! In this section, we will show you how to add a vibrant and eye-catching touch to your chairs using spray paint. By the end, you’ll have chairs that are uniquely yours and provide a pop of color to your space.
When it comes to adding a fresh and colorful element to your chairs, spray paint is an excellent choice. It allows you to easily customize and update the look of your chairs, without the need for expensive upholstery or costly replacements. With a wide variety of colors available, you can choose shades that complement your existing decor or go for a bold and contrasting look that make a statement.
The process of spray painting your chairs is simple and can be done with just a few supplies. Start by preparing your chairs – remove any seat cushions or parts that you don’t want to be painted. Clean the surface of the chairs thoroughly using soap and water or a mild cleaner to ensure the paint adheres properly. Once the chairs are dry, place them in a well-ventilated area or outdoors, preferably on a drop cloth or newspaper to protect the surrounding surfaces.
Before you start spraying, make sure to shake the spray paint can thoroughly to mix the color pigments. Hold the can about 8-12 inches away from the chair surface and begin spraying in smooth, even strokes. Start with a light coat and let it dry before applying additional coats for a more vibrant and opaque finish. Take your time and apply the paint evenly to avoid drips or uneven coverage.
After you have finished spraying the chairs, allow them to dry completely according to the instructions on the paint can. Once dry, reattach any seat cushions or parts that were removed and step back to admire your handiwork. You’ll be amazed at how a simple touch of color can completely transform the look and feel of your chairs.
In conclusion, spray painting your chairs is a cost-effective and creative way to add a pop of color to your space. It allows you to personalize your chairs and make a bold statement without spending a fortune. So why wait? Grab a can of spray paint and get ready to breathe new life into your chairs!
Questions and answers
What are some easy and affordable DIY room decor ideas?
There are several easy and affordable DIY room decor ideas that you can try. Some popular ones include creating your own wall art using canvas and paint, making personalized photo collages, repurposing old furniture with a fresh coat of paint, creating your own framed mirrors, and crafting your own decorative pillows.
How can I transform my space on a budget?
You can transform your space on a budget by utilizing DIY room decor ideas. Instead of buying expensive decor items, you can make your own using affordable materials. This includes repurposing old items, shopping at thrift stores for affordable treasures, and using basic art supplies to create unique wall art.
What are some tips for creating DIY room decor on a budget?
When creating DIY room decor on a budget, it’s important to plan ahead and do some research. Look for inspiration online or in magazines to get ideas. Make a list of the materials you’ll need and try to find affordable alternatives. Don’t be afraid to repurpose old items and get creative with what you have. Finally, be patient and take your time to ensure quality results.
Are these DIY room decor ideas suitable for beginners?
Yes, most of these DIY room decor ideas are suitable for beginners. They are designed to be easy and affordable, making them accessible to people of all skill levels. Even if you have little to no experience with crafting or home decor, you can still achieve great results by following step-by-step tutorials and taking your time to practice and refine your skills.
What are some easy and affordable DIY room decor ideas?
Some easy and affordable DIY room decor ideas include creating your own artwork, making a personalized gallery wall, using decorative tape to update furniture, adding fairy lights for a cozy atmosphere, and repurposing mason jars as storage or vases.
How can I transform my space on a budget?
You can transform your space on a budget by following these DIY room decor ideas: utilize what you already have, upcycle old items, shop at thrift stores or yard sales, use removable wallpaper or decals, and get creative with inexpensive materials like washi tape or fabric scraps.
What are some ideas for creating your own artwork?
There are several ideas for creating your own artwork, including painting a canvas with acrylics or watercolors, making collages using old magazines or photographs, creating abstract designs with fabric paint, or even using natural materials like leaves and flowers to make pressed botanical art.
Can you provide some tips for making a personalized gallery wall?
Certainly! Here are some tips for making a personalized gallery wall: choose a common theme, mix different sizes and orientations of frames, include a variety of artwork, photographs, and mementos, lay out the arrangement on the floor before hanging, and use command strips or adhesive hooks for easy installation.
How can I update my furniture using decorative tape?
You can easily update your furniture using decorative tape by applying it to the edges of shelves or drawers for a pop of color, creating geometric patterns on plain furniture, or even covering the entire surface with a patterned tape. It’s a simple and affordable way to give your furniture a fresh look.