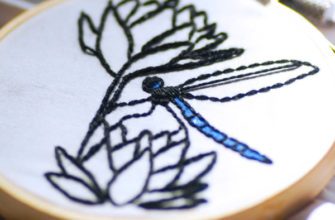
As the vibrant colors of nature come alive and the air fills with the gentle fragrance of blossoms, it’s time to let your creative spirit soar. Dive into the captivating world of handicrafts and discover a plethora of imaginative projects that embody the essence of spring. From whimsical decorations to personalized gifts, these crafts offer an opportunity to infuse your surroundings with a touch of individuality and charm.
Unlock your inner artist as you embark on a journey of self-expression through various artistic mediums. Whether it’s painting, sculpting, or repurposing everyday objects, the possibilities are boundless. Harness the power of your imagination and create unique masterpieces that reflect the blooming energy of the season.
Revolutionize Your Health & Lifestyle!
Dive into the world of Ketogenic Diet. Learn how to lose weight effectively while enjoying your meals. It's not just a diet; it's a lifestyle change.
Learn MoreTransform your living space into an enchanting haven with captivating floral arrangements. Delicate petals and vibrant blooms can instantly uplift any room, adding a fresh and invigorating ambiance. Discover the art of flower arranging and explore innovative techniques that allow you to create stunning displays that will leave your guests in awe.
From DIY fashion accessories that capture the youthful exuberance of spring to meticulously crafted home decor items, there is something for everyone to enjoy. Personalize your accessories with intricate beadwork or experiment with eco-friendly materials, allowing you to make a bold fashion statement while reducing your carbon footprint.
With spring calling for celebrations and festivities, imagine the joy on your loved ones’ faces when they receive a handmade gift. Showcasing thoughtfulness, precision, and creativity, these unique crafts become cherished tokens of affection that warm the heart and create everlasting memories.
So, why not embrace the irresistible allure of spring and embark on a crafting adventure? Unleash your creativity, embrace the abundance of colors, and embark on a journey of self-discovery through these remarkable handicrafts that promise to uplift your spirits and infuse joy into every corner of your world.
- Decorate Your Space with Vibrant Flower Bouquets
- Add a Splash of Color to Your Living Space with DIY Floral Arrangements
- Create Stunning Spring Centerpieces with Fresh Blooms
- Learn How to Preserve Your Favorite Flowers in Resin for Beautiful Keepsakes
- Craft Adorable Butterfly Magnets for a Whimsical Touch
- Add a Fluttering Element to Your Fridge with Easy Butterfly Magnets
- Create Beautiful Butterfly Magnets Using Recycled Materials
- Explore Different Techniques to Paint Unique Butterfly Designs
- Questions and answers
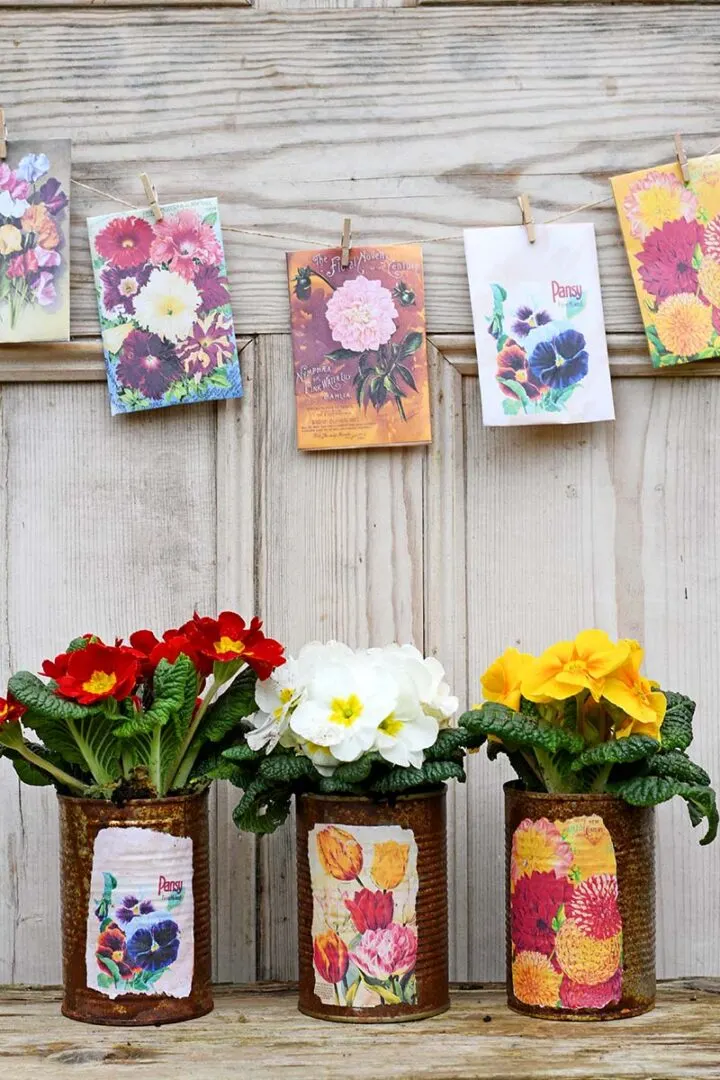
Decorate Your Space with Vibrant Flower Bouquets
Adorn your surroundings with stunning flower arrangements that will instantly add an atmosphere of freshness and vibrancy to any space. Bring the beauty of nature indoors with unique and eye-catching bouquets that are sure to captivate and uplift your spirits.
Fill your home or office with an array of colorful blooms that will brighten up even the dullest of days. Choose from a wide variety of flowers, each possessing its own unique charm and fragrance. Whether you prefer the delicate petals of roses, the bold and cheerful sunflowers, or the elegant allure of lilies, there is a bouquet out there that perfectly suits your style and taste.
Consider creating a bouquet that combines different types of flowers, each complementing and enhancing the beauty of the others. Blend contrasting colors and textures for a visually striking display that will effortlessly become the highlight of any room. Don’t be afraid to experiment and play with different floral combinations to create a bouquet that truly reflects your individuality.
Enhance the overall look of your bouquets by selecting the perfect vase or container. Opt for clear glass vases to showcase the natural beauty of the flowers, or choose whimsical and decorative containers that add an extra touch of charm and personality to your arrangements. Mix and match different vessels to add variety and visual interest to your space.
Remember to keep your flower bouquets fresh and vibrant by regularly trimming the stems and changing the water. This simple maintenance routine will ensure that your blooms stay vibrant and last longer, allowing you to enjoy their beauty for an extended period of time.
So, why not bring the joys of spring into your space by adorning it with vibrant flower bouquets? Let the beauty and fragrance of nature inspire and uplift you, creating a space that is filled with the invigorating spirit of the season.
Add a Splash of Color to Your Living Space with DIY Floral Arrangements
In this section, we will explore the wonderful world of DIY floral arrangements that can instantly transform your home into a vibrant and lively oasis. By incorporating these artistic creations into your living space, you can effortlessly infuse a burst of color, fragrance, and natural beauty into your day-to-day life.
One of the simplest ways to add a pop of color to your home is by creating your own floral arrangements. Whether you prefer elegant bouquets or quirky centerpieces, there is a DIY project out there for everyone. By using a variety of flowers in different shades, shapes, and sizes, you can create a dynamic display that complements your existing decor while also reflecting your personal style.
When it comes to DIY floral arrangements, the possibilities are endless. You can experiment with unique containers such as vintage teapots, mason jars, or even repurposed wine bottles to create a one-of-a-kind centerpiece. Incorporating unexpected elements like feathers, ribbons, or decorative stones can add an extra touch of whimsy and individuality to your arrangement.
Not only are DIY floral arrangements a feast for the eyes, but they also have the power to invigorate your senses. The natural scents emitted by fresh flowers can uplift your mood and bring a sense of tranquility to your space. By strategically placing your arrangements in rooms where you spend the most time, such as the living room or bedroom, you can create a serene atmosphere that rejuvenates both your mind and body.
Creating your own floral arrangements is not only a visually rewarding experience but also a cost-effective way to enhance your home decor. Instead of spending a fortune on store-bought bouquets, you can source flowers from your own garden or local farmer’s market, saving both money and supporting local businesses.
So why not embrace your creative side and bring a burst of color and nature indoors with DIY floral arrangements? With a little bit of time, effort, and imagination, you can transform your home into a delightful sanctuary that exudes charm and personality.
| Tips for DIY Floral Arrangements: |
|---|
| 1. Choose a variety of flowers in different colors and sizes to create an eye-catching display. |
| 2. Get creative with your choice of containers, using unique items like teapots or mason jars. |
| 3. Incorporate unexpected elements like feathers, ribbons, or decorative stones for added visual interest. |
| 4. Place your floral arrangements in rooms where you spend the most time to fully enjoy the scents and colors. |
| 5. Source flowers from your own garden or local farmer’s market to save money and support local businesses. |
Create Stunning Spring Centerpieces with Fresh Blooms

Transform your home into a vibrant oasis this spring with the help of beautiful and fragrant flowers. Elevate your decor and embrace the beauty of the season by crafting stunning centerpieces using fresh blooms.
A fresh centerpiece is a perfect way to bring the essence of spring indoors. With a variety of colorful flowers to choose from, you can create a centerpiece that reflects your personal style and adds a touch of freshness to any space.
Start by selecting a combination of blooms that complement each other in color and texture. Consider incorporating a mix of tulips, daisies, and roses to create a dazzling display. Arrange the flowers in a vase or a decorative container, ensuring that each stem is trimmed to the appropriate length.
To add depth and dimension to your centerpiece, incorporate elements such as greenery or branches with budding leaves. This will not only provide a natural backdrop for the flowers but also add an organic touch to the arrangement.
Don’t be afraid to get creative with your centerpiece design. Experiment with different shapes, heights, and textures to create a visually appealing arrangement. You can also consider adding additional decorative elements such as ribbons or embellishments to enhance the overall look of the centerpiece.
Remember to regularly change the water in the vase to ensure the longevity of your fresh blooms. By refreshing the water every few days and trimming the stems as needed, you can enjoy your stunning spring centerpiece for an extended period of time.
With these simple steps, you can create stunning spring centerpieces that will bring cheer and beauty to your home. Adorn your dining table, mantel, or any other focal point with this creative and refreshing decor, and let the vibrant colors and lovely scents of fresh blooms brighten up your living space.
Learn How to Preserve Your Favorite Flowers in Resin for Beautiful Keepsakes
Discover the art of preserving the beauty of nature by learning how to encase your favorite flowers in resin, creating stunning keepsakes that will last a lifetime. This unique craft allows you to capture the intricate details and vibrant colors of your beloved flowers, transforming them into beautiful and personal pieces of art.
Begin by selecting your favorite flowers or blooms from your garden or local florist. Choose flowers that hold special meaning or sentimental value to you, as these will make the most heartfelt keepsakes. Consider the vibrant hues of spring blossoms or the delicate petals of summer flowers, each offering a unique beauty to be preserved.
Once you have gathered your flowers, it’s time to prepare them for preservation. Carefully remove any excess leaves or stems, ensuring that only the blooms themselves remain. This will help to create a more visually appealing final product and ensure that the flowers are fully covered in resin.
- Arrange the flowers in a mold or container of your choice, making sure to create an arrangement that is visually pleasing. You can experiment with different flower combinations, varying the sizes and colors for added interest.
- Mix the resin according to the manufacturer’s instructions, taking care to follow the correct ratios and mixing thoroughly to prevent air bubbles. You can also add in any desired pigments or glitters to enhance the visual appeal.
- Gently pour the resin mixture over the flowers, ensuring that they are fully submerged and covered. Use a toothpick or small stick to gently move the flowers into the desired positions within the resin if needed.
- Allow the resin to cure and harden according to the manufacturer’s instructions. This process can take several hours or even days, depending on the type of resin used. It is important to keep the resin in a dust-free and well-ventilated area to ensure optimal results.
- Once the resin has fully cured, carefully demold your flower keepsake. Trim any excess resin or rough edges if necessary, being cautious not to damage the delicate flowers.
- Your preserved flower keepsake is now ready to be displayed or gifted. Consider incorporating it into jewelry, such as a pendant or earrings, or simply showcase it as a standalone art piece.
Preserving your favorite flowers in resin allows you to create beautiful and meaningful keepsakes that capture the essence of nature’s beauty. These unique creations can serve as a reminder of special moments, cherished memories, or simply the joy of embracing the beauty of spring.
Craft Adorable Butterfly Magnets for a Whimsical Touch
Bring a touch of magic and charm to your space with these delightful butterfly magnets. These whimsical creations are a perfect way to add a pop of color and joy to your surroundings. Let your creative spirit take flight as you craft these unique and enchanting magnets.
These magnetic butterflies are not only a fun and easy craft project, but they also serve a practical purpose. Use them to hold memos, photos, and other small items on your refrigerator or any magnetic surface. Every time you see these delightful creatures fluttering about, they will bring a smile to your face.
To create your own butterfly magnets, you will need a few simple materials. Gather some colorful cardstock or patterned paper, scissors, a pencil, a ruler, a glue stick, and small magnets. Start by sketching out the shape of your butterfly on the cardstock and cut it out. You can let your imagination run wild and create butterflies in various sizes and shapes.
Once you have your butterfly cutouts, it’s time to add some whimsy and personality. Use markers or colored pencils to draw intricate patterns, vibrant designs, or even add some glitter for a touch of sparkle. Let your creativity soar as you bring these butterflies to life on the paper.
After you have decorated your butterflies, it’s time to attach the magnets. Apply a small amount of glue to the back of each butterfly and carefully press the magnet onto the glue. Make sure the magnets are securely attached so they can hold up the weight of the items you’ll be displaying.
Once the glue has dried, your adorable butterfly magnets are ready to bring a touch of whimsy to any space. Arrange them on your refrigerator or magnetic board in a playful and eye-catching way. These charming little creatures will brighten up your day and remind you of the beauty of nature.
So, embrace your inner artist and create these unique butterfly magnets. Let the whimsical touch of these delightful creatures enchant your surroundings and bring a breath of fresh air to your space. Get ready to experience the joy and beauty of spring every time you see these adorable magnets fluttering by.
Add a Fluttering Element to Your Fridge with Easy Butterfly Magnets
Introduce a vibrant touch of nature to your kitchen with these delightful and simple butterfly magnets. These charming creations will bring a hint of whimsy and color to any metallic surface, adding a playful and fluttering element to your everyday environment.
Crafting your own butterfly magnets is a wonderful way to showcase your creativity while breathing new life into mundane objects. With just a few basic materials and a dash of imagination, you can transform any ordinary day into a magical experience.
Start by gathering colorful cardstock or patterned paper in a variety of shades and designs. You can choose to cut out butterfly shapes that represent real species or let your imagination run wild with fantastical creations. Adding a touch of glitter or using metallic markers to accentuate the details can make your butterflies truly come to life.
Next, attach a small magnet to the back of each butterfly using strong adhesive or a hot glue gun. Ensure that the magnet is securely attached, allowing your creations to effortlessly adorn your fridge or other metallic surfaces for an extended period.
Once your magnets are completed, let your creativity soar by experimenting with different arrangements and positions on your fridge. You can create a fluttering swarm of butterflies or choose to showcase a single masterpiece. Feel free to mix and match colors and styles to achieve a harmonious and captivating display.
Not only will these butterfly magnets add a touch of whimsy to your kitchen, but they can also serve as a reminder of the beauty and joy that springtime brings. Every time you catch a glimpse of these fluttering creatures, you will be transported to a world of blooming flowers, warm sunshine, and new beginnings.
So why wait? Get started on this delightful craft project today and bring the spirit of spring into your home with these easy and enchanting butterfly magnets.
Create Beautiful Butterfly Magnets Using Recycled Materials
Discover a wonderful way to add a splash of vibrant color to your living space while also contributing to a sustainable future. In this section, we will explore how to make stunning butterfly magnets using discarded or repurposed materials. By following our step-by-step guide, you can create a unique and eco-friendly decoration that will bring joy and warmth into your daily life.
Transforming waste into art is not only a creative endeavor but also an opportunity to make a positive impact on the environment. Instead of throwing away old buttons, bottle caps, and scraps of colorful fabric, you can repurpose them into eye-catching butterfly magnets. Not only will you give new life to discarded materials, but you will also have a one-of-a-kind piece that showcases your creativity.
Materials you will need:
- Unused buttons in various sizes and colors
- Bottle caps
- Scissors
- Strong adhesive or glue
- Magnetic strips or small magnets
- Colorful fabric scraps
- Colored markers or paint
- Decorative beads or gems (optional)
Step 1: Preparation
Gather all the necessary materials, ensuring that the buttons, bottle caps, and fabric scraps are clean and dry. Sort the buttons by size and color to easily select the ones you want to use for your butterfly magnets.
Step 2: Creating the Butterfly Shape
Using scissors, carefully cut the fabric scraps into butterfly shapes. You can refer to online templates or create your own design. Make sure the butterfly shape is large enough to accommodate the buttons and bottle caps that will serve as the wings.
Step 3: Decorating the Butterfly
Add vibrant colors to the fabric butterfly by using markers or paint. Let your imagination soar as you experiment with different patterns and shades. Allow the colors to dry completely before proceeding to the next step.
Step 4: Attaching the Wings
Apply a small amount of strong adhesive or glue to the back of the buttons and bottle caps. Carefully arrange them on the fabric butterfly, using the adhesive to secure them in place. You can mix and match different sizes and colors to create a visually dynamic effect.
Step 5: Adding the Magnet
Cut a small piece of magnetic strip or attach a small magnet to the back of the fabric butterfly using strong adhesive or glue. Ensure that the magnet is securely attached to allow the butterfly magnet to be easily displayed on any magnetic surface.
Step 6: Optional Embellishments
If desired, you can further enhance your butterfly magnets by adding decorative beads or gems to the wings. These embellishments will add an extra touch of sparkle and individuality to your creations.
With your colorful butterfly magnets complete, you can now enjoy the beauty of spring and the magic of recycling in a unique and practical way. Spread the joy by gifting these magnets to friends and family, or proudly display them on your fridge or any magnetic surface. Let your creativity take flight and embrace the joy of crafting with recycled materials!
Explore Different Techniques to Paint Unique Butterfly Designs
In this section, we will delve into various methods for creating one-of-a-kind butterfly designs through the art of painting. Discover a range of techniques that will allow you to add your personal touch and bring these magnificent creatures to life on canvas.
Unleash your creativity as you experiment with different brush strokes, color combinations, and textures to capture the essence of butterflies. Whether you prefer bold and vibrant designs or subtle and delicate details, there are endless possibilities when it comes to exploring the world of butterfly painting.
Embrace the fluidity of watercolors and watch as they blend and flow together, creating beautiful gradients and soft edges that mimic the graceful movements of butterflies. Or try your hand at acrylics, allowing you to layer colors and create more defined shapes and patterns.
Consider incorporating other elements into your butterfly designs, such as metallic or iridescent paints, to add a touch of shimmer and sparkle. Experiment with different tools, like sponges or palette knives, to achieve unique textures and effects that will make your butterflies truly stand out.
Remember, painting butterfly designs is not just about capturing their physical appearance, but also the symbolism and emotions they represent. Let your brush strokes express feelings of freedom, transformation, and the fleeting beauty of nature.
Whether you are a beginner or an experienced artist, exploring different techniques to paint unique butterfly designs offers a wonderful opportunity to connect with nature, unleash your imagination, and create stunning works of art that will brighten any space.
Questions and answers
What are some unique crafts to embrace the spring spirit?
There are several unique crafts you can try to embrace the spring spirit. Some ideas include making flower crowns, creating a DIY terrarium, painting and decorating flower pots, or crafting colorful wind chimes. These crafts will bring a touch of nature and brightness to your day.
How can flower crowns be made for spring?
Making flower crowns for spring is a fun and creative activity. Start by gathering an assortment of fresh or silk flowers, greenery, and floral wire. Create a circular base using the wire, then attach the flowers and greenery by wrapping the stems with floral wire. Be sure to secure each element tightly. Finally, adjust the size of the crown to fit your head and you’ll have a beautiful flower crown to embrace the spring spirit.
What materials are needed to create a DIY terrarium?
To create a DIY terrarium, you will need a glass container with a lid (such as a mason jar or fish tank), small stones or pebbles, activated charcoal, potting soil, and various small plants or succulents. Additionally, you may choose to add decorative elements such as small figurines or colored pebbles. These materials will help you build a miniature and self-sustaining ecosystem to brighten up your space.
How can flower pots be painted and decorated for a unique touch?
Painting and decorating flower pots is a fun way to add a unique touch to your spring decor. Start by selecting pots in different shapes and sizes. Then, choose acrylic paints in vibrant colors and let your creativity shine. You can paint the pots with patterns, floral designs, or even write inspiring quotes. Once the paint is dry, add additional embellishments like ribbons, buttons, or glitter. These customized flower pots will surely brighten your day.
How can colorful wind chimes be crafted to embrace the spring spirit?
Creating colorful wind chimes is a wonderful way to embrace the spring spirit. Begin by collecting materials such as colorful beads, seashells, charms, or recycled items like bottle caps or old keys. String these items on nylon fishing line or sturdy thread at various lengths. Then, attach them to a circular base made of wood or metal. Hang your wind chime in a sunny spot outside, and let the gentle breeze create a delightful melody while adding a touch of color to your surroundings.
What kind of crafts are included in the article?
The article includes a variety of unique crafts that are perfect for embracing the spring spirit. Some of the crafts featured in the article include flower wreaths, painted pots for indoor plants, dyed Easter eggs, homemade bird feeders, and DIY wind chimes.
Are these crafts suitable for children?
Yes, many of the crafts mentioned in the article are perfect for children. Crafts such as dyed Easter eggs and painted pots can be enjoyed by kids of all ages. However, adult supervision may be required for certain crafts that involve sharp tools or hot glue guns.
Where can I find the materials needed for these crafts?
You can find the materials needed for these crafts at various places. Common materials such as paint, glue, and crafting paper can be found at your local craft store. For specific items like bird feeder kits or wind chime supplies, you may need to check specialty stores or browse online for the best deals.
How difficult are these crafts to make?
The difficulty level of these crafts varies. Some crafts, like making a simple flower wreath, can be quite easy and suitable for beginners. On the other hand, more intricate crafts like dyeing Easter eggs with intricate designs may require some level of skill and patience. The article provides step-by-step instructions for each craft to make it easier to follow along.
Can these crafts be made with recycled materials?
Yes, many of the crafts can be made with recycled materials. For example, flower wreaths can be created using leftover fabric scraps, and bird feeders can be made from empty plastic bottles or milk cartons. Repurposing materials not only adds an eco-friendly aspect to the crafts but also makes them more affordable.