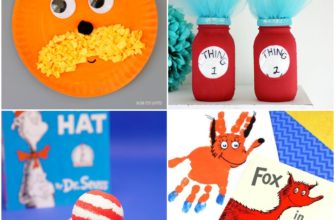
In a world where creativity knows no bounds, there lies a realm where the pages of Dr. Seuss’s stories come to life. Engage your little ones in a world of wonder and exploration as you embark on an adventure filled with crafts inspired by the beloved rhymes and whimsical illustrations of Dr. Seuss.
Discover the magic of turning ordinary objects into extraordinary masterpieces. Encourage your children to unleash their inner artist as they dive into the playful world of Dr. Seuss-inspired crafts. From colorful Truffula trees to mischievous Cat in the Hat hats, these crafts are designed to ignite their imagination and foster a love for creating something unique.
Revolutionize Your Health & Lifestyle!
Dive into the world of Ketogenic Diet. Learn how to lose weight effectively while enjoying your meals. It's not just a diet; it's a lifestyle change.
Learn MoreWith each craft, children will not only develop their fine motor skills but also dive into the narratives of Dr. Seuss’s iconic characters. Allow them to immerse themselves in a world brimming with imagination and untold possibilities. As they cut, glue, and paint, they will learn the value of patience, attention to detail, and the joy of bringing their favorite stories to life through crafts.
Whether you’re a seasoned crafter or just starting out, the world of Dr. Seuss-inspired crafts offers a myriad of opportunities for both children and adults alike. Let the rhythm of Dr. Seuss’s words guide you as you create unique pieces that pay homage to the incredible world he created. Get ready to embark on a journey that transcends the pages of a book and allows your children to become active participants in their favorite tales.
- Unleash Your Imagination with Dr. Seuss-inspired Crafts
- Why Dr. Seuss Crafts Are Perfect for Kids
- Whimsical Hat Craft
- Create Your Own Enchanting Headdress
- Materials Needed for the Hat Craft
- Step-by-Step Guide to Making a Dr. Seuss Hat
- Truffula Tree Pencil Holders
- Add Some Color to Your Desk
- Materials You’ll Need to Make Truffula Tree Pencil Holders
- Step-by-Step Instructions for Crafting Truffula Tree Pencil Holders
- Fox in Socks Finger Puppets
- Bring the Characters to Life
- Questions and answers
Unleash Your Imagination with Dr. Seuss-inspired Crafts
Dive into a world of limitless creativity and boundless imagination with these unique crafts inspired by the works of Dr. Seuss. Let your mind roam free as you explore a range of fun and engaging projects that will transport you to the whimsical and colorful universe of Dr. Seuss.
Discover the joy of bringing your favorite Dr. Seuss characters to life through a variety of crafting techniques. From creating playful paper masks of The Cat in the Hat to designing vibrant bookmarks featuring Horton the Elephant, these crafts will inspire and delight kids of all ages.
Unleash your inner artist as you experiment with different materials and textures to capture the essence of Dr. Seuss’ magical world. Craft your own Truffula trees using colorful pom-poms or construct a 3D model of Whoville with recycled materials – the possibilities are endless!
Engage in hands-on activities that promote imagination, problem-solving, and fine motor skills. Whether it’s designing a whimsical Seussian garden using clay and natural materials or creating a collage inspired by Oh, the Places You’ll Go!, these crafts encourage children to think outside the box and explore their own unique creative vision.
Not only will these Dr. Seuss-inspired crafts provide hours of fun and entertainment, but they also offer an opportunity for children to engage with and appreciate the wonderful world of literature. Through the process of creating their own Seussian masterpieces, kids can develop a deeper connection to the beloved characters and stories found within Dr. Seuss’ books.
So grab some glue, scissors, and a pinch of imagination – it’s time to unleash your creativity and embark on a journey through the fantastical realms of Dr. Seuss!
Why Dr. Seuss Crafts Are Perfect for Kids
|
Dr. Seuss crafts provide an ideal opportunity for children to indulge in their imaginative side while exploring their creativity in a unique way. These crafts, inspired by the beloved works of Dr. Seuss, offer children a chance to unleash their artistic abilities and express themselves through colorful and whimsical creations. |
Whimsical Hat Craft
Step into the fantastical world of imagination with this whimsical hat craft! In this delightful activity, children can let their creativity and imagination soar as they design and create their very own unique hats. With a variety of materials and colors at their disposal, they can bring their wildest ideas to life in the form of a one-of-a-kind hat.
Encourage your little ones to think outside the box as they experiment with different shapes, textures, and patterns. They can use colorful papers, fabrics, feathers, beads, and other fun embellishments to make their hats truly stand out. By combining various materials and using their hands to mold and shape the hat, children can tap into their artistic abilities and express their individuality.
Whether they choose to create a quirky top hat, a whimsical floppy hat, or a funky beret, this craft allows children to explore their own unique style and imagination. They can personalize their hats with their favorite characters, animals, or symbols, adding an extra touch of whimsy and personal flair.
Not only does this craft foster creativity and imagination, but it also encourages fine motor skills and hand-eye coordination. As children cut, glue, and decorate their hats, they develop their dexterity and attention to detail.
Once their masterpieces are complete, children can proudly wear their whimsical hats while engaging in imaginative play, dress-up, or even during a Dr. Seuss-themed party or event. These hats are not just a craft, they are a gateway to a world of creativity and endless possibilities.
So why wait? Let your child’s imagination run wild as they embark on this whimsical hat craft adventure!
Create Your Own Enchanting Headdress

Step into a world of wonder and imagination as you embark on a journey to create your very own magical headpiece. This unique craft will transport you to a realm where dreams come true and creativity knows no bounds. Take a moment to tap into your inner artist and let your imagination run wild as you explore the endless possibilities of crafting a one-of-a-kind headdress.
First, gather your materials. You’ll need a headband as the base of your headdress – choose one that fits comfortably on your head. Get your hands on an assortment of colorful feathers, sparkling gemstones, vibrant ribbons, and any other whimsical trinkets that catch your eye. Remember, this is your chance to let your individuality shine, so feel free to mix and match materials that reflect your unique style.
Once you have your materials ready, it’s time to let your creativity soar. Start by attaching the feathers to the headband using glue or by tying them securely in place. Experiment with different feather sizes and colors – you may even want to trim them to achieve your desired look. As the feathers begin to take shape, you’ll feel a sense of magic and transformation in the air.
- Add a touch of sparkle to your headdress by affixing gemstones in strategic spots. These shimmering accents will catch the light and give your creation an ethereal glow.
- Embellish the headband further by weaving colorful ribbons through the feathers. This will add movement and a playful touch to your headdress.
- Don’t be afraid to explore beyond feathers, gemstones, and ribbons. Consider incorporating other elements like small bells, fabric flowers, or even seashells to add an unexpected twist to your headpiece.
As you continue to add layers of creativity to your headdress, let your imagination guide you. There are no limits to what you can create – whether it’s a whimsical fairy crown, a majestic unicorn headdress, or a mystical nature-inspired headpiece. Remember, the key is to have fun and embrace the magic of the process.
Once your headdress is complete, put it on and step into a world where anything is possible. Allow your magical creation to transport you to a place where imagination reigns supreme, and let the joy of your craft inspire others to unleash their creativity too. You now possess a truly enchanting headpiece that is as unique and extraordinary as you are.
Materials Needed for the Hat Craft

In order to create a wonderful hat craft inspired by Dr. Seuss, you will need a variety of materials. These supplies will help bring your creative ideas to life and allow you to express your artistic talents. From basic materials like construction paper to decorative items such as feathers and glitter, there are endless possibilities to design a unique and eye-catching hat.
To start with, you will need a few sheets of construction paper in different colors. This paper will form the base of your hat and provide the structure for your design. Additionally, you will require scissors to cut the paper into the desired shape and size. Remember to always ask an adult for assistance when using scissors to ensure safety.
Next, gather some glue or tape to secure the edges and attach any additional decorative elements. This will allow you to add unique touches to your hat, such as feathers, pom-poms, or even sequins. These embellishments can help make your craft stand out and add a touch of personality to your creation.
Furthermore, consider using markers or colored pencils to add details and designs to your hat. Whether it’s drawing stripes, polka dots, or your favorite Dr. Seuss characters, these coloring tools will bring your vision to life and make your hat truly one-of-a-kind.
Lastly, don’t forget to have some fun and let your imagination run wild! You can incorporate other materials like ribbons, buttons, or even fabric scraps to add texture and visual interest to your hat. The key is to experiment and explore different combinations until you achieve the look you desire.
With these materials and your creative spirit, you are ready to embark on a fun-filled crafting journey inspired by the whimsical world of Dr. Seuss. So gather your supplies, put on your thinking cap, and get ready to create a hat that will surely spark joy and imagination!
Step-by-Step Guide to Making a Dr. Seuss Hat
In this section, we will provide you with easy-to-follow instructions on how to make a fun and whimsical hat inspired by the iconic Dr. Seuss. This project is a great way to engage your child’s creativity and imagination, all while creating a unique accessory that they can proudly wear. Get ready for a step-by-step journey into the world of Dr. Seuss as we guide you through the process of making this one-of-a-kind hat.
- Gather your materials: To create your Dr. Seuss hat, you will need the following supplies:
- Red and white construction paper
- Ruler
- Pencil
- Scissors
- Glue or tape
- Stapler
- Optional: markers or colored pencils for decorating
- Measure and cut the brim: Start by measuring and cutting a long strip of red construction paper, approximately 2 inches wide and long enough to fit around your child’s head comfortably. This will be the brim of the hat.
- Create the crown: Using the remaining red construction paper, measure and cut a large rectangle. The dimensions will depend on the desired height of the hat. Roll the rectangle into a cylinder and secure with glue or tape.
- Attach the brim to the crown: Place the brim onto the bottom edge of the crown and secure it with glue or tape. For added durability, you can also staple the brim to the crown. Make sure it is evenly attached all the way around.
- Add white stripes: Cut several long strips of white construction paper, approximately 1 inch wide. Glue or tape these strips vertically onto the red crown, spacing them evenly apart. These white stripes will give your hat the signature Dr. Seuss look.
- Decorate and personalize: Now comes the fun part! Use markers or colored pencils to add additional designs, patterns, or even illustrations that showcase your child’s favorite Dr. Seuss characters or quotes. Get as creative as you’d like and make this hat truly unique!
- Let it dry: Allow the glue or tape to dry completely before wearing your hat. Once it is dry, it’s time to put it on and channel your inner Dr. Seuss!
Now that you have followed these simple steps, you have successfully created your very own Dr. Seuss hat. Wear it proudly and let your imagination run wild just like the beloved characters in Dr. Seuss’s books. This craft project is not only a fun activity for kids, but it also encourages creativity, fine motor skills, and a love of reading. Enjoy the whimsical world of Dr. Seuss with your unique hat creation!
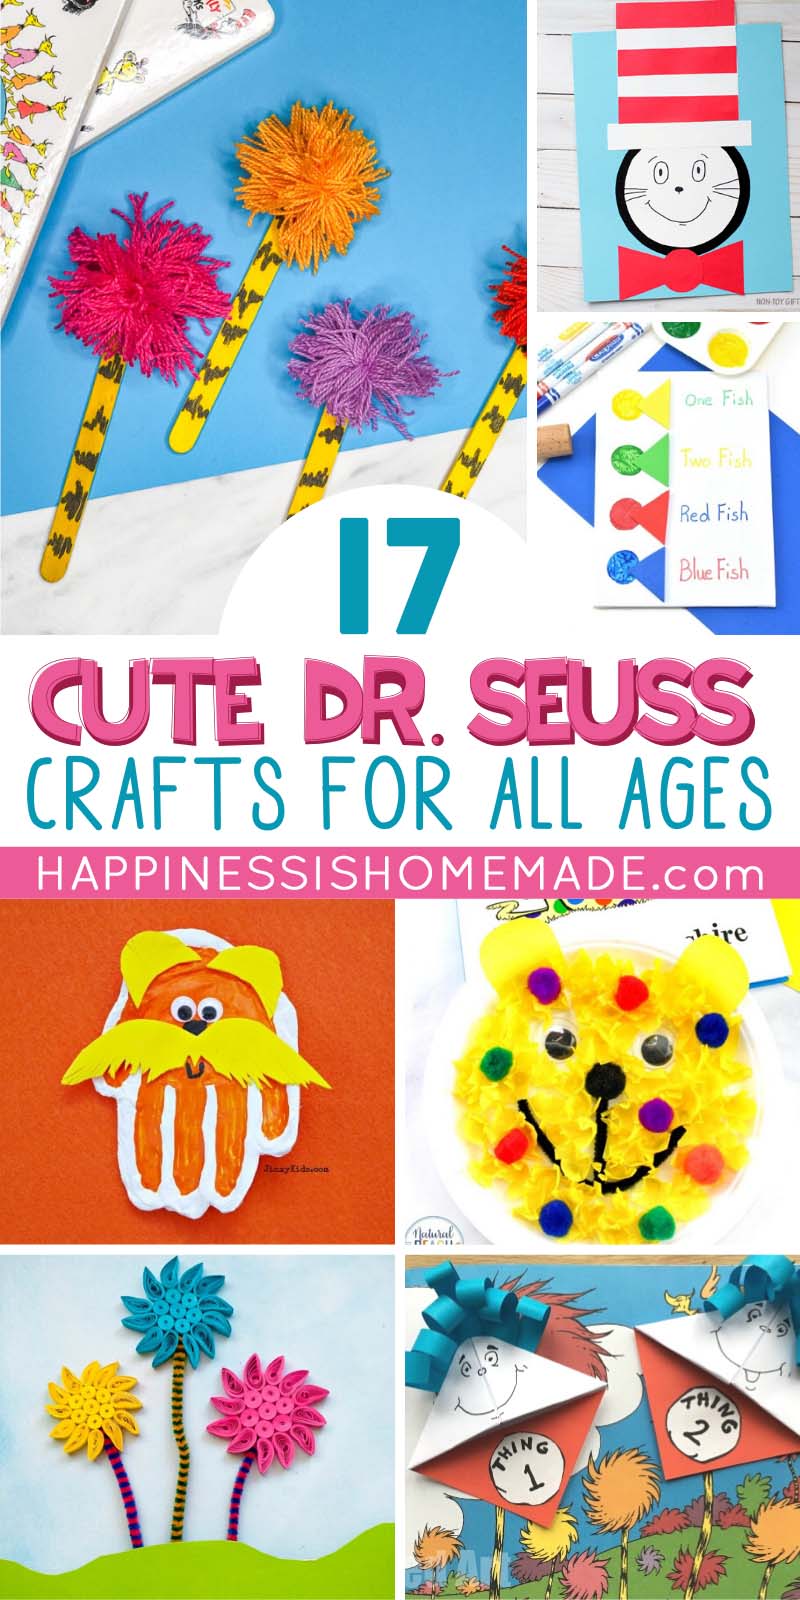
Truffula Tree Pencil Holders
Bring the whimsical world of Dr. Seuss to life with these charming Truffula Tree Pencil Holders. Inspired by the vibrant and imaginative illustrations in Dr. Seuss’ beloved books, these pencil holders are a fun and creative way for kids to keep their pencils organized and add a touch of Seussian style to their workspace.
Using simple materials and easy-to-follow instructions, children can create their very own Truffula Tree Pencil Holders. These DIY pencil holders are not only practical but also serve as a delightful decorative piece. Kids will have a blast making them and can personalize each one to reflect their own unique artistic style.
- To start, gather the following materials:
- – Empty and clean tin cans
- – Assorted colored paints
- – Paintbrushes
- – Craft feathers
- – Pompoms or small colorful balls
- – Glue
- – Scissors
- – Glitter (optional)
Begin by painting the tin cans in vibrant colors, using Seuss-inspired hues like bright pink, electric blue, and sunny yellow. Let the paint dry completely before moving on to the next step.
Next, take the craft feathers and glue them to the tops of the cans, creating the signature Truffula Tree appearance. Make sure to arrange the feathers in a fluffy and whimsical manner, just like the illustrations in Dr. Seuss’ books.
For the final touch, glue pompoms or small colorful balls to the base of the can to resemble the Truffula Tree tufts. Add a sprinkle of glitter if desired to give the pencil holders an extra touch of sparkle.
Once the glue is dry, the Truffula Tree Pencil Holders are ready to be used. Kids can proudly display their creations on their desks or give them as gifts to friends and family. These delightful pencil holders are not only functional but also serve as a reminder of the imaginative and playful world of Dr. Seuss.
So, have fun getting crafty and let your imagination run wild as you create your very own Truffula Tree Pencil Holders!
Add Some Color to Your Desk
Bring a vibrant and lively atmosphere to your workspace with these creative ideas to add color to your desk. Discover unique ways to infuse your surroundings with bursts of energy and inspiration, making your desk a reflection of your personality and style.
1. Personalize Your Accessories
Make your everyday office essentials stand out by adding a pop of color. Instead of settling for standard black or gray, opt for colorful pens, notebooks, and desk organizers. Not only will these brighten up your workspace, but they will also make you more excited to tackle your tasks.
2. Decorate with Plants
Bring the freshness of nature indoors by placing plants on your desk. Choose small potted plants or succulents that require minimal maintenance and add a touch of greenery to your workspace. Not only will they add color, but they will also purify the air and create a calming atmosphere.
3. Utilize Colorful Storage Solutions
Keep your desk tidy and stylish by incorporating colorful storage solutions. Invest in vibrant file folders, desk organizers, and storage boxes to keep your papers, supplies, and gadgets in order. Not only will these brighten up your desk, but they will also make it easier for you to find what you need.
4. Display Inspiring Artwork
Hang an inspiring piece of artwork or a motivational quote on your desk to add a splash of color and inspiration. Whether it’s a framed print, a canvas painting, or a collage of uplifting images, surrounding yourself with visually appealing and meaningful art can spark creativity and boost productivity.
5. Use Colorful Desk Accessories
Add a touch of fun to your desk with colorful desk accessories. From funky paperclips to bright desk lamps and vibrant mouse pads, there are endless options to choose from. These small yet impactful additions will not only add personality to your workspace but also make it a more enjoyable place to work.
- Personalize your accessories
- Decorate with plants
- Utilize colorful storage solutions
- Display inspiring artwork
- Use colorful desk accessories
By incorporating these colorful ideas into your workspace, you can transform your desk into a lively and inspiring environment that will make you look forward to tackling your daily tasks. Let your imagination run wild and infuse your desk with your unique sense of style!
Materials You’ll Need to Make Truffula Tree Pencil Holders
In this section, we will explore the essential items you’ll need to create charming Truffula Tree pencil holders. These handy and whimsical crafts are inspired by the imaginative world of Dr. Seuss. By gathering a few simple materials, you can create a fun and unique pencil holder that will delight kids and adults alike.
To craft your Truffula Tree pencil holders, you will need:
1. Empty toilet paper rolls: These will form the base of your pencil holder. You can collect these from your daily use or ask friends and family to save them for you.
2. Assorted colorful yarn: Choose a variety of vibrant colors that will resemble the fluffy tops of the Truffula Trees. The more colors you have, the more whimsical your pencil holder will look.
3. Craft glue: A strong adhesive is essential to ensure that the yarn sticks firmly to the toilet paper roll. Look for a glue that is safe for children to use, if they will be participating in the craft.
4. Scissors: You will need scissors to cut the yarn into various lengths and to trim any excess threads.
5. Optional decorations: If you want to add some extra flair to your Truffula Tree pencil holders, consider using glitter, pom-poms, or any other craft materials you have on hand. Let your creativity run wild!
Note: Keep in mind that adult supervision may be required, especially when using scissors and craft glue. Ensure that young children are adequately supervised to prevent accidents.
With these materials on hand, you are ready to embark on a crafty adventure and create charming Truffula Tree pencil holders that will add a touch of whimsy to any desk or workspace. Get ready to let your imagination soar!
Step-by-Step Instructions for Crafting Truffula Tree Pencil Holders
Learn how to create whimsical and colorful Truffula Tree pencil holders with these step-by-step instructions. This craft is inspired by the imaginative world of Dr. Seuss, where imagination knows no bounds.
- Start by gathering the materials needed for this craft:
- A clean and empty tin can
- Colorful craft paper or tissue paper
- Scissors
- Glue stick
- Markers or colored pencils
- Cut the craft or tissue paper into strips of varying lengths. These strips will represent the vibrant Truffula Tree tops.
- Apply glue to one end of a paper strip and attach it to the inside bottom of the tin can. Repeat this step with the remaining paper strips, placing them close together to create a lush Truffula Tree top.
- Use markers or colored pencils to draw colorful patterns or designs on the outside of the tin can. Let your imagination run wild as you create unique and whimsical Truffula Trees.
- Allow the glue to dry completely before using your Truffula Tree pencil holder. Once dry, it’s ready to hold all your writing utensils and bring a touch of Dr. Seuss-inspired magic to your desk or workspace.
This craft is a fun and creative way for kids to engage their imaginations and bring a bit of Dr. Seuss’s whimsical world into their everyday lives. So gather your materials and get ready to craft your very own Truffula Tree pencil holder!
Fox in Socks Finger Puppets
Engaging and interactive, the Fox in Socks Finger Puppets craft brings the beloved characters from Dr. Seuss’s famous book to life. These adorable finger puppets are a perfect way to spark your child’s imagination and encourage storytelling. With just a few simple materials, you and your child can create these cute and entertaining puppets together.
|
Materials:
|
Instructions:
|
Once the Fox in Socks Finger Puppets are ready, let the storytelling adventures begin! Encourage your child to act out scenes from the book or let their imagination take the lead. These adorable puppets will not only bring joy and laughter but also enhance your child’s fine motor skills and storytelling ability. Enjoy the whimsical world of Dr. Seuss with this fun and easy craft!
Bring the Characters to Life
Experience the enchanting world of Dr. Seuss like never before by bringing his beloved characters to life! In this section, we will explore engaging and imaginative ways to immerse children in the magical universe of Dr. Seuss’s stories and illustrations.
One delightful activity to ignite the young ones’ creativity is to organize a costume party inspired by the characters from Dr. Seuss’s books. Encourage children to dress up as their favorite characters, whether it’s the mischievous Cat in the Hat, the lovable Horton, or the colorful and imaginative Thing One and Thing Two. This will not only provide endless entertainment but also foster a love for literature and encourage role-playing.
Inspired by the vibrant illustrations found in Dr. Seuss’s books, children and their families can engage in a collaborative art project. Set up a dedicated art station with various art supplies such as colored paper, pens, paints, and glue. Encourage everyone to create their unique interpretations of Dr. Seuss’s whimsical characters. Once the artwork is completed, display it proudly as a colorful gallery wall, showcasing the creativity and individuality of each participant.
For a hands-on experience, consider organizing a puppet show featuring iconic Dr. Seuss characters. Create simple puppets using paper bags, popsicle sticks, or even old socks. Encourage the children to craft their own puppets or provide pre-made ones for them to bring to life. Let their imaginations run wild as they act out their favorite scenes from Dr. Seuss’s books, promoting storytelling and dramatic play.
Another way to transport children into the fantastical world of Dr. Seuss is by organizing a themed scavenger hunt. Hide clues and hints throughout the house or garden, each leading to a Dr. Seuss character or book-related item. Children can embark on an exciting adventure, following the clues and collecting treasures along the way. This activity promotes problem-solving skills, teamwork, and a deeper appreciation for Dr. Seuss’s stories.
In conclusion, by bringing the characters to life, children can fully immerse themselves in the imaginative world of Dr. Seuss. Whether it’s through dressing up, creating artwork, puppet shows, or scavenger hunts, these activities not only promote creativity but also cultivate a love for reading and storytelling. Explore these ideas and watch as your children’s eyes light up with wonder and joy!
Questions and answers
What are some fun crafts inspired by Dr. Seuss?
There are plenty of fun crafts you can try! One idea is to create Lorax masks using paper plates and construction paper. Another option is to make Truffula trees by gluing colorful craft feathers onto pipe cleaners.
Are these crafts suitable for kids of all ages?
Yes, these crafts are designed to be fun and easy for kids of all ages. Younger children may need some assistance with cutting and gluing, but they can still participate and enjoy the process.
Can I use materials from around the house for these crafts?
Definitely! Many of the materials used in these crafts can be found around the house. For example, you can use empty toilet paper rolls to create Horton the Elephant or empty egg cartons to make a Cat in the Hat hat.
Are there any safety precautions to keep in mind while doing these crafts?
While these crafts are generally safe and suitable for kids, it’s always a good idea to supervise younger children and make sure they are using child-safe scissors and non-toxic glue. Also, be cautious with small craft materials to avoid choking hazards.
Where can I find more Dr. Seuss inspired craft ideas?
There are plenty of resources online where you can find more Dr. Seuss inspired craft ideas. Websites like Pinterest and parenting blogs often have a wide range of creative and fun craft projects for kids based on Dr. Seuss books.
What are some examples of crafts inspired by Dr. Seuss?
Some examples of crafts inspired by Dr. Seuss include creating Truffula Trees from The Lorax using colored craft paper and pom-poms, making Cat in the Hat bookmarks using popsicle sticks and colored paper, and designing Horton the Elephant masks using paper plates and paint.
Are these crafts suitable for all ages?
Yes, these crafts are suitable for a wide range of ages. Younger children may need more assistance with cutting and assembling the crafts, but they can still participate and have fun with the process. Older children can add their own creative touches and make more intricate designs.
Can these crafts be done with materials commonly found at home?
Yes, most of these crafts can be done with materials commonly found at home or easily obtained at a crafts store. The materials often include paper, scissors, glue, colored markers or pencils, popsicle sticks, and pom-poms. If any specific materials are needed, they are usually mentioned in the instructions.
Are there step-by-step instructions provided for these crafts?
Yes, the article provides step-by-step instructions for each craft, along with accompanying photographs to help visualize the process. The instructions are easy to follow and include any necessary templates or patterns that need to be printed out. This makes it easy for parents and kids to create the crafts together.
How long do these crafts typically take to complete?
The time it takes to complete each craft depends on the complexity and the age of the child. Some crafts can be completed in as little as 15-20 minutes, while others may take an hour or more. It is important to allow for additional time if the child wants to add their own creative touches or if certain steps require drying time for paint or glue.