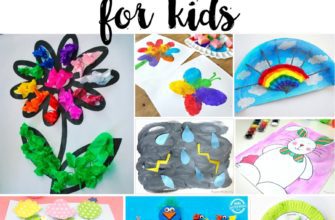
Spring is here and it’s the perfect time to embrace your artistic side and engage in some hands-on fun with your children. With Easter just around the corner, why not explore a plethora of exciting crafts that will keep your little ones entertained and bring the whole family together?
Encouraging children to explore their creativity not only provides them with an outlet for self-expression but also helps them develop essential skills such as fine motor coordination, problem-solving, and decision-making. Engaging in crafts is a wonderful way to bond with your kids and create lasting memories.
Revolutionize Your Health & Lifestyle!
Dive into the world of Ketogenic Diet. Learn how to lose weight effectively while enjoying your meals. It's not just a diet; it's a lifestyle change.
Learn MoreIn this article, we will introduce you to a collection of enjoyable activities that are perfect for little hands. From painting vibrant Easter eggs to creating adorable paper bunnies, the possibilities are endless. So, let’s dive in and explore the world of delightful crafts that will make this Easter season truly special!
- Cute and Colorful Easter Egg Decorating Ideas
- Sparkly Glitter Eggs
- Painted Animal Print Eggs
- Tie-Dye Easter Eggs
- Adorable DIY Easter Bunny Crafts
- Pom-Pom Easter Bunny Wreath
- Sock Easter Bunny Doll
- Paper Plate Easter Bunny Mask
- Creative Easter Basket Ideas
- Personalized Monogram Easter Baskets
- Questions and answers
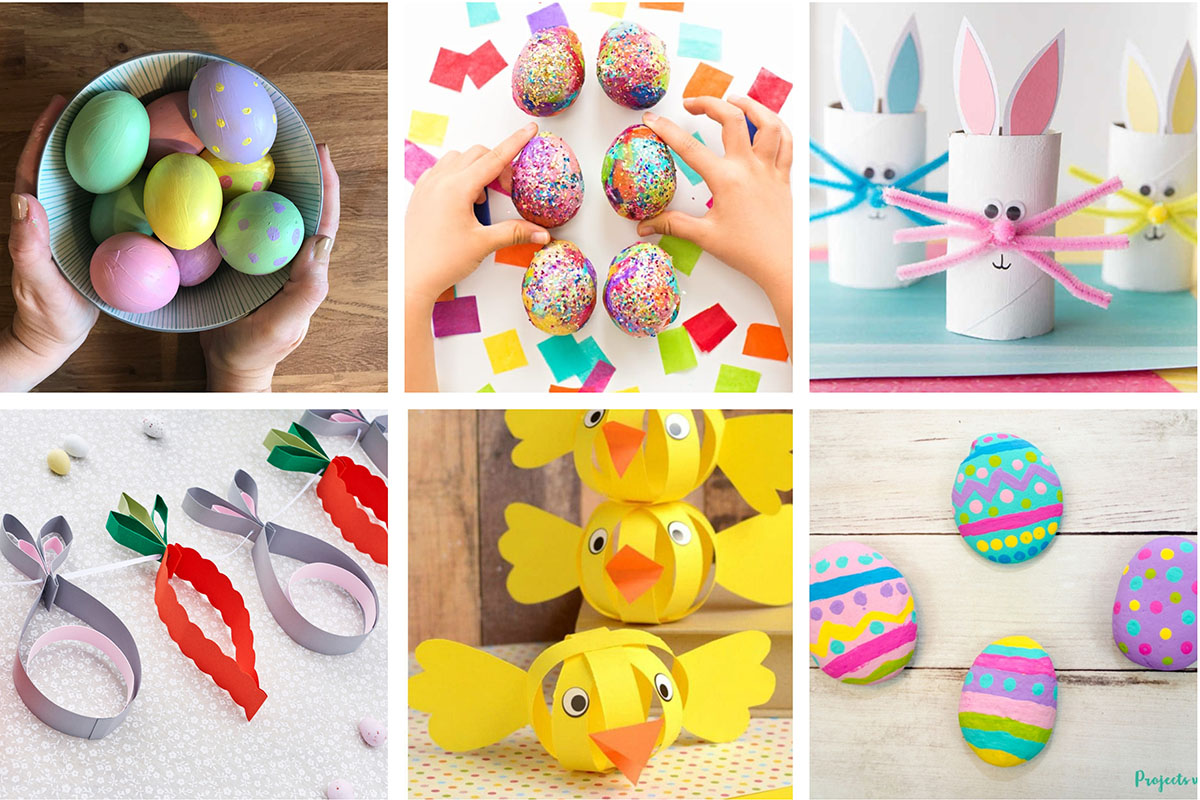
Cute and Colorful Easter Egg Decorating Ideas
Easter is a festive holiday that brings joy and excitement to families around the world. One of the most beloved traditions of Easter is decorating eggs. This section will provide you with a variety of adorable and vibrant ideas to make your Easter eggs truly special.
|
To start, consider using natural dyes to create a beautiful palette of colors for your eggs. Boiling various fruits and vegetables, such as blueberries, beets, and spinach, can produce vibrant and unique hues. Experimenting with different combinations and dip-dying techniques will result in stunning and eye-catching designs. |
|
If you prefer a more playful look, why not turn your Easter eggs into cute animal characters? Use markers or paint to draw faces, ears, and legs on the eggs to transform them into charming bunnies, chicks, or even lambs. Adding small accessories like bows or mini hats will enhance the cuteness factor. |
|
For a touch of elegance, try incorporating patterns and designs using various materials. You can use adhesive tapes or stickers to create striped, polka dot, or geometric patterns on the eggs. Alternatively, you can wrap the eggs with lace or ribbon, securing them with glue or tiny bows. These exquisite decorations will make your Easter eggs stand out. |
|
If you want to add some sparkle and shimmer to your Easter eggs, consider using glitter. Apply glue to specific areas of the eggs and sprinkle glitter over them. You can experiment with different colors and sizes of glitter to create dazzling and glamorous designs. The glittery eggs will capture the light and create a magical atmosphere. |
|
To make your Easter eggs truly unique and personalized, you can incorporate your family’s interests and hobbies. Use stickers or decals related to favorite movies, sports teams, or hobbies to decorate the eggs. These customized eggs will make your Easter celebration even more meaningful and enjoyable for everyone. |
These are just a few ideas to get you started on your Easter egg decorating adventure. Remember to have fun and let your creativity shine as you create beautiful and memorable Easter eggs with your family.
Sparkly Glitter Eggs
Discover a dazzling way to celebrate Easter with these sparkling and shimmering glitter eggs. Add a touch of enchantment to your holiday traditions with this fun and creative activity that the entire family can enjoy.
Transform ordinary eggs into extraordinary works of art by covering them in a layer of vibrant and glittery goodness. The shimmering effect of the glitter will instantly add a touch of elegance and magic to your Easter decorations.
First, gather all the materials you’ll need: eggs, glue, glitter, a small paintbrush, newspaper or a disposable tablecloth, and a tray or plate to catch any excess glitter. To get started, carefully blow out the eggs to remove the egg yolk and white, ensuring that they are empty and clean before proceeding.
- Begin by applying a thin layer of glue to the surface of the egg using the small paintbrush. This will act as the adhesive for the glitter.
- Next, hold the egg over the tray or plate and sprinkle a generous amount of glitter onto the glued area, making sure to cover the entire surface.
- Slowly rotate the egg, allowing the excess glitter to fall onto the tray or plate. You can gently tap the egg to remove any stubborn glitter.
- Repeat the process for each egg, using different colors of glitter to create a diverse and eye-catching collection.
- Once all the eggs are covered in glitter, set them aside to dry completely. This may take a few hours, so be patient!
Once dry, these sparkly glitter eggs can be displayed in a variety of ways. Arrange them in a decorative basket, use them as table centerpieces, or hang them from branches to create a unique Easter tree. The possibilities are endless!
Get ready to add a touch of sparkle to your Easter celebrations with these beautiful glitter eggs. This fun and simple craft will not only bring joy to your little ones but will also create lasting memories for the whole family.
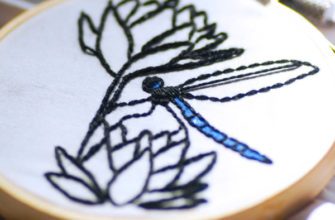
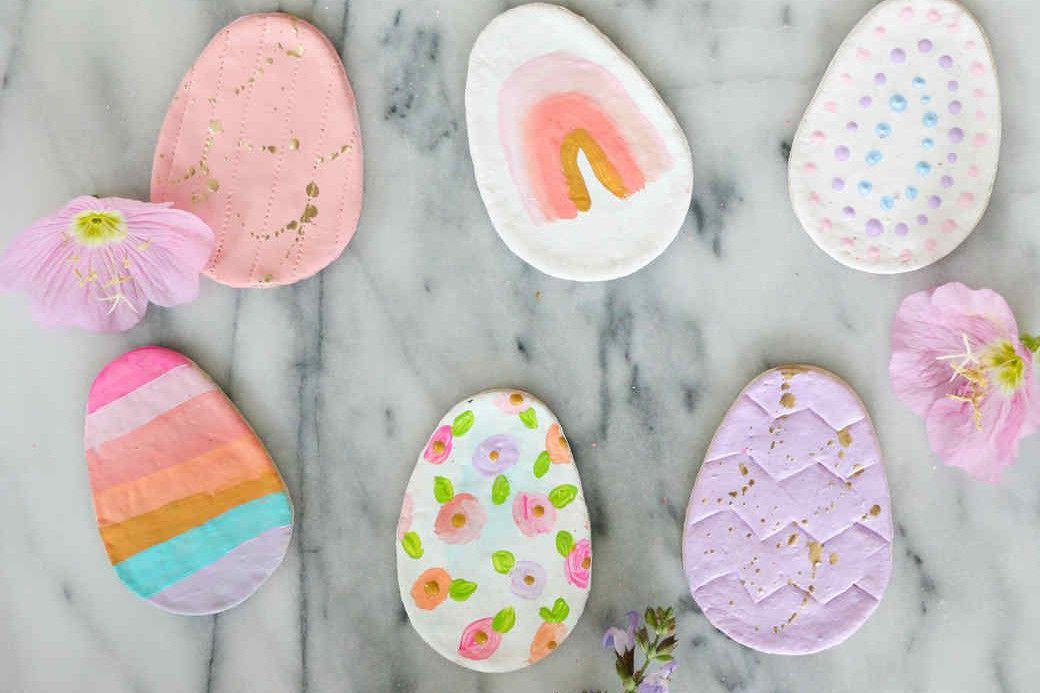
Painted Animal Print Eggs
To create these painted animal print eggs, you will need a few simple materials such as hard-boiled eggs, acrylic paint in various colors, small paintbrushes, and a steady hand. Start by choosing your favorite animal prints, such as leopard, zebra, or tiger patterns, and gather inspiration from nature or online resources.
Next, set up a well-organized workspace to avoid any paint mishaps. Cover the table with a plastic tablecloth or newspaper to protect it from any accidental spills. Place the eggs in an egg carton or an egg holder to make the painting process easier.
Now, it’s time to unleash your artistic skills! Start by painting a base coat on the eggs using a light-colored acrylic paint. This will serve as a background for the animal print patterns. Allow the base coat to dry completely before proceeding.
Once the base coat is dry, use a thin paintbrush to carefully create the animal print patterns on the eggs. Experiment with different colors and shapes to achieve the desired effect. You can paint spots, stripes, or even a combination of both, depending on the animal print you’re trying to recreate.
Remember to take your time and be patient as you paint each egg. The more intricate the pattern, the more precise your brushstrokes should be. Allow the painted eggs to dry thoroughly before handling them or displaying them as part of your Easter décor.
| Materials: | – Hard-boiled eggs | – Acrylic paint in various colors | – Small paintbrushes |
| – Plastic tablecloth or newspaper | – Egg carton or egg holder |
Adding painted animal print designs to your Easter eggs provides a unique twist to the traditional egg decorating activity. These creatively designed eggs will surely impress your family and friends and create lasting memories. So, gather your materials and get ready to unleash your creativity with these fun and captivating painted animal print eggs!
Tie-Dye Easter Eggs
Get ready to create a stunning and unique twist on traditional Easter eggs with the exciting technique of tie-dye! This captivating activity allows children and their families to unleash their creativity and produce vibrant, one-of-a-kind decorations for the Easter season.
Using a combination of colors and patterns, tie-dye Easter eggs bring a fresh and playful touch to your holiday celebrations. By employing various methods such as rubber bands, string, or even pantyhose, you can achieve mesmerizing designs on your eggs.
Injecting a burst of color
Give your Easter eggs a stylish makeover by coloring them in bold, brilliant hues. Dyeing the eggs in different segments, either by dipping them intricately or using a sponge, creates amazing color combinations and visually captivating patterns that will leave everyone amazed.
Experimenting with patterns
Encourage your children to think outside the box and experiment with different tie-dye patterns on their Easter eggs. Techniques like the bullseye, swirls, or even a spiral pattern can be achieved effortlessly and produce stunning results. These mesmerizing patterns will make your eggs the star of any Easter egg hunt!
Adding a personal touch
Let your imagination run wild and add a personal touch to your tie-dye Easter eggs. Using stickers, glitter, or even markers, you can embellish the eggs with designs, names, or messages. This makes them not only beautiful decorations but also meaningful gifts for friends and family.
In conclusion, tie-dye Easter eggs offer a fun and engaging activity that the whole family can enjoy. With endless possibilities for creativity and a chance to explore different colors and patterns, this craft will create lasting memories while ensuring a memorable Easter celebration.
Adorable DIY Easter Bunny Crafts
Looking for cute and charming Easter bunny crafts that you and your children can create together? This section will showcase a variety of delightful and creative DIY projects centered around Easter bunnies. From simple crafts that require minimal supplies to more elaborate creations, there’s something here for every level of crafting ability.
- Bunny Finger Puppets: Craft adorable finger puppets using felt, googly eyes, and glue. Your kids will love bringing their bunny characters to life and using them for imaginative play.
- Paper Plate Bunny Mask: Transform plain paper plates into adorable bunny masks using paint, construction paper, and elastic bands. Let your children’s creativity shine as they design and decorate their own unique masks.
- Bunny Ear Headbands: Create cute bunny ear headbands using pipe cleaners, colorful ribbons, and a bit of glue. Your little ones can wear these headbands during Easter festivities or as a fun dress-up accessory.
- Yarn-Wrapped Easter Bunnies: Engage your children in a tactile craft by making yarn-wrapped Easter bunnies. All you need is cardboard cutouts, yarn, and scissors. The end result is a fluffy and charming bunny that can be displayed as Easter decor.
These delightful Easter bunny crafts are not only enjoyable for kids, but they also provide an opportunity for the whole family to come together and create cherished memories. Watch as your children’s faces light up with joy and pride as they proudly display their handmade Easter bunny creations for everyone to admire.
Remember to supervise young children during crafting activities and have fun exploring your creativity with these adorable DIY Easter bunny crafts!
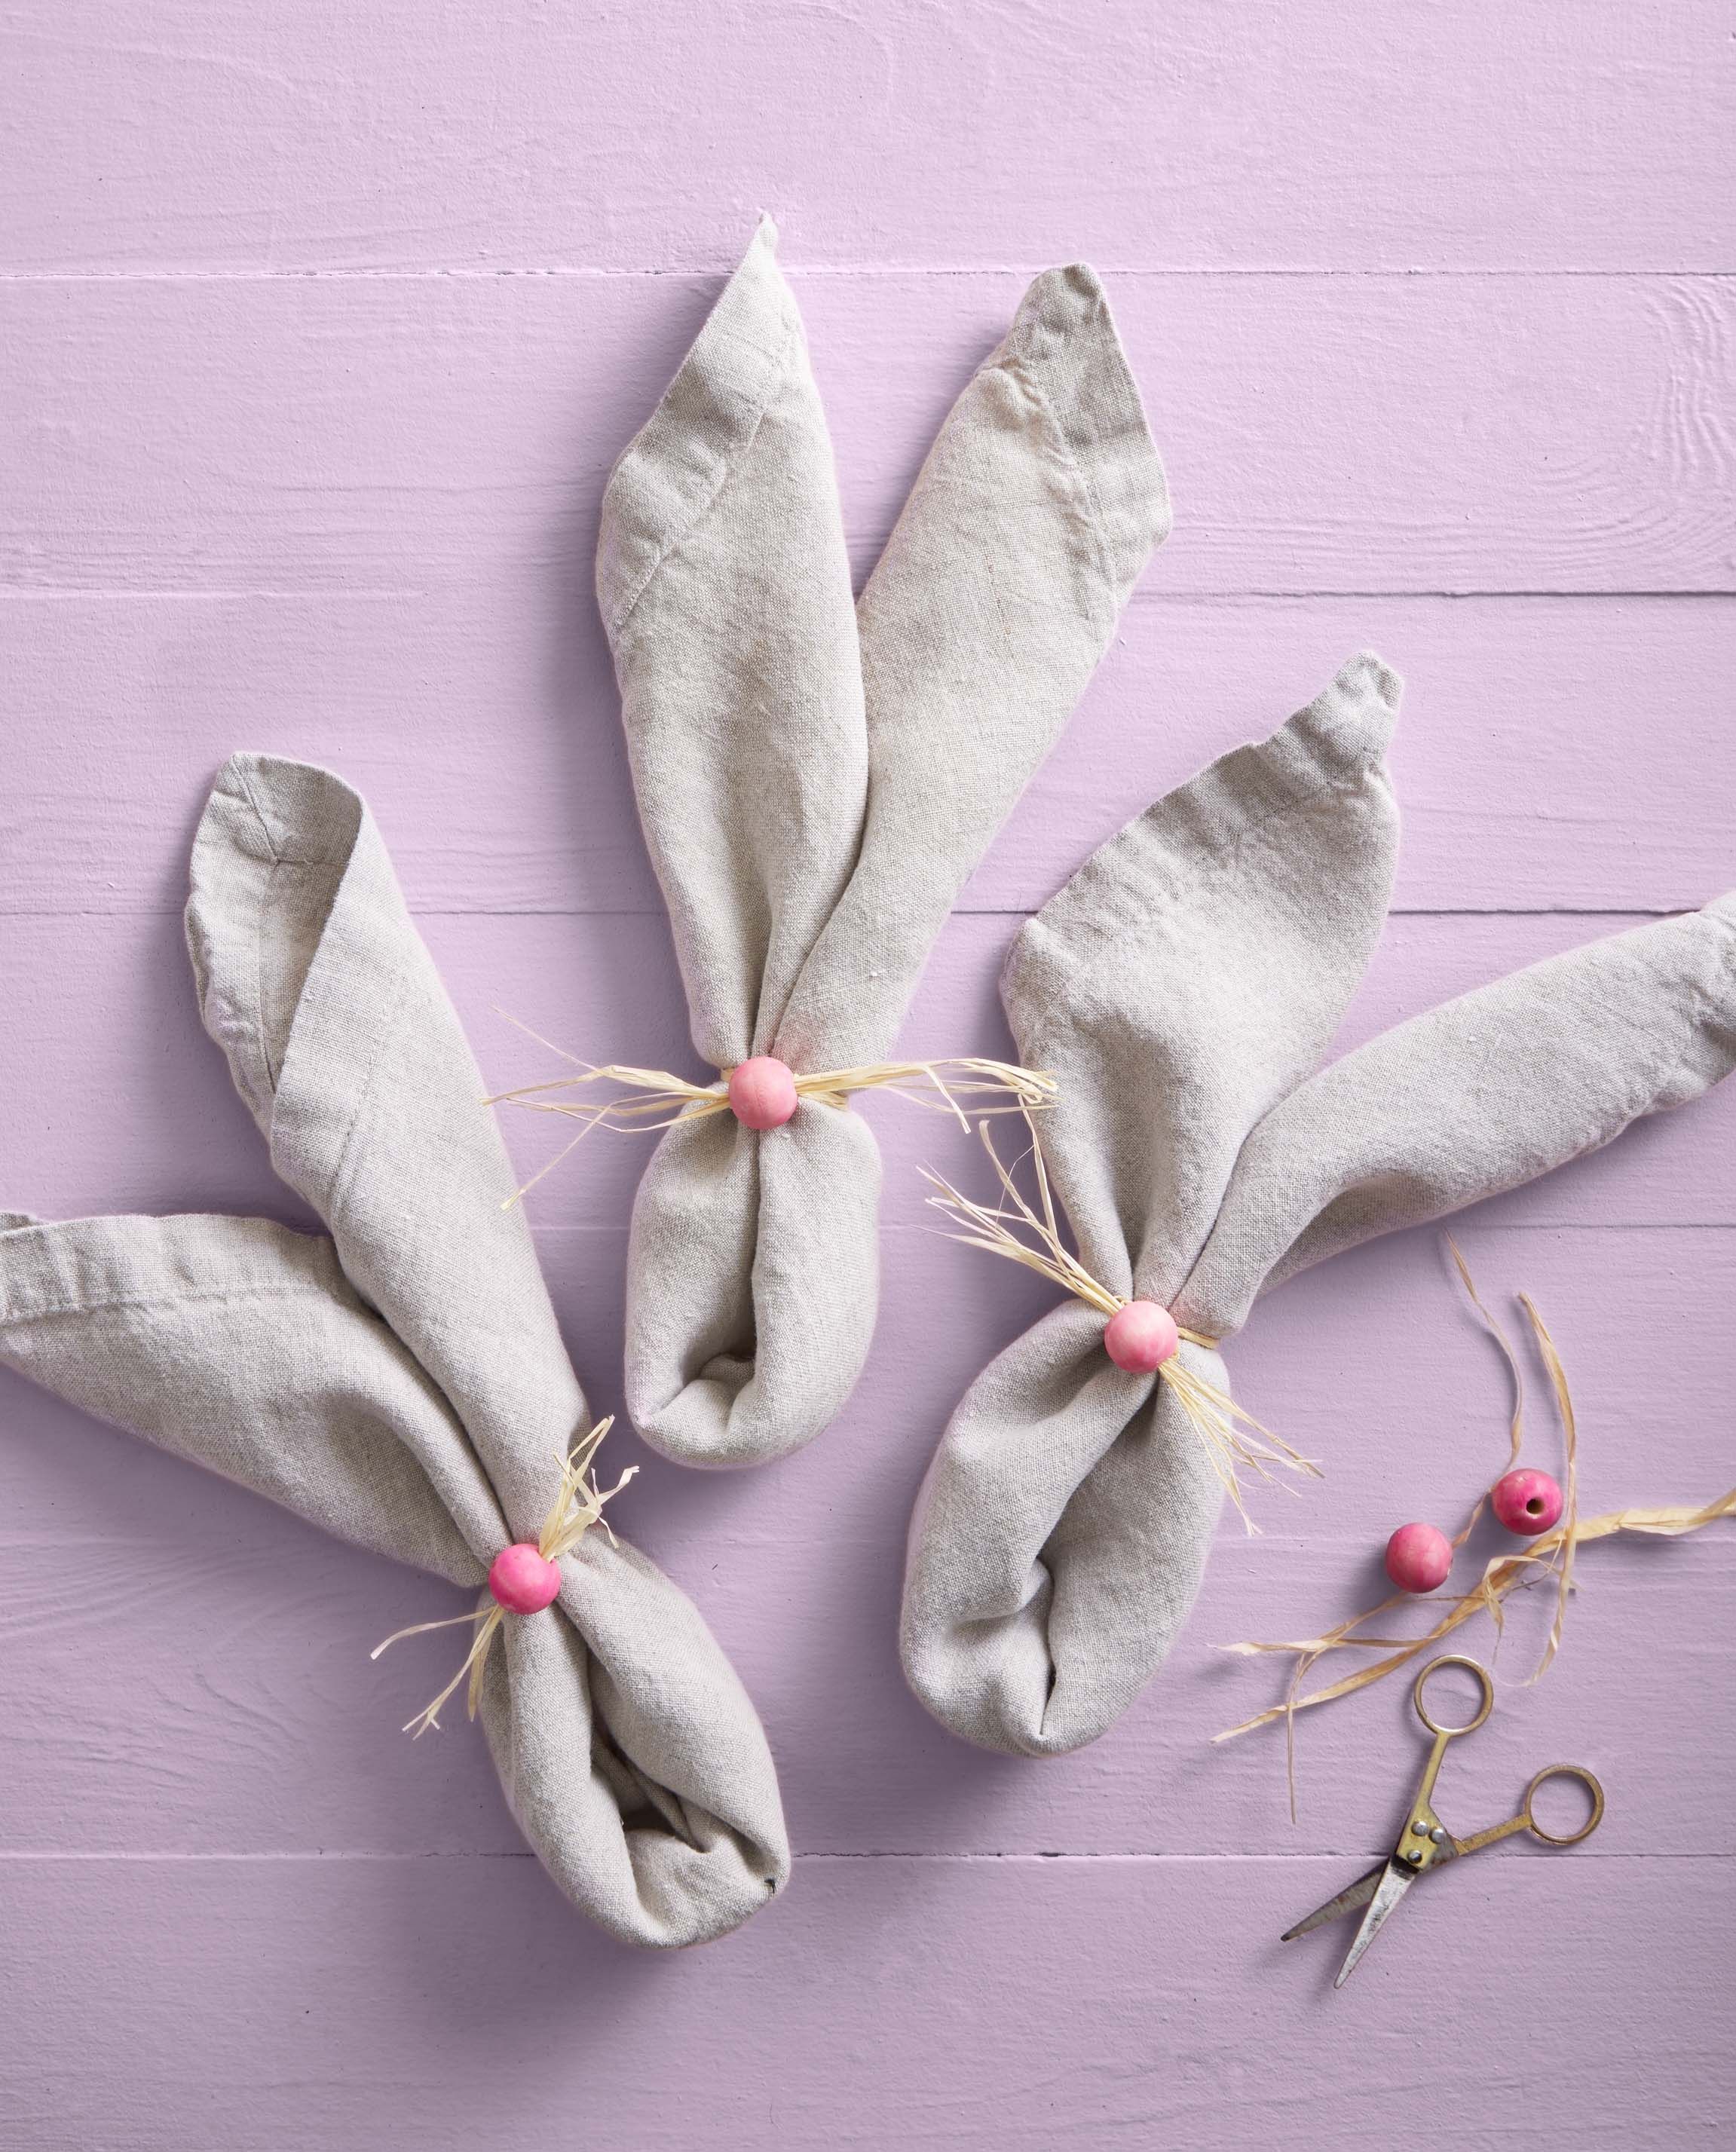
Pom-Pom Easter Bunny Wreath
:strip_icc()/pom-pom-bunny-garland-91997899-04a2f72925074561bdf3004fd157c538.jpg)
In this section, we will explore a delightful and simple Easter craft project that is perfect for the whole family to enjoy together. Get ready to create an adorable and festive Pom-Pom Easter Bunny Wreath!
With just a few materials and some creativity, you can make a charming wreath that features fluffy pom-pom bunnies, adding a touch of Easter whimsy to your home decor. This craft project is not only enjoyable but also a great way to engage your kids in a fun and imaginative activity.
To begin, gather the following materials: a foam wreath base, pastel-colored yarn, pom-pom maker or a fork, scissors, felt sheets in various colors, craft glue, and googly eyes. The soft and colorful yarn will create a fluffy texture, while the felt and googly eyes will bring the cute bunnies to life.
Once you have all your materials ready, start by wrapping the yarn around the wreath base, securing it with craft glue as needed. This will create a soft and spring-like backdrop for your pom-pom bunnies. Next, make pom-poms using the pom-pom maker or fork technique. Vary the sizes and colors to add visual interest to your wreath.
After making the pom-poms, it’s time to transform them into adorable bunnies. Cut out ears from the felt sheets and attach them to the pom-poms using craft glue. Then, glue googly eyes onto the pom-poms to give the bunnies their cute and expressive faces. Let your kids unleash their creativity by making different expressions and adding accents using felt scraps.
Finally, attach the pom-pom bunnies to the yarn-wrapped wreath base using craft glue. Arrange them in a playful and visually pleasing manner, allowing them to peek out from behind the yarn. Hang your whimsical Pom-Pom Easter Bunny Wreath on your front door or display it as a festive centerpiece to bring cheer and joy to your Easter celebrations.
This charming craft project will not only provide a fun and engaging activity for the whole family but also add a unique touch to your Easter decorations. Let your creativity soar as you and your kids craft adorable pom-pom bunnies and create a festive wreath that will be cherished for years to come!
Sock Easter Bunny Doll
Introducing the adorable and cuddly Sock Easter Bunny Doll, a perfect craft activity for children during the Easter season. This delightful project involves transforming a simple sock into a charming bunny doll that will bring joy and creativity to the whole family.
Creating a Sock Easter Bunny Doll is a creative and enjoyable way to engage children in craft activities. It allows them to use their imagination and develop fine motor skills while having fun. With just a few materials and simple steps, children can bring their bunny doll to life.
To make a Sock Easter Bunny Doll, you will need a sock, rice or fiberfill for stuffing, rubber bands, scissors, and various decorative items such as buttons, ribbons, and fabric scraps. The process involves filling the sock with rice or fiberfill to create the bunny’s body, securing it with rubber bands to create the head and body shape, and then adding the finishing touches with the decorative items.
This craft activity not only provides entertainment for children but also encourages creativity and imagination. They can personalize their bunny doll by choosing their favorite colors, patterns, and decorations. Additionally, this activity promotes recycling as it repurposes a sock that may no longer be in use.
The completed Sock Easter Bunny Doll can be used as a festive decoration or a beloved toy for imaginative play. It will surely become a cherished keepsake that brings smiles and fond memories to the whole family. Engaging in this craft activity together provides an opportunity for quality bonding time, as parents and children can collaborate and share their ideas while creating these adorable bunny dolls.
Get ready for an enjoyable and creative Easter craft experience with the Sock Easter Bunny Doll. Let your children’s imaginations soar as they create their personalized bunny dolls, spreading joy and happiness throughout the Easter season.
Paper Plate Easter Bunny Mask
Looking for a creative and engaging craft activity for Easter? Discover how to make a delightful Paper Plate Easter Bunny Mask that will bring smiles to the whole family. This easy and enjoyable project allows kids to explore their artistic talents while celebrating the festive spirit of Easter.
- Materials needed:
- – Paper plate
- – Scissors
- – Glue
- – Paints or markers
- – Cotton balls
- – Elastic string
Begin by cutting out eye holes in the paper plate. This will serve as the base of the bunny mask. Next, encourage the kids to unleash their creativity by decorating the paper plate with paints or markers, using vibrant colors to bring the bunny character to life. They can add fun patterns, designs, or even draw Easter-themed elements such as eggs or carrots to enhance the festive touch.
Once the decorating part is done, glue cotton balls on the bottom edge of the paper plate to create the bunny’s fluffy cheeks. These soft and fluffy additions will add texture and extra cuteness to the mask. After that, make small holes on either side of the paper plate and tie elastic string through them. This will enable the mask to be comfortably worn.
The Paper Plate Easter Bunny Mask can be worn and enjoyed during Easter egg hunts or used as a prop for imaginative play. Kids can have a blast pretending to be adorable bunnies and hopping around, spreading extra cheer during the holiday festivities.
This craft activity is not only entertaining but also helps develop fine motor skills, creativity, and imagination in kids. It’s an excellent opportunity for the whole family to come together, bond, and have fun. Get ready for an egg-citing Easter with this delightful Paper Plate Easter Bunny Mask!
Creative Easter Basket Ideas
In this section, we will explore imaginative and unique Easter basket ideas that can add a touch of creativity to your holiday celebrations. Discover novel ways to present gifts and treats to your loved ones, making Easter even more memorable and enjoyable.
One idea is to create themed Easter baskets that reflect the interests or hobbies of the recipient. For example, for a sports enthusiast, you can assemble a basket filled with items related to their favorite sport, such as mini sports equipment, trading cards, or a small game. This personalized touch will make the gift extra special and show that you put thought into selecting it.
Another creative Easter basket idea is to incorporate handmade items. Encourage your children to create their own crafts, such as painted wooden eggs or homemade cards, and include them in the basket. This not only adds a personal touch but also provides an opportunity for the little ones to showcase their artistic skills.
You can also think outside the traditional basket shape and use alternative containers for your Easter gifts. Consider using a colorful watering can, a beach bucket, or a decorative storage box as a unique and functional Easter basket. Not only will it surprise the recipient, but it can also be reused for other purposes after the holiday.
For a touch of elegance, consider creating a sophisticated Easter basket using unconventional materials. Utilize a beautiful ceramic or porcelain dish as the base and fill it with delicate, handmade crafts, gourmet chocolates, and luxurious bath products. This upscale approach will make the recipient feel truly pampered and create a lasting impression.
In conclusion, by embracing creativity and incorporating personalized touches, you can elevate the experience of giving Easter baskets. Whether it’s through themed baskets, handmade crafts, alternative containers, or sophisticated presentations, these ideas will bring joy and excitement to your Easter celebrations.
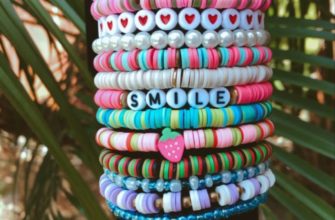
Personalized Monogram Easter Baskets
In this section, we will explore a creative and personalized way to make Easter baskets for your little ones. Adding a monogram to their baskets will not only make them feel special but also add a unique touch to their Easter celebration. With a few simple materials and a touch of imagination, you can create personalized monogram Easter baskets that will delight your kids and make their Easter egg hunt even more memorable.
Materials:
- A plain Easter basket
- Embroidery thread in different colors
- A needle
- Fabric glue
- Scissors
- Optional: embellishments such as ribbons, fabric flowers, or decorative buttons
Instructions:
- Choose the colors of embroidery thread that you want to use for the monogram. Select contrasting colors to make the letters stand out.
- Create a template of the monogram letters on a piece of paper. You can either print out a monogram template or draw the letters freehand.
- Cut out the letters from the template and place them on the front of the Easter basket. Arrange them in the desired position and use fabric glue to secure them in place.
- Thread the needle with the chosen embroidery thread and begin stitching the monogram letters onto the basket. Use a simple backstitch or any other embroidery stitch you prefer.
- Once you have finished stitching the letters, tie off the thread and trim any excess.
- For added flair, you can embellish the basket with ribbons, fabric flowers, or decorative buttons. Use fabric glue to attach these embellishments securely.
- Allow the fabric glue to dry completely before using the personalized monogram Easter basket for your Easter egg hunt.
Note: Remember to supervise young children during the crafting process and ensure they do not handle sharp objects such as needles without adult assistance.
By following these simple steps, you can create beautiful and personalized monogram Easter baskets that will make your kids feel extra special during the Easter festivities. They will love hunting for eggs with their own unique baskets, and you will have a cherished memory of a fun and creative family activity.
Questions and answers
What are some fun and easy Easter crafts for kids?
Some fun and easy Easter crafts for kids include making Easter bonnets, decorating Easter eggs, creating Easter bunny masks, making Easter-themed paintings, and crafting paper Easter baskets.
How can I involve the whole family in Easter crafts?
You can involve the whole family in Easter crafts by organizing a family craft night where everyone can participate in making Easter crafts together. You can assign different tasks to each family member or work on a craft collectively.
Can you give some examples of enjoyable activities related to Easter crafts?
Some enjoyable activities related to Easter crafts include hosting an Easter egg hunt, having a family picnic with homemade Easter treats, organizing a craft fair where kids can showcase and sell their handmade Easter crafts, or even participating in community Easter craft events.
Are there any Easter crafts suitable for toddlers?
Yes, there are many Easter crafts suitable for toddlers. Some examples include finger painting Easter eggs, creating handprint bunnies, making a paper plate Easter chick, or simply letting them decorate pre-cut Easter shapes with markers or stickers.
What are some benefits of doing Easter crafts with kids?
Doing Easter crafts with kids offers multiple benefits. It helps stimulate their creativity and imagination, improves their fine motor skills, encourages them to follow instructions, provides an opportunity for quality family time, and allows them to express their artistic abilities.
What are some fun Easter crafts for kids?
There are plenty of fun Easter crafts that kids can enjoy. Some ideas include making Easter bunny masks using paper plates, creating colorful Easter egg sun catchers with tissue paper, and decorating Easter baskets with ribbons and stickers.
Are these Easter crafts suitable for kids of different ages?
Yes, these Easter crafts can be enjoyed by kids of different ages. While younger children may need more adult supervision and assistance, older kids can have more independence in creating their own crafts.
What materials are needed for these Easter crafts?
The materials needed for these Easter crafts vary depending on the specific craft. Some common materials include paper plates, tissue paper, glue, scissors, ribbons, stickers, and markers. It’s a good idea to gather all the necessary supplies before starting the crafts.
Can these Easter crafts be done with limited resources?
Yes, many of these Easter crafts can be done with limited resources. For example, instead of using store-bought materials, you can use recycled materials like cardboard or old magazines. The key is to be creative and flexible with the materials you have on hand.
Are these Easter crafts suitable for the whole family to participate in?
Yes, these Easter crafts are designed to be enjoyable activities for the whole family. Parents, grandparents, and siblings can all join in the fun and create their own unique crafts. It’s a great way to spend quality time together and bond over a shared creative experience.