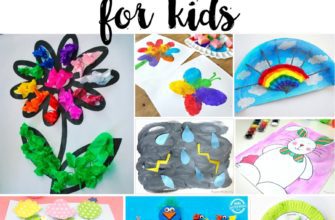
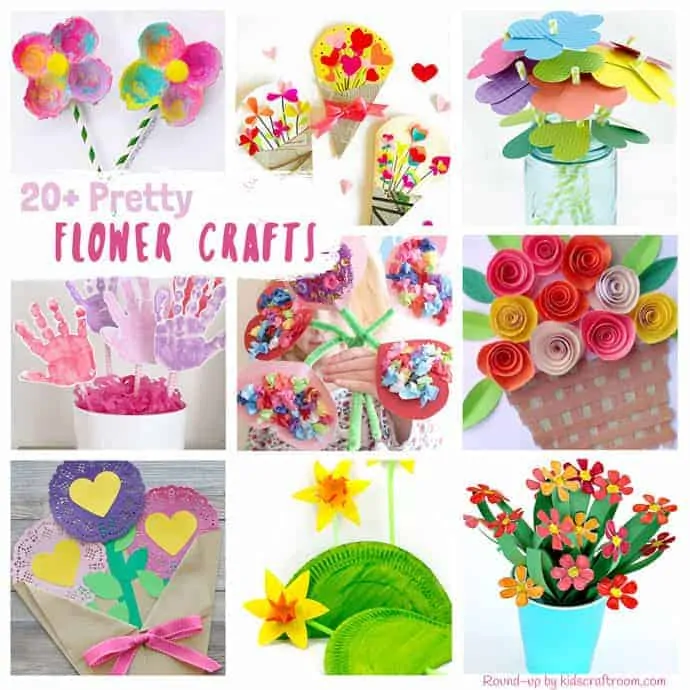
Unleash the boundless imagination and resourcefulness of your little ones with a range of captivating craft activities that are perfect for the season of renewal and growth. Engaging in hands-on projects not only stimulates creativity but also cultivates vital developmental skills, fostering innovation, problem-solving, and self-expression. So, get ready to embark on a thrilling journey of discovery and fun as we present a curated collection of inspiring craft ideas that are sure to make this spring a memorable and enchanting experience for children of all ages!
With our carefully crafted selection of craft projects, youngsters will have the opportunity to explore a multitude of artistic techniques and materials, allowing them to experiment, learn, and create meaningful objects that reflect their own unique personality. From paper mache and origami to clay modeling and recycled material crafts, there is truly something for every little artist to delight in. Encourage them to let their imagination soar as they paint, sculpt, cut, and glue their way to crafting masterpieces that will bring joy and pride not only to themselves but to the entire family.
Revolutionize Your Health & Lifestyle!
Dive into the world of Ketogenic Diet. Learn how to lose weight effectively while enjoying your meals. It's not just a diet; it's a lifestyle change.
Learn MoreWhether your child is an aspiring engineer, a budding fashionista, or a natural-born storyteller, our kid-friendly craft ideas will unleash their inner talents and passions. From designing and constructing their own mini greenhouses to creating vibrant butterfly crowns and whimsical fairy houses, these projects instill a sense of accomplishment, instigating a love for creativity that will last a lifetime. Embark on a memorable bonding experience with your little ones by diving into these imaginative crafts that will not only entertain but also foster important skills such as patience, perseverance, and attention to detail.
- Brighten Up Your Home with DIY Flower Pot Decorations
- Create unique and colorful flower pot decorations to add a vibrant touch to your home. Let your kids unleash their creativity by painting, adding stickers, or using other craft supplies to personalize their own flower pots.
- Painted Flower Pots
- Give your plain flower pots a makeover by painting them with bright and cheerful colors. Your kids will love experimenting with different patterns and designs.
- Sticker Decorations
- Take Your Flower Pots to the Next Level with Stickers and Gems
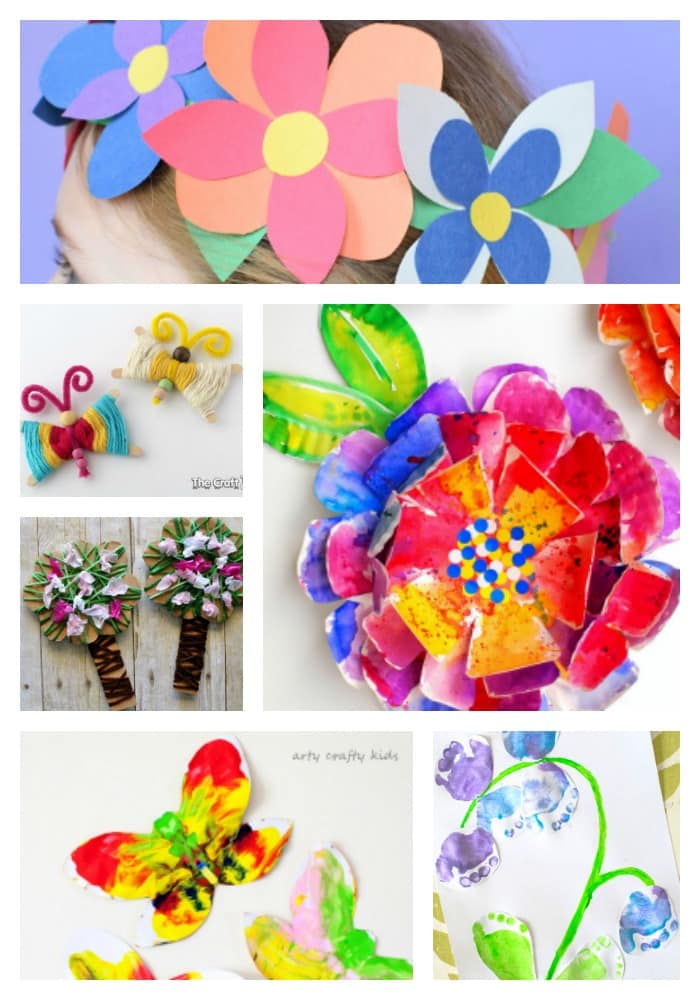
- Create Adorable Paper Butterflies to Adorn Your Spring Decor
- Add a touch of nature to your spring decorations by making colorful paper butterflies. Use colored paper, googly eyes, and pipe cleaners to create these delightful creatures.
- Paper Butterfly Template
- Find or draw a butterfly template and trace it onto colored paper. Cut out the shapes and let your kids decorate them with markers, glitter, or crayons.
- Questions and answers
Brighten Up Your Home with DIY Flower Pot Decorations
Add a touch of vibrancy and freshness to your living space with these simple and creative flower pot decoration ideas. Whether you have a green thumb or are just starting your gardening journey, these DIY projects are perfect for adding a personalized and artistic flair to your home. With a little creativity and a few basic supplies, you can transform ordinary flower pots into stunning décor pieces that will brighten up any room.
|
1. Painted Terracotta Pots: Give your plain terracotta pots a colorful makeover by using acrylic paints. Choose bright and vibrant colors or opt for pastel shades to match your existing home décor. You can use brushes for precise designs or get creative with sponge or stenciling techniques. These unique pots will instantly add charm and personality to your indoor or outdoor garden. |
|
2. Decoupage Flower Pots: Create visually stunning flower pots by using decoupage techniques. Select your favorite patterned or decorative papers and apply them to the pot’s surface using decoupage glue. This method allows you to transform simple clay pots into works of art. You can mix and match different patterns or keep it cohesive with a specific theme. These decoupage pots will give your plants a stylish and elegant home. |
|
3. Washi Tape Designs: Add a pop of color and pattern to your flower pots using washi tape. The versatility of washi tape allows you to create endless designs and combinations. From geometric shapes to intricate patterns, there are no limits to your imagination. Simply apply the tape to the pot’s surface and mix and match different tapes to create a unique and eye-catching design. These washi tape embellishments will instantly make your pots stand out. |
|
4. Rope-Wrapped Pots: Bring a touch of rustic charm to your flower pots by wrapping them with natural or colored rope. Use a hot glue gun to secure the rope in place and create patterns or designs as you go. The rope not only adds texture and visual interest but also provides a sturdy grip for carrying the pots around. These rope-wrapped pots will add a cozy and welcoming vibe to any corner of your home. |
|
5. Mosaic Flower Pots: Create a stunning mosaic effect on your flower pots using broken ceramic tiles, glass pieces, or even seashells. Arrange the pieces in a pattern or design of your choice and secure them with strong adhesive or grout. The mosaic technique adds a touch of elegance and sophistication to your pots, making them true eye-catchers. These unique and dazzling pots will surely spark conversations among your guests. |
Get creative and let your imagination soar with these DIY flower pot decorations. Whether you choose to paint, decoupage, tape, wrap, or mosaic, these projects offer endless possibilities for adding color and style to your home. Unleash your inner artist and watch as your flower pots transform into stunning decorative pieces that will brighten up your space and bring joy to both you and your family.
Create unique and colorful flower pot decorations to add a vibrant touch to your home. Let your kids unleash their creativity by painting, adding stickers, or using other craft supplies to personalize their own flower pots.
Enhance the aesthetic appeal of your living spaces with these delightful flower pot decorations that are sure to bring a burst of color and cheerfulness to your home. Engage your children in a fun and interactive activity as they explore their imaginations and add a personal touch to their own flower pots.
Encourage your kids to experiment with various painting techniques, such as sponge painting, finger painting, or brush painting, to create unique and eye-catching designs on their flower pots. They can mix different colors to create amazing patterns or opt for a single color for a more minimalistic look.
In addition to painting, encourage your children to let their creativity soar by adding stickers to their flower pots. From nature-themed stickers to playful cartoon characters, there are endless possibilities to personalize their pots and make them truly one-of-a-kind.
If you want to take the decoration to the next level, provide your kids with an assortment of craft supplies such as glitter, sequins, ribbons, and buttons. They can glue these materials onto their pots to add texture and extra visual appeal. The possibilities are endless, and your kids will have a blast creating their own masterpieces.
Your child’s personalized flower pot can serve as a beautiful centerpiece or a thoughtful gift for friends and family. Encourage them to display their creations proudly and watch as these vibrant additions bring warmth and joy to any room.
- Experiment with painting techniques such as sponge painting, finger painting, and brush painting.
- Add stickers to personalize the flower pots with nature-themed or playful designs.
- Use craft supplies like glitter, sequins, ribbons, and buttons to add texture and visual interest.
- Display the finished flower pots as centerpieces or give them as thoughtful gifts.
Creating unique and colorful flower pot decorations is a fun and engaging activity that allows your children to express their creativity while adding a vibrant touch to your home. So gather your crafting supplies and get ready for an enjoyable art session with your kids!
Painted Flower Pots
Indulge your creative side with this enchanting activity that allows you to transform plain flower pots into vibrant and unique works of art. With a few simple materials and a dash of imagination, you can personalize your garden or indoor plants with beautifully painted designs that will surely brighten up any space.
Give your plain flower pots a makeover by painting them with bright and cheerful colors. Your kids will love experimenting with different patterns and designs.
Transform your ordinary flower pots into vibrant and eye-catching masterpieces with a simple touch of paint. Let your kids unleash their creativity by exploring an array of colors and experimenting with various patterns and designs. By engaging in this fun-filled and hands-on activity, your children will not only enhance their artistic skills but also develop a greater appreciation for nature and gardening.
Start by gathering a collection of plain flower pots in different shapes and sizes. These can be easily found at any local gardening store or repurposed from old containers lying around the house. Make sure to clean and dry the pots thoroughly before beginning the painting process.
Next, collect an assortment of bright and cheerful paints that are suitable for outdoor use. Acrylic paints or spray paints work well for this project. Encourage your children to select their favorite shades and experiment with mixing them to create unique and personalized colors.
Before diving into the painting process, it’s a good idea to provide your kids with some inspiration. Show them pictures of painted flower pots online or in magazines to spark their imagination. Discuss different patterns such as polka dots, stripes, or floral designs that they can incorporate into their artwork.
Once the pots are ready and the paints have been chosen, it’s time for the creativity to flow. Encourage your children to paint freehand or use stencils for more precise designs. They can also try techniques such as sponge painting or splatter painting to add texture and depth to their creations.
After completing their designs, allow the painted pots to dry fully before placing them in your garden or patio. To protect the artwork from weathering, consider applying a layer of clear varnish or sealant. This will help preserve the colors and designs, ensuring that your kids’ masterpieces can be admired for months to come.
With their newfound love for painting and gardening, your children will be proud to showcase their colorful flower pots and will be eager to care for the plants that inhabit them. Don’t be surprised if their creativity extends beyond the pots – they may soon be inspired to paint other garden decorations or even create their own mini gardening projects.
So why wait? Unleash the artist within your child and brighten up your spring with these delightful and personalized flower pots. Watch as their imaginations soar and their love for crafting and nature blossoms.
Sticker Decorations
Enhance the vibrant spirit of the new season by adding a touch of creativity to your surroundings. In this section, we present a range of easy and enjoyable craft ideas using stickers to bring a burst of color and fun to your surroundings. Whether you’re a parent looking for activities to engage your child’s imagination or simply someone who enjoys DIY projects, these sticker decorations are sure to delight and inspire.
Take your pick from a variety of sticker designs and themes, ranging from animals and plants to popular characters and symbols. Customizing your accessories, room decor, or even party favors has never been this exciting! Transform plain objects into eye-catching works of art by incorporating stickers in unique ways.
 |
 |
|
Creative Phone Case: Add personality to your smartphone with a sticker-filled phone case. Arrange stickers in a visually appealing pattern or create a fun collage effect by overlapping different designs. The possibilities are endless! |
Playful Photo Frames: Gather your favorite photos and transform ordinary frames into captivating pieces. Decorate the borders with stickers that complement the theme of the pictures or use them to create unique designs that reflect your personal style. |
Additionally, stickers can be used to elevate the aesthetics of everyday items. Jazz up your diary or journal by adorning the cover with stickers that represent your interests or hobbies. Alternatively, bring life to plain notebooks, folders, and school supplies by attaching stickers in a thoughtful and artistic manner.
Sticker decorations offer a simple and enjoyable way to boost creativity and add a personal touch to your environment. With a wide range of possibilities and endless design combinations, the only limit is your imagination. So, gather your favorite stickers and let’s get started on this exciting crafting adventure!
Take Your Flower Pots to the Next Level with Stickers and Gems
Add a touch of excitement and whimsy to your flower pots with colorful stickers or self-adhesive gems. This creative idea is perfect for little ones who may find painting a bit challenging, as it allows them to personalize their pots with ease. By choosing vibrant stickers or sparkling gems, children can transform ordinary flower pots into extraordinary works of art.
Let their imagination run wild as they select stickers in various shapes, sizes, and colors. From cheerful flowers and playful animals to sparkling jewels and shimmering stars, the options are endless. Encourage them to mix and match stickers to create unique designs, or let them create their own stories by arranging the stickers in a meaningful way.
Not only will this activity boost children’s creativity, but it will also enhance their fine motor skills as they carefully peel and stick each sticker or gem onto the pot’s surface. Watching their creation come to life will bring a sense of accomplishment and pride to their faces, while also adding a touch of charm to your home or garden.
Additionally, this craft idea is a wonderful opportunity for parents and children to bond over a shared project. Sit down together, dive into the world of stickers and gems, and let your imaginations soar. This simple yet delightful activity will surely bring smiles to everyone involved, fostering a love for crafting and creative expression.
So why not try this fun and easy idea today? Gather your flower pots, stickers, and gems, and let the magic begin. Enjoy the process of transforming ordinary flower pots into captivating pieces of art, all while creating precious memories with your little ones.
Create Adorable Paper Butterflies to Adorn Your Spring Decor
:max_bytes(150000):strip_icc()/0206_kids_gtenvbunny_vert-2000-ba0ac60233b6417f9909d09191ed2f65.jpg)
Add a charming touch to your spring decor with these delightful paper butterflies. Made from simple materials, these easy-to-create crafts will bring a dash of whimsy to any room. Whether you’re looking to spruce up your living space or engage your kids in a fun and creative activity, paper butterflies are the perfect choice.
To get started, gather some colorful paper, scissors, and glue. Opt for patterns and colors that complement your existing decor or go for vibrant hues to add a pop of color. Fold the paper in half and cut out butterfly shapes, making sure to leave a small tab at the center. This tab will be used to attach the butterflies to various surfaces.
Once you have cut out your butterfly shapes, now is the time to get creative. Decorate the wings of each butterfly with markers, paints, or even glitter. Add intricate patterns, swirls, or dots to make each butterfly unique. These whimsical designs will add visual interest and create a playful atmosphere in your space.
After decorating the wings, fold the butterflies in half along the center tab and secure them by gluing or stapling the tab together. This will give the butterflies a three-dimensional look and make them easier to attach to different surfaces. Consider attaching them to walls, lampshades, or even creating a mobile with a few butterflies suspended in the air.
If you’re looking for a more interactive display, you can attach the butterflies to strings or thin wires and hang them from the ceiling. This will allow the butterflies to gently sway with the breeze, adding movement to your decor. Alternatively, attach them to potted plants or flower arrangements for a whimsical touch.
Don’t limit yourself to just one size or style of butterfly. Experiment with different sizes, shapes, and colors to create a diverse and dynamic display. Arrange them in groups or scatter them throughout your space to create a sense of enchantment. The possibilities are endless!
So, this spring, let the charm of these adorable paper butterflies enhance your decor. With their vibrant colors and playful designs, they are sure to bring a smile to your face and add a touch of magic to any room. Get creative, involve the kids, and have fun crafting these delightful paper butterflies!
Add a touch of nature to your spring decorations by making colorful paper butterflies. Use colored paper, googly eyes, and pipe cleaners to create these delightful creatures.
Embrace the beauty of nature this spring by incorporating vibrant paper butterflies into your home decor. These whimsical creations bring a touch of enchantment and playfulness to any space. Using colored paper, googly eyes, and pipe cleaners, you can easily craft these delightful creatures and add an element of creativity to your springtime celebrations.
When it comes to making paper butterflies, the possibilities are endless. Experiment with different colors and patterns of paper to match your desired theme or aesthetic. Opt for pastel shades for an Easter-inspired decor or go for bold and bright hues to embrace the cheerful spirit of spring. Let your imagination run wild and create a flutter of butterflies that will bring joy and cheer to your surroundings.
A key element in bringing your paper butterflies to life is the addition of googly eyes. These small plastic eyes add a touch of personality and whimsy to your creations. Simply glue them onto the paper butterfly bodies to instantly give them a lively and animated appearance. You can experiment with different sizes and colors of googly eyes to create butterflies with unique and individual personalities.
Another essential component of your paper butterflies is the pipe cleaners. These versatile craft materials serve as antennae and a means to attach the butterflies to various surfaces. Twist and shape the pipe cleaners to form gentle curves, mimicking the delicate and graceful movements of real butterflies. Attach them to the back of the paper butterfly bodies to complete the look and make them ready to adorn your spring decorations.
Whether you choose to hang your paper butterflies from the ceiling, attach them to walls, or incorporate them into floral arrangements, these delightful creations will add a touch of charm and whimsy to your spring decor. Let the vibrant colors, animated eyes, and delicate antennae of these paper butterflies inspire a sense of joy and wonder in both children and adults alike.
So this spring, why not embark on a creative journey and make your own colorful paper butterflies? With just a few simple materials and a sprinkle of imagination, you can infuse your home with the beauty of nature and create a visual spectacle that captures the essence of the season.
Paper Butterfly Template
In this section, we will explore a delightful craft project that involves creating paper butterflies. These beautiful insects can be brought to life using a simple template and basic materials. Through this craft, children can enhance their creativity and design skills while enjoying a fun and engaging activity.
To begin, you will need a printable butterfly template, which can be easily found online or drawn by hand. Once you have the template ready, gather colorful construction paper, scissors, glue, and any other decorative materials that you would like to use, such as glitter or markers.
Next, trace the butterfly template onto the construction paper and carefully cut out the shape. Encourage your child to experiment with different colors and patterns, allowing them to unleash their imagination and create unique butterfly designs. They can also add details like intricate patterns or even googly eyes for a playful touch.
Once the butterfly shape is cut out, fold it in half to create a crease down the center. This step adds dimension and makes the butterfly appear more lifelike. You can also gently curl the wings by running a pencil along the edges, giving the butterfly an elegant and realistic look.
Finally, it’s time to assemble the butterfly. Apply glue to one side of the creased center and press it firmly onto a popsicle stick or a clothespin. This will serve as the body of the butterfly and allow children to play with their creations by fluttering them around. Alternatively, you can attach a string to hang the butterflies as decorations.
Encourage your child to make a collection of these paper butterflies using different colors and sizes. They can create a vibrant display by hanging them in their bedroom or using them as decorative accents for parties or special occasions. These paper butterflies are not only a joy to make but also a wonderful way to bring a touch of nature indoors.
With this simple and enjoyable craft, children can experience the joy of creating something beautiful and unique. By exploring their creativity and working with their hands, they can develop important cognitive and motor skills while gaining a sense of accomplishment.
So, let your child’s artistic abilities take flight with this paper butterfly template craft project!
Find or draw a butterfly template and trace it onto colored paper. Cut out the shapes and let your kids decorate them with markers, glitter, or crayons.
Encourage your children’s creativity with this delightful craft idea. Start by finding or creating a butterfly template, which you can trace onto colored paper. Once you have the shapes cut out, it’s time for the fun part! Let your kids use markers, glitter, or crayons to decorate their butterflies, allowing their artistic talents to shine.
The butterfly template can be as simple or intricate as you wish, depending on your child’s age and skill level. You can find various butterfly templates online or draw your own, tailoring them to your child’s preferences. The vibrant colors of the colored paper will make their creations even more visually appealing.
When it comes to decorating the butterflies, provide your kids with a wide range of materials to choose from. Colorful markers will allow them to add intricate details and patterns, while glitter will add a touch of sparkle. Crayons offer a more traditional coloring experience and can create unique textures when layered. Encourage them to experiment with different techniques and combine materials for even more exciting results.
This craft not only provides a creative outlet for your children but also helps them develop fine motor skills, hand-eye coordination, and artistic expression. It’s a wonderful way to spend quality time together while boosting their confidence and imagination.
Once your kids have finished decorating their butterflies, you can display their masterpieces around the house. Attach them to walls, windows, or string them onto a mobile for a whimsical touch. These beautiful creations will surely bring a sense of joy and color to any space, making spring even more vibrant and enjoyable for your family.
Questions and answers
What are some fun and easy craft ideas for kids during spring?
There are several fun and easy craft ideas for kids to enjoy during spring. Some popular options include making flower crowns out of tissue paper or real flowers, creating colorful and decorative wind chimes with recycled materials, painting rocks and turning them into garden decorations, constructing bird feeders using pinecones, and designing paper kites to fly in the open sky.
How can I make flower crowns with my kids?
Making flower crowns with your kids is a fun and easy craft activity. First, gather fresh or artificial flowers of various colors. Cut a long strip of green construction paper or a braided elastic band to fit around your child’s head. Then, using glue or tape, attach the flowers to the strip, making sure they are evenly spread out. Allow the glue to dry before placing the flower crown on your child’s head and let the spring festivities begin!
What materials can I use for creating wind chimes with my kids?
Creating wind chimes with your kids can be a delightful craft project. You can use a variety of materials, such as empty tin cans, seashells, plastic bottles, old keys, or even colorful beads. Simply string these items together with sturdy thread, rope, or wire. Hang the wind chime outside, where the wind can gently sway it, creating beautiful sounds for your child to enjoy during springtime.
How do I make decorative garden rocks with my kids?
Making decorative garden rocks with your kids is a fantastic springtime craft idea. Start by gathering smooth rocks of various sizes. Prep the rocks by washing and drying them thoroughly. Then, provide your children with colorful acrylic paint and painting brushes. Let their creativity flow as they paint intricate designs, patterns, or even small animals on the rocks. Once the paint is dry, you can place these decorative rocks in your garden to add a touch of color and whimsy.
Can you suggest an easy way to create bird feeders with pinecones?
Absolutely! Creating bird feeders with pinecones is a simple and enjoyable craft activity for kids. Begin by collecting pinecones and tying a length of string or twine around the top of each pinecone, leaving enough string to hang it later. Then, spread peanut butter or vegetable shortening over the pinecones, making sure to cover all the nooks and crannies. Roll the pinecones in birdseed, pressing gently to make the seed stick. Hang the finished bird feeders from tree branches or any outdoor hook, and watch as the birds flock to enjoy the tasty treat.
What are some fun and easy spring craft ideas for kids?
Some fun and easy spring craft ideas for kids include making flower collages using construction paper, creating colorful sun catchers with tissue paper, crafting paper butterflies, decorating birdhouses, and painting rocks to create garden markers.
Are these craft ideas suitable for kids of all ages?
Yes, these craft ideas are suitable for kids of all ages. Younger kids may require some assistance and supervision, but the activities can be enjoyed by children of different age groups.
What materials are needed for these spring craft projects?
The materials needed for these spring craft projects usually include construction paper, scissors, glue, markers or crayons, tissue paper, small birdhouses, acrylic paints, paintbrushes, and rocks. Some projects may require additional materials such as stickers or googly eyes for added decoration.
Can these spring crafts be done indoors or are they better suited for outdoor activities?
These spring crafts can be done both indoors and outdoors. Some crafts like making flower collages or paper butterflies can easily be done indoors at a table or desk. Other activities like decorating birdhouses or painting rocks can be enjoyed outdoors to make use of the natural environment.
Are there any safety concerns or precautions to keep in mind while doing these craft projects with kids?
While doing these craft projects with kids, it is important to consider safety precautions. Make sure to provide appropriate supervision to prevent accidents, especially when using scissors or acrylic paints. Also, ensure that the materials used are non-toxic and suitable for children.