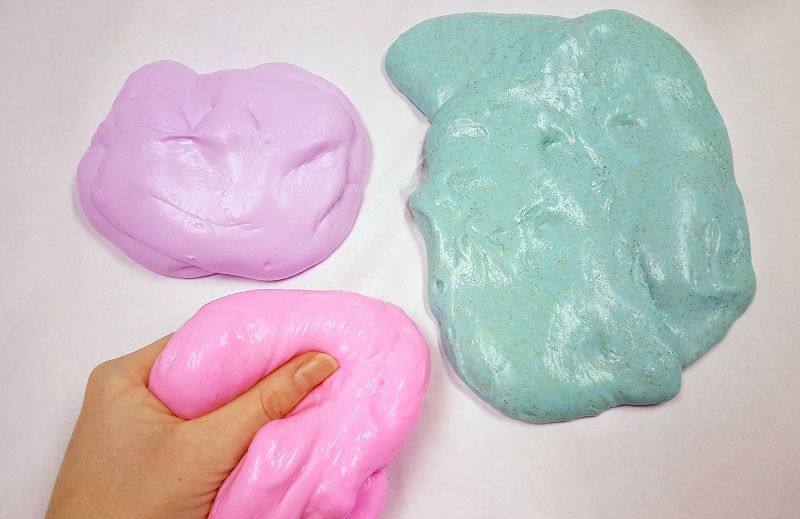
Are you searching for a fascinating and engaging activity to keep your kids entertained? Look no further, as we unveil the secrets to crafting your own slimy creations right in the comfort of your own home. This comprehensive guide will equip you with all the necessary knowledge and techniques required to embark on the mesmerizing world of slime-making.
In this article, we will explore a variety of methods and recipes that are easy to follow, allowing you to unleash your creativity and produce unique slimes that are sure to astound your friends and family. From glittery and scented slimes to glow-in-the-dark and fluffy textures, the possibilities are endless. Get ready to dive into the delightful world of slime concoctions!
Revolutionize Your Health & Lifestyle!
Dive into the world of Ketogenic Diet. Learn how to lose weight effectively while enjoying your meals. It's not just a diet; it's a lifestyle change.
Learn MoreThroughout this guide, we will not only provide you with step-by-step instructions but also offer tips and tricks, ensuring that your slime-making experience is smooth and hassle-free. Dive into the fascinating art of slime-making as we demystify the science behind this gooey substance. Discover the ingredients needed and their properties, as well as the precautions to take to ensure safety during the process. Get ready to unleash your imagination and create mesmerizing slimes that will bring joy and excitement!
The Basics of Creating Homemade Slime
When embarking on the wondrous journey of concocting your very own slime from the comfort of your own abode, it is crucial to acquaint yourself with the fundamental principles that underpin its creation. This section aims to provide a comprehensive overview of the essential elements and procedures involved in making slime.
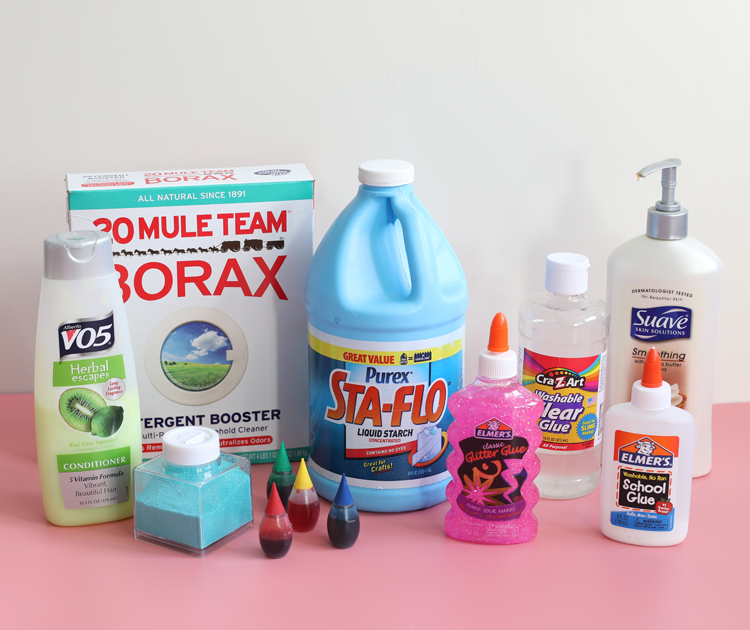
Creating slime involves a series of simple yet crucial steps, each contributing to the final product’s texture and consistency. First and foremost, it is essential to gather the necessary ingredients. These include a flexible adhesive substance, such as glue or clear glue, and a slime-activating agent, often in the form of a borax solution or liquid starch. Additionally, one may opt to incorporate various coloring agents, glitter, or other embellishments for aesthetic purposes.
Once all the ingredients are assembled, the next step involves combining them to initiate the chemical reaction that transforms the mixture into slime. This typically entails gradually introducing the slime activator into the adhesive substance while continuously stirring. It is crucial to maintain a balanced ratio between the adhesive and activator to achieve the desired consistency. Adjustments can be made by adding more of either ingredient, depending on whether the resulting texture is too sticky or too firm.
After thoroughly stirring the mixture, it is time for an essential step in the slime-making process: kneading. This step aids in evenly distributing the activator throughout the adhesive substance and helps to solidify the slime’s structure. Kneading should be done gently and continuously until the mixture reaches its optimal elasticity and no longer sticks to the hands.
Once the slime has attained its desired state, it is recommended to store it in an airtight container to preserve its texture and prevent drying. Proper storage also allows for extended playtime with your homemade slime creation.
The basics outlined in this guide serve as a foundation for creating various types of slime concoctions. Experimenting with different adhesive substances, slime activators, and additives will unleash a world of possibilities, enabling you to customize your slime to your heart’s desire.
Choosing the Right Ingredients
When it comes to creating your own homemade slime, selecting the perfect components is crucial for achieving the desired texture and consistency. This section will provide you with valuable guidance on making informed decisions when it comes to choosing the right ingredients for your slime-making adventures.
| Ingredient | Description |
|---|---|
| Adhesive | The adhesive acts as the base for your slime, providing the stickiness and stretchiness. Popular options include PVA glue, clear glue, or even liquid starch. |
| Activator | An activator is essential for transforming the adhesive into a solid, stretchy slime. Common activators are borax solution, contact lens solution, or baking soda mixed with water. |
| Additives | Additives such as food coloring, glitter, beads, or foam balls can be incorporated to enhance the visual appeal and sensory experience of your slime. Choose additives that suit your desired effect. |
| Texture Enhancers | To achieve specific textures, you may consider incorporating texture enhancers like lotion, baby oil, or cornstarch. These ingredients can help you obtain a glossy, fluffy, or stretchy slime. |
| Scent | Add a pleasing aroma to your slime by using scented oils or extracts. Options like lavender, strawberry, or mint can make your slime even more enjoyable to play with. |
| Packaging | Consider the packaging materials you will use to store your slime, such as airtight containers or resealable plastic bags. Proper packaging will help maintain the slime’s freshness and prevent it from drying out. |
Remember, the quality and combination of ingredients you choose will greatly impact the final result of your slime. Experiment with different ingredients and proportions to find your favorite recipe and create slimes that are uniquely yours!
PVA Glue
In this section, we will explore the essential ingredient in making slime: PVA glue. PVA glue, also known as polyvinyl acetate glue, is a versatile adhesive widely used for both crafts and household projects. It is a popular choice for slime making due to its strong bonding properties and easy availability. Let’s learn more about PVA glue and how it contributes to creating the perfect slime!
When it comes to making slime, not all glues are created equal. PVA glue stands out as a reliable choice due to its thick consistency, which helps give the slime its desired stretchy and gooey texture. This glue is commonly found in clear or white forms, both of which work well for slime making.
One of the advantages of using PVA glue is its non-toxic nature, making it safe for children to handle while creating their slime masterpieces. However, it is essential to ensure that the glue is labeled as washable, as some PVA glues may not come off easily from fabrics or other surfaces.
There are various brands of PVA glue available in the market, offering different formulas and adhesion strengths. You can choose from well-known brands or opt for store-brand alternatives, depending on your preference and budget.
- Elmer’s Glue: Elmer’s is a popular brand known for its high-quality PVA glue, making it a favored choice among slime enthusiasts. With its strong bonding properties, Elmer’s glue ensures your slime holds together well.
- School Glue: Many school glue brands offer PVA glue that works perfectly for slime making. These glues are affordable and easily accessible, making them a great option for beginners.
- Craft Glue: Craft glues are specifically formulated for various art and craft projects. They often contain PVA glue as the main ingredient and can be used for making slime along with other creative endeavors.
When adding PVA glue to your slime mixture, make sure to follow the recipe’s instructions carefully to achieve the desired consistency and texture. Mixing the glue with other key ingredients like borax or saline solution will help create the perfect slime that stretches and oozes just right.
Remember, PVA glue is the foundation of slime making, so it’s crucial to choose a reliable brand and pay attention to its washability. Experiment with different glues and have fun exploring the creative world of slime-making!
Borax or Contact Lens Solution
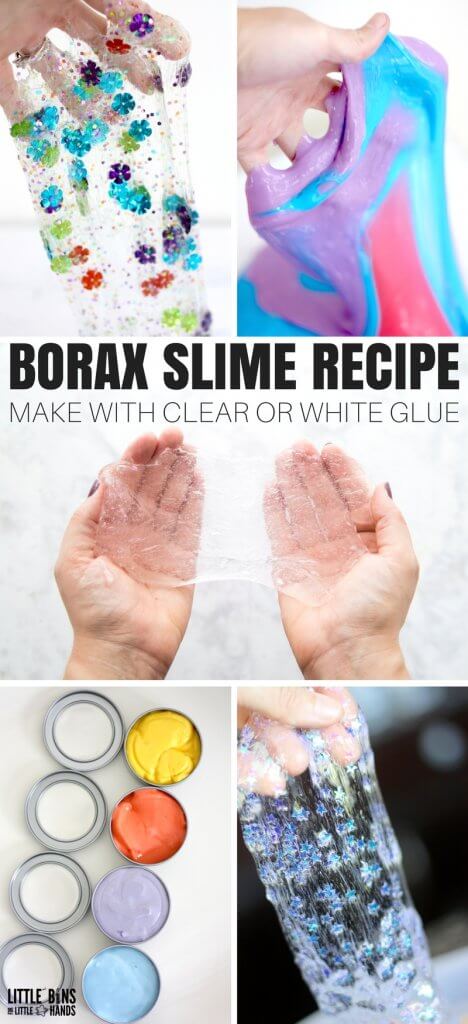
In this section, we will explore the options of using either borax or contact lens solution as the activator in your slime-making process. Both have their pros and cons, so it’s important to understand the differences before deciding which one to use.
One of the most popular choices for slime activator is borax, which is a common household item used for cleaning and laundry purposes. It is a powdery substance that, when mixed with water, creates a solution that can be added to your slime mixture. Borax is known for providing a strong and long-lasting slime, with a stretchy and solid texture that many slime enthusiasts enjoy.
On the other hand, contact lens solution has gained popularity as an alternative to borax. It is a liquid solution that usually contains boric acid and is made for cleaning and disinfecting contact lenses. Contact lens solution is readily available and easy to find in most drugstores and supermarkets, making it convenient for slime-making purposes. It is also a safer option for those who want to avoid working with powdery substances like borax, as it is easier to handle and measure.
When deciding between borax and contact lens solution, it’s important to consider any sensitivities or allergies you or your family members may have. Some people may experience skin irritation or allergic reactions when using borax, while contact lens solution is generally milder and less likely to cause any issues.
Regardless of your choice, it’s essential to follow the instructions and measurements provided in the slime recipe you are using. Whether you opt for borax or contact lens solution, both can effectively activate the slime ingredients and give you a satisfying and fun slime-making experience!
Gathering the Necessary Supplies
Before you embark on your slime-making adventure, it is important to assemble all the essential materials. This section will guide you through the process of gathering the required supplies, ensuring that you have everything you need for a successful slime-making experience.
Ingredients:
To create your own slime, you will need a selection of ingredients that will contribute to its unique texture and appearance. It is important to choose high-quality materials to achieve the best results. Some key ingredients include:
- Adhesive: Select a suitable adhesive, such as glue or a liquid starch, that will provide the sticky base for your slime.
- Activator: An activator is essential in transforming the adhesive into a solid and stretchy substance. Common activators include borax, contact lens solution, or baking soda and vinegar mixture.
- Additives: For added fun and creativity, consider incorporating various additives, such as food coloring, glitter, beads, or foam balls, to give your slime a personalized touch.
Equipment:
Alongside the ingredients, you will require a specific set of tools to make the slime-making process smoother and more efficient. These essential equipment pieces include:
- Mixing Bowl: A medium-sized mixing bowl will serve as the primary container for combining the ingredients and creating your slime concoction.
- Measuring Cups and Spoons: Accurate measurements are crucial when it comes to mixing the ingredients in the correct proportions. Make sure to have a set of measuring cups and spoons handy.
- Spatula or Spoon: A spatula or spoon will assist you in thoroughly mixing the adhesive, activator, and additives, ensuring a smooth and consistent slime consistency.
- Storage Containers: Plan ahead and prepare storage containers to store your finished slime. Mason jars or plastic containers with secure lids are ideal for keeping your slime fresh and preventing it from drying out.
Safety Precautions:
When working with ingredients and materials, it is important to prioritize safety. Follow these safety precautions during the slime-making process:
- Always work in a well-ventilated area to avoid inhaling fumes from certain activators or additives.
- Wear gloves to protect your hands from any potentially harmful substances and to make clean-up easier.
- Avoid ingesting any slime ingredients, as they may not be safe for consumption.
- Keep small children and pets away from the slime-making area to prevent accidents or ingestion.
By gathering the necessary supplies and taking the appropriate safety measures, you are now ready to dive into the exciting world of slime-making!
Mixing Bowl
When it comes to creating your own slime, one essential tool that you’ll need is a mixing bowl. This versatile vessel serves as the foundation for combining all your ingredients and achieving the perfect slime consistency.
The mixing bowl acts as a canvas of possibilities, allowing you to experiment with different textures, colors, and add-ins to create a slime that suits your unique preferences. It’s where the magic happens as you blend together various components to form a gooey and satisfying concoction.
Whether you opt for a small or large mixing bowl, make sure it’s clean and smooth to ensure easy mixing. Consider using a bowl with high sides to prevent any potential spillage while stirring or adding ingredients.
As you dive into the world of slime-making, remember that the mixing bowl plays a crucial role in the overall slime-making process. Take a moment to appreciate this fundamental tool that brings together the ingredients and allows you to unleash your creativity.
Measuring Cups and Spoons
Accurate measurement is a crucial step in creating the perfect slime mixture. In this section, we will explore the importance of using measuring cups and spoons to ensure precise proportions and consistent results.
When it comes to making slime, precision is key. Measuring cups and spoons are essential tools that allow you to accurately measure the ingredients for your slime recipes. These tools come in various sizes and can be made of different materials, such as plastic, glass, or metal.
Using a measuring cup, you can easily measure the volume of liquid ingredients, like glue or water, needed for your slime mixture. Similarly, measuring spoons are useful for measuring small amounts of ingredients, such as borax or food coloring. By using these tools, you can maintain the right balance of ingredients, ensuring your slime has the perfect consistency.
It is important to note that not all measuring cups and spoons are created equal. When selecting your tools, opt for those that are clearly marked with accurate measurements. This will help prevent any errors in your measurements and ensure consistent results every time you make slime.
In addition, it’s a good idea to have multiple sets of measuring cups and spoons on hand. This will allow you to measure different ingredients simultaneously without having to wash and dry your tools between each measurement. It also prevents cross-contamination of ingredients, especially if you are making different colored or scented slimes.
Remember, precise measurements are crucial in achieving the desired texture and consistency for your slime. By using measuring cups and spoons, you can confidently create various slime recipes knowing that you are accurately measuring each ingredient. So, grab your measuring tools and let’s get started on the next step of your slime-making adventure!
Step-by-Step Guide to Creating Slime
In this section, we will provide you with a detailed overview of the process to create your very own slime. We will take you through each step, highlighting the necessary materials and exploring different techniques. By following these instructions, you will be able to make slime easily and enjoyably, bringing fun and creativity into your home.
To begin, gather all the ingredients needed for your slime recipe. This may include glue, water, borax, food coloring, and other optional additives to customize your slime. Once you have everything ready, prepare your workspace by covering it with newspaper or a plastic tablecloth to protect the surface.
The first step is to mix the glue and water together in a bowl. This combination will form the base of your slime. Stir thoroughly until the mixture is well blended and smooth. Next, add the desired amount of food coloring to give your slime a vibrant and exciting color. Feel free to experiment with different shades and combinations.
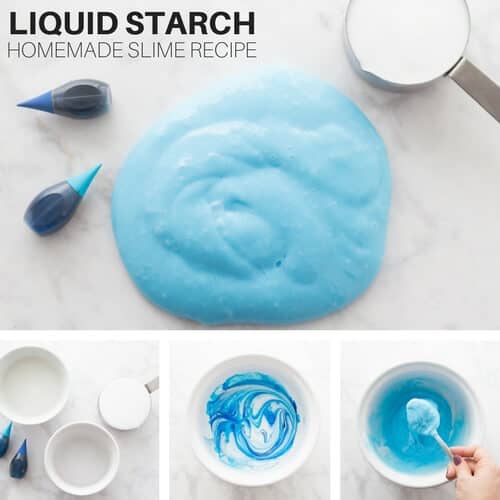
Now, it’s time to activate your slime by adding the activator. This is where borax comes into play. Dissolve a small amount of borax in water and slowly pour it into the glue mixture, stirring continuously. Keep adding the borax solution until the slime starts to form and pull away from the sides of the bowl. Be mindful not to add too much borax, as it can make your slime too stiff.
Once the slime has reached the desired consistency, take it out of the bowl and start kneading it with your hands. This step allows the slime to fully come together and develop its unique texture. As you knead, you may notice the slime becoming stretchier and more pliable.
Finally, it’s time to play and explore! Stretch, squish, and mold your slime to your heart’s content. You can even add some fun elements like glitter or small toys to make it even more exciting. Remember to store your slime in an airtight container to keep it from drying out.
Now that you have mastered the art of slime-making through this step-by-step guide, the possibilities are endless. Feel free to experiment with different colors, textures, and ingredients to create your own unique slime creations. Have fun and get creative!
Step 1: Prepare the Glue Mixture
In this initial step, we will focus on the crucial process of creating a well-prepared mixture using glue. By following these instructions, you will lay a solid foundation for the successful creation of your unique slime. Pay attention to the details and prepare to explore the fascinating world of homemade slime!
Gather the Ingredients:
Before diving into the exciting world of slime making, it’s essential to gather all the necessary ingredients. Be sure to have glue, which acts as the main component, at hand. Remember to double-check if your glue is non-toxic and suitable for making slime. This precaution guarantees a safe and enjoyable experience.
Mixing the Glue:
Once you have your glue ready, it’s time to mix it with other essential ingredients. Take a moment to appreciate the texture of the glue as you pour it into a suitable container. You can choose to add vibrant colors, such as food coloring or glitter, as per your creative preferences. Stir the mixture gently, ensuring the glue blends uniformly, and any additional ingredients are fully incorporated.
Add Liquid Activator:
After achieving a homogeneous glue mixture, it’s time to introduce the liquid activator. The activator is responsible for transforming your mixture into slime. Use ingredients like borax, contact lens solution, or laundry detergent as your choice of activator. With a steady hand, add the activator gradually, continuously stirring to achieve the desired consistency. Take note to not add too much activator at once, as it may cause the slime to over-activate or become too stiff.
Mixing it Well:
Throughout the entire process, it’s crucial to mix the ingredients thoroughly and with care. Give extra attention to the edges and corners of your container, as the ingredients might settle there. Utilize a spoon or spatula to scrape the sides, ensuring everything is well-mixed. Keep stirring until the slime begins to form and you achieve the desired stretchy and gooey texture.
Note: Remember to follow any additional instructions or variations provided by specific slime recipes. Each recipe might have unique recommendations to enhance your slime-making experience.
Measure the PVA glue
In order to create your desired slime consistency, it is important to carefully measure the PVA glue. This crucial step ensures that your slime turns out just right, providing the perfect stretch and texture.
When measuring the PVA glue, be sure to use a reliable measuring tool such as a measuring cup or spoon. It is important to accurately measure the amount of glue needed for your slime recipe in order to achieve the desired outcome.
Important tip: For a stretchier and more flexible slime, you can add a bit more PVA glue to your mixture. Conversely, if you prefer a thicker and less stretchy slime, use a slightly smaller amount of PVA glue.
Remember, the PVA glue acts as the backbone of your slime, providing the basic structure and hold for any additional ingredients or textures you may choose to add. So, take your time and measure out the PVA glue precisely to ensure a successful and enjoyable slime-making experience!
Questions and answers
What ingredients do I need to make slime at home?
To make slime at home, you will need glue, borax or liquid starch, water, and optional additions like food coloring, glitter, or beads.
Can I make slime without using borax?
Yes, you can make slime without using borax. Instead, you can use alternatives like liquid starch, contact lens solution, or laundry detergent.
How do I color my slime?
To color your slime, you can add a few drops of food coloring during the mixing process, or you can knead in the coloring once the slime is made.
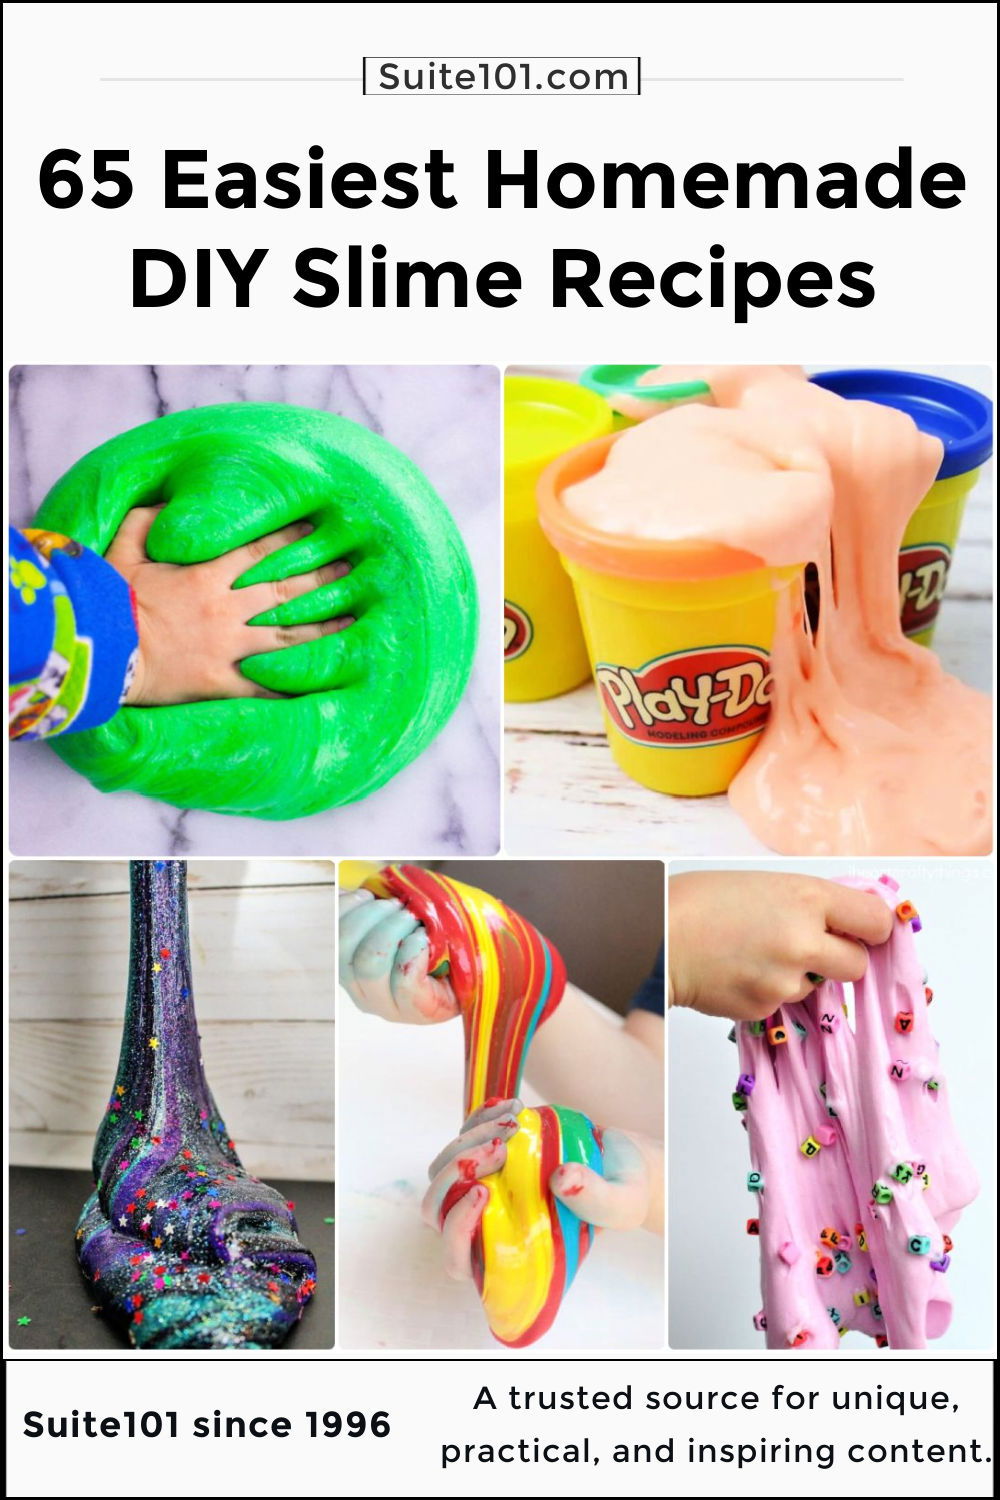
What are some fun variations of slime recipes?
There are numerous fun variations of slime recipes available. You can try making fluffy slime, clear slime, glow-in-the-dark slime, or even magnetic slime.
How can I store my slime?
To store your slime, you can keep it in an airtight container or a ziplock bag. Make sure to seal it properly to prevent the slime from drying out.
What are the basic ingredients needed to make slime at home?
The basic ingredients needed to make slime at home are glue, water, and borax or liquid starch. You can also add food coloring or glitter for a fun twist.
Can I make slime without using borax?
Yes, you can make slime without using borax. Instead of borax, you can use liquid starch or contact lens solution as an alternative. These alternatives work just as well in creating a stretchy and slimy texture.
Are there any safety precautions to be taken while making slime at home?
Yes, there are a few safety precautions to follow while making slime at home. It is important to always have adult supervision, especially when using borax or any other chemical. Additionally, it is recommended to wash your hands thoroughly after handling slime and avoid ingesting it.
What are some fun recipe variations I can try when making slime?
There are many fun recipe variations you can try when making slime. You can add various mix-ins such as foam beads, confetti, or even small toys to create different textures and appearances. Additionally, you can experiment with different scents and colors by adding essential oils or food coloring.
How can I store slime to keep it from drying out?
To store slime and keep it from drying out, it is best to store it in an airtight container or a zipper-seal bag. Make sure to remove any air bubbles before sealing the container. Placing the slime in the refrigerator can also help prolong its shelf life.