Unleash your creativity with an exciting and engaging activity that will capture the imagination of both kids and adults. In a world where DIY projects are becoming increasingly popular, making your own slime is an easy, affordable, and fun endeavor. This step-by-step guide will help you master the art of slime-making in no time.
Forget about the hassle of purchasing expensive chemical-filled slime kits. By following this quick and hands-on approach, you can create your very own slime with just a few simple ingredients that you probably already have in your kitchen pantry.
Revolutionize Your Health & Lifestyle!
Dive into the world of Ketogenic Diet. Learn how to lose weight effectively while enjoying your meals. It's not just a diet; it's a lifestyle change.
Learn MoreGet ready to embark on a slimy adventure that will provide endless hours of entertainment. But don’t be fooled by its simplicity–slime-making is not only a playful experience, it also offers numerous benefits. As you mix the ingredients together, you’ll enhance your fine motor skills and hand-eye coordination. Additionally, engaging in this sensory activity can promote relaxation and stress relief.
What is Slime?
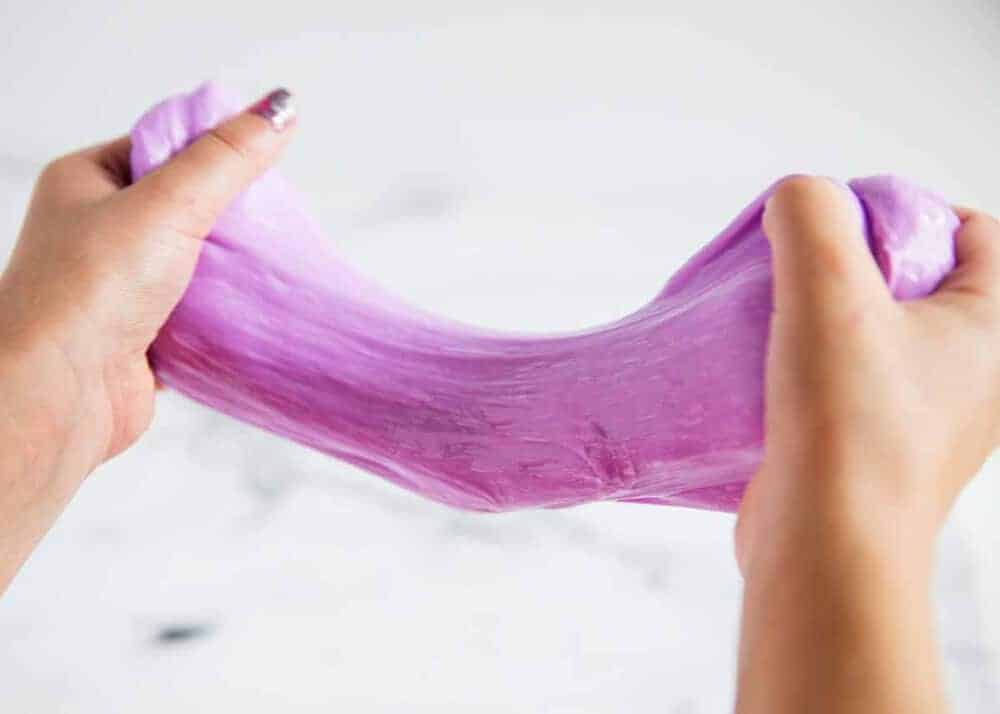
Slime, sometimes referred to as goo or ooze, is a unique substance that has gained immense popularity among both children and adults. It is a viscoelastic material that exhibits properties of both liquids and solids, making it incredibly fascinating to play with. Slime is known for its stretchy and malleable nature, allowing it to be molded and shaped in various ways.
Slime comes in a wide range of colors, textures, and consistencies, catering to individual preferences and sensory experiences. It can be sticky, slimy, or even fluffy, giving it a tactile appeal that captivates the senses. Slime has become a popular sensory toy and stress-reliever, as it provides a soothing and calming effect when manipulated.
The ingredients used to make slime can vary, but common components include a type of adhesive like glue, a thickening agent such as borax or liquid starch, and water. Additives like food coloring, glitter, or scents can be incorporated to enhance the visual appeal and sensory experience of the slime.
Slime has become a social media sensation, with countless DIY recipes and creative ways to customize it. It is often used as a form of entertainment, sensory play, or even as a tool for educational purposes. So whether you’re looking to relieve stress, engage in sensory play, or simply enjoy the tactile wonders of slime, this versatile material is sure to provide endless fun and exploration.
The Popularity of Slime
Slime, with its squishy and malleable texture, has become an unequivocal sensation, captivating the attention of young minds across the globe. It has gained an almost iconic status due to its ability to provide endless hours of entertainment, sensory satisfaction, and creative exploration.
The allure of slime lies in its versatility – it can be stretchy, fluffy, glittery, or even glow in the dark. Its tactile nature encourages tactile stimulation, making it a popular choice for stress relief and sensory play. The act of kneading, squishing, and shaping slime can have a soothing and calming effect, providing individuals with a form of relaxation and tranquility.
Not limited to mere entertainment, slime has also captured the attention of educators and scientists. Its unique properties make it an engaging tool for hands-on learning, particularly in areas such as chemistry and physics. Through experimenting with different slime recipes and observing the reactions and transformations, children can develop their scientific skills and curiosity.
The popularity of slime transcends the boundaries of the physical world and extends into the realm of social media. Online platforms, such as Instagram and YouTube, have become a hub for slime enthusiasts to share their creations and techniques. Tutorials, reviews, and mesmerizing videos of slime being manipulated have garnered millions of views, turning slime-making into a global phenomenon.
It is undeniable that the popularity of slime continues to grow and evolve, captivating individuals with its mesmerizing qualities and creative potential. Whether it’s for relaxation, sensory play, or scientific exploration, the allure of slime shows no signs of fading anytime soon.
Ingredients for Making Slime
In this section, we will explore the essential components needed to create your very own slime concoction. To achieve a successful slime creation, various ingredients are required, each playing a unique role in the final product. Let’s dive into the world of slime making and discover the key elements that make it a delightfully squishy and stretchy playtime sensation.
| Ingredients | Description |
|---|---|
| 1. Glue | The foundation of slime, glue provides the basic structure and stickiness necessary for a satisfying texture. |
| 2. Activator | An essential ingredient that triggers a chemical reaction with the glue, transforming it into a less liquid and more solid state. Common activators include borax, contact lens solution, or liquid starch. |
| 3. Coloring | To add a splash of vibrancy and personalization to your slime, coloring agents such as food coloring or acrylic paint can be incorporated. Let your creativity shine! |
| 4. Texture Enhancers | To give your slime a distinct touch, various texture enhancers can be used. Examples include foam beads, glitter, or even small toys to provide a sensory delight while playing with your slime creation. |
| 5. Scents | For an additional sensory experience, scents like essential oils or perfumes can be added to your slime creation. Choose a fragrance that pleases your senses and enhances the overall enjoyment. |
By carefully combining these ingredients, you can create your perfect slime masterpiece. Remember to follow safety precautions and have fun experimenting with different ratios and variations to achieve the desired stretchiness and squishiness. Enjoy the exciting journey of making your own slime!
Non-Toxic Glue
In this section, we will explore the alternative options for creating slime without the use of toxic glue. You don’t need to rely on hazardous ingredients to enjoy the fun and creativity of making your own slime. By utilizing non-toxic glue, you can ensure a safe and enjoyable slime-making experience for everyone involved.
One option for non-toxic glue is a natural adhesive made from plant-based ingredients. These eco-friendly glues are made from renewable resources and do not contain harmful chemicals. They provide a non-toxic alternative without compromising on the quality and stickiness required for making slime. Look for glue products specifically labeled as non-toxic or environmentally friendly.
Another alternative is using homemade glue made from ingredients commonly found in your kitchen pantry. This option allows you to have full control over the ingredients and ensures that no toxic substances are present in the glue. For example, a combination of flour, water, and salt can be used to create a simple and safe glue solution. Mix these ingredients together until you achieve a smooth and viscous consistency, perfect for slime-making.
When using non-toxic glue for slime-making, it is important to consider the desired texture and stretchiness of your slime. Experiment with different ratios of glue to other ingredients, such as borax or liquid starch, to achieve the desired consistency. Remember, the goal is to create a fun and safe slime that provides hours of entertainment and sensory play.
- Consider exploring different non-toxic glue options available in the market
- Check for eco-friendly glues made from plant-based ingredients
- Create your own homemade glue using kitchen pantry ingredients
- Experiment with ratios and additional ingredients for desired slime texture
By opting for non-toxic glue, you can confidently create slime without compromising on safety. Enjoy the process of making your own slime while ensuring a safe and enjoyable experience for all.
Borax or Contact Lens Solution
When it comes to making your own slime, one important decision you need to make is whether to use borax or contact lens solution. These two ingredients are commonly used to create the perfect slime consistency, but they have different properties and effects on the slime.
Borax, also known as sodium borate, is a popular ingredient in slime recipes. It acts as a cross-linking agent, helping to create a stretchy and firm slime texture. By adding borax to your slime mixture, you can achieve a more defined shape and a satisfying stretch. However, it’s important to note that borax can be irritating to some people’s skin, so it’s crucial to handle it with care and avoid contact with sensitive areas.
On the other hand, contact lens solution is another option to consider. It contains boric acid, which serves as a slime activator. Contact lens solution provides a similar outcome to borax, resulting in a stretchy and slime-like texture. The advantage of using contact lens solution is that it may be a milder alternative for those with sensitive skin.
When choosing between borax and contact lens solution, it’s essential to consider your personal preferences and any skin sensitivities. Both options can yield fantastic results, so it’s a matter of finding the one that works best for you. Whether you prefer the traditional method of using borax or the potentially gentler approach of using contact lens solution, you can create your own slime masterpiece in no time!
Step-by-Step Instructions
Follow these simple instructions to create your own homemade slime in just a matter of minutes. This section will guide you through each step, providing easy-to-follow directions without any unnecessary details or complicated techniques.
1. Prepare your materials: Gather all the necessary ingredients and tools required for making slime. Make sure you have measuring cups, mixing bowls, and spoons ready. You will also need glue, borax, water, and optional food coloring or glitter for customization.
2. Mix the glue and water: In a mixing bowl, combine the desired amount of glue with an equal amount of water. Stir the mixture until the glue is fully dissolved and there are no lumps remaining. You can also add a few drops of food coloring or glitter at this stage to add color or sparkle to your slime.
3. Prepare the borax solution: In a separate bowl, dissolve one teaspoon of borax into one cup of warm water. Stir the solution until the borax is completely dissolved. This will act as the activator for your slime.
4. Combine the glue mixture and borax solution: Slowly pour the borax solution into the bowl containing the glue mixture. Stir continuously as you pour, ensuring that the two solutions are thoroughly mixed. Keep stirring until the slime starts to come together and becomes more difficult to stir.
5. Knead and play with the slime: Once the slime has formed, take it out of the bowl and start kneading it with your hands. This will help to further activate and solidify the slime. Continue kneading until the slime reaches the desired consistency, which should be stretchy and not overly sticky. If the slime is too sticky, add a small amount of borax solution and knead it in.
6. Store and enjoy your slime: After kneading, your slime is ready to be played with and enjoyed! Store it in an airtight container to keep it from drying out. Remember to wash your hands after handling slime and avoid ingesting it. Have fun exploring the endless possibilities of your homemade slime!
Mixing the Glue and Water
One crucial step in creating your very own slime is the process of combining the adhesive substance and a liquid to form the base of your slime. This essential step sets the foundation for your slime’s texture and elasticity.
When mixing the glue with water, the goal is to achieve a smooth and homogeneous mixture. The adhesive component, often referred to as the glue, acts as a binding agent, while the water helps to dilute and soften the glue, making it easier to work with. The interaction between the two ingredients creates a chemical reaction that transforms the mixture into a viscous and pliable substance.
It is important to find the right balance when combining the glue and water. Too much water can result in a runny slime that lacks structure, while too little water can make the mixture difficult to manipulate. Experimenting with different ratios of glue to water can help you achieve the desired consistency for your slime.
As you mix the glue and water together, you may notice a change in the substance’s appearance. Initially, the mixture might appear cloudy or slightly milky, reflecting the presence of the diluted glue. However, as you continue to mix, the solution should become more transparent and cohesive, indicating that the ingredients are blending together effectively.
Once you have achieved a well-mixed and balanced combination of glue and water, you are ready to proceed to the next step of the slime-making process. This step sets the stage for the addition of other ingredients and the customization of your slime, allowing you to create unique textures, colors, and scents.
Adding the Borax or Contact Lens Solution
In this section, we will explore the crucial step of incorporating the necessary ingredients to create the desired consistency of your slime. By carefully introducing either borax or contact lens solution, you will achieve the perfect texture. Let’s dive into the details of this significant aspect of slime-making!
Before proceeding further, it’s important to note that the terms borax and contact lens solution can be used interchangeably in slime-making recipes. These solutions serve as activators that help bind the mixture and transform it into the slimy consistency we desire. However, the exact measurement of borax or contact lens solution needed may vary depending on the recipe or slime creator’s preferences.
When adding borax or contact lens solution to the mixture, it is crucial to exercise caution and follow the instructions precisely. Gradually introduce the activator into the base mixture while constantly stirring. This method ensures that the slime mixture absorbs the activator in a controlled manner, preventing the slime from becoming too sticky or too firm.
A general guideline is to add the activator in small increments, thoroughly mixing it in before adding more. Keep an eye on the slime’s consistency as you go along. If the slime feels too stiff, add a few drops of water or contact lens solution to soften it. On the other hand, if the slime appears too runny or sticky, sprinkle additional borax or contact lens solution to enhance its thickness and elasticity.
Remember, the secret to achieving the ideal slime texture lies in finding the perfect balance – not too stiff, not too sticky. So, take your time, experiment, and adjust the amount of activator until you achieve the desired outcome. This process will ensure that your slime maintains its shape, stretchiness, and most importantly, the enjoyment it brings!
Kneading and Stretching the Slime
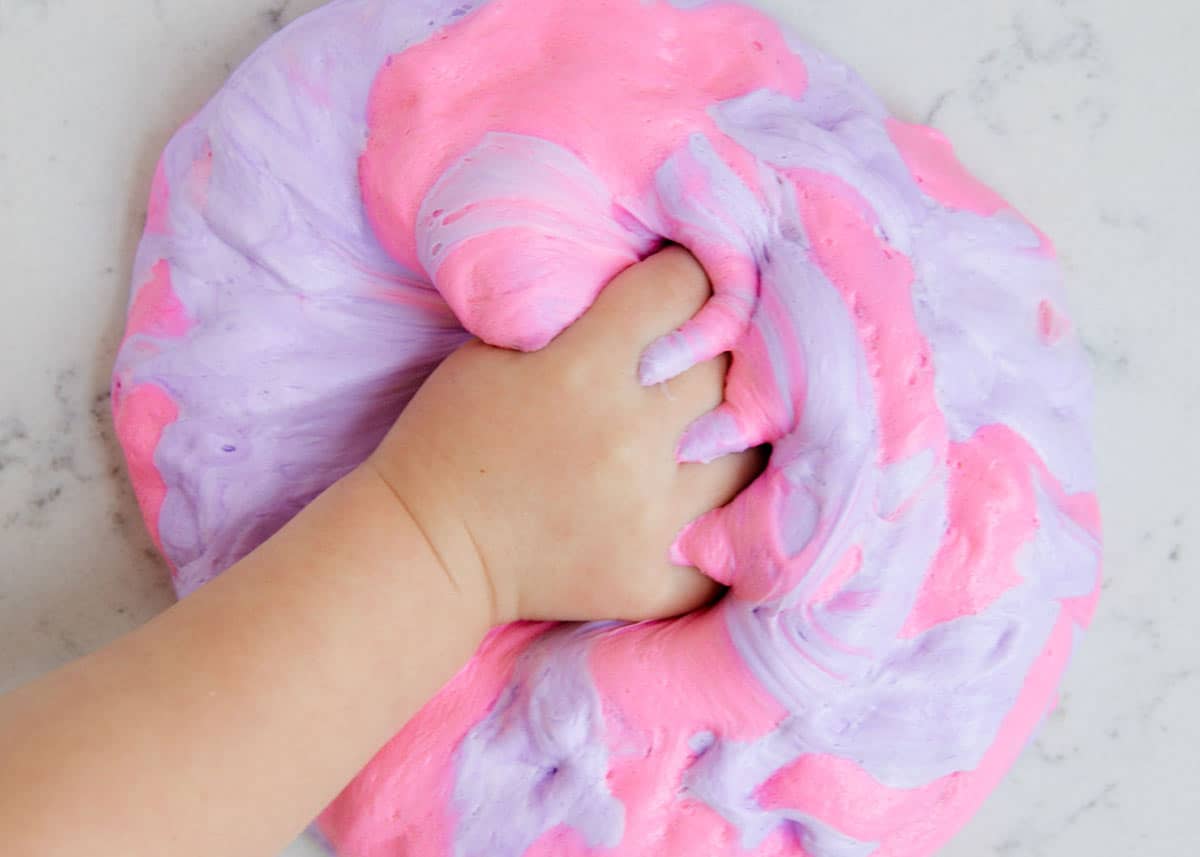
Exploring the fascinating properties of your homemade slime involves an essential step: kneading and stretching. Through this process, you can transform your slime into various shapes and textures, enhancing the sensory experience.
Kneading involves gently folding and pressing the slime to improve its elasticity and consistency. As you knead the slime, it becomes smoother and more malleable, allowing you to mold it into different forms. This physical manipulation also helps to distribute any remaining ingredients more evenly throughout the slime.
Stretching the slime provides an exciting visual and tactile experience. Slowly pulling the slime apart reveals its inherent stretchiness, allowing it to elongate and form intriguing patterns. You can experiment with different speeds and pressures to observe how the slime behaves and stretches, perhaps even trying some fun tricks like blowing bubbles or creating slime ribbons.
By dedicating some time to kneading and stretching your slime, you unlock its full potential. The unique sensations and playful possibilities that arise from this process make it a rewarding activity for both children and adults alike. So, take a moment to immerse yourself in the captivating world of slime and enjoy the endless creativity it offers!
Tips and Variations
In this section, we will explore different techniques and ideas to enhance your slime-making experience. Discover unique variations and helpful tips to create slime that is truly your own. Explore the possibilities and let your creativity shine!
Create Custom Colors:
Experiment with different combinations of food coloring or non-toxic paint to create your desired slime colors. Mix and match hues to achieve a rainbow effect or create a slime that matches your favorite color. The choice is yours, and the possibilities are endless.
Add Textures:
Take your slime to the next level by adding textures. Consider mixing in foam beads, glitter, or sequins to give your slime a unique feel and appearance. The added textures will provide a sensory experience like no other, making your slime even more enjoyable to play with.
Experiment with Scents:
Add a personalized touch to your slime by incorporating scents. Try using scented oils or extracts to create a slime that smells delightful. From fruity scents to soothing lavender, the choice of scents is entirely up to you. Immerse yourself in a multisensory experience as you enjoy the tactile sensation and delightful aroma of your scented slime.
Explore Different Stretchiness:
Adjust the consistency of your slime by altering the amount of liquid ingredients you use. For a stretchier slime, add more water or glue to the mixture. On the other hand, if you prefer a firmer slime, decrease the amount of liquid ingredients. Experiment with different ratios until you find the perfect texture that brings you joy.
Container Options:
Consider storing your slime in creative containers to keep it fresh and ready for playtime. From resealable plastic bags to glass jars, choose a container that suits your style. Decorate the container with stickers or labels to make it even more personal.
Remember, the key to creating slime that is uniquely yours is to experiment, have fun, and let your imagination guide you. With these tips and variations, you can elevate your slime-making skills and create a truly enjoyable sensory experience.
Questions and answers
What ingredients do I need to make slime?
You will need glue, baking soda, contact lens solution, and optional food coloring or glitter.
How much time does it take to make slime?
With this quick and easy recipe, you can make slime in just 5 minutes.
Can I make slime without glue?
No, glue is an essential ingredient to create the slime’s texture. You cannot make slime without glue.
Is it safe for children to play with slime?
Yes, as long as the ingredients used are non-toxic and the slime is not ingested. However, adult supervision is always recommended.
How do I store the slime after making it?
You can store the slime in an airtight container or a ziplock bag to prevent it from drying out. Make sure to keep it away from heat and direct sunlight.
What ingredients do I need to make slime?
To make slime, you will need liquid glue, baking soda, water, and contact lens solution. You can also add food coloring or glitter for extra fun.
Can I make slime without using contact lens solution?
Yes, you can make slime without contact lens solution. Instead, you can use a mixture of baking soda and water or saline solution. However, keep in mind that the consistency may be slightly different.
How long does it take for the slime to fully form?
The slime will start forming immediately after you add the contact lens solution to the glue mixture. However, it may take a few minutes of mixing and kneading for the slime to reach the desired consistency.
Is this slime recipe safe for children to play with?
Yes, this slime recipe is safe for children to play with. However, it is important to ensure that children do not ingest the slime and wash their hands thoroughly after playing with it.
Can I store the slime for later use?
Yes, you can store the slime in an airtight container for future use. Make sure to keep it in a cool and dry place. If the slime becomes too sticky, you can add a little bit of contact lens solution or water to restore its consistency.