Are you in search of the ultimate solution to unleash your creativity and create something truly mesmerizing? Look no further! This comprehensive guide will take you on an exciting journey towards concocting your very own cloud slime, right in the cozy confines of your home.
Prepare to be astounded as you explore the captivating world of cloud slime making. With each step carefully detailed, you will soon discover the secrets behind this unique and ethereal substance. Whether you are a seasoned slime enthusiast or a curious beginner, this guide will offer something for everyone.
Revolutionize Your Health & Lifestyle!
Dive into the world of Ketogenic Diet. Learn how to lose weight effectively while enjoying your meals. It's not just a diet; it's a lifestyle change.
Learn MoreEnvelop yourself in an adventure of sensory exploration as this guide reveals the secrets to achieving the perfect consistency, captivating colors, and tantalizing textures that are the hallmarks of cloud slime. Delve into the realm of ingredients and discover the precise combinations that will transport you to a world of enchantment.
Unlock your inner artiste as you add a personal touch to your cloud slime creations. With our expert tips and tricks, you will be able to experiment with different additives, such as shimmering glitters or scintillating beads, to imbue your slime with an unmatched elegance and charm.
So, get ready to embark on a magical journey that will unleash your imagination and satisfy your desire for tactile satisfaction. Prepare to be captivated as you dive into this comprehensive guide, an indispensable resource for every avid slime lover eager to create their very own marvelous cloud slime masterpiece.
- What is Cloud Slime?
- Understanding Cloud Slime Composition
- Advantages of Making Cloud Slime
- Step 1: Gather Your Ingredients
- Essential Ingredients for Creating a Dreamy Cloud Slime
- Additional Materials for Customization
- Step 2: Mixing the Base
- Measuring and Preparing the Glue
- Incorporating the Activator
- Adding Color and Scent (Optional)
- Step 3: Achieving the Cloudy Texture
- Questions and answers
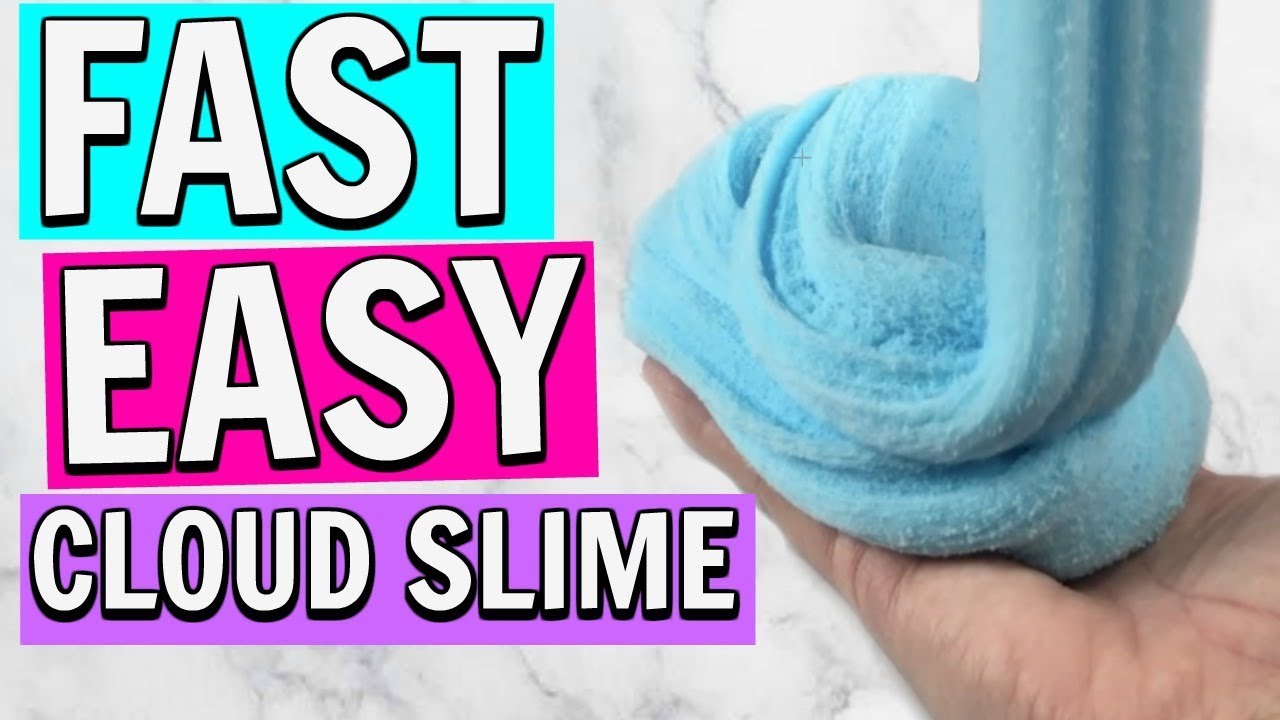
What is Cloud Slime?
Curious about the new trend sweeping the slime-making world? Let us introduce you to the mesmerizing world of cloud slime. This innovative variation of traditional slime is known for its unique texture and cloud-like appearance. With its soft and stretchy consistency, cloud slime offers a satisfying sensory experience for both kids and adults alike.
Imagine holding a handful of fluffy, yet moldable slime that feels incredibly light and airy. Cloud slime gets its name from its ability to effortlessly plop and hold its shape, making it reminiscent of floating clouds. Its smooth and squishy texture provides a soothing tactile sensation, offering a delightful stress-reliever for those seeking sensory satisfaction.
Unlike other types of slime, cloud slime is typically made using a combination of ingredients that give it its signature texture. By incorporating special components such as instant snow powder, foam beads, or cotton candy scents, cloud slime takes on a whole new dimension of playability.
Cloud slime offers endless creative possibilities for customization. Whether you prefer pastel hues, vibrant colors, or even glittery effects, this type of slime can be easily personalized to suit your style and preferences. Its versatile nature allows for the incorporation of various add-ins and mix-ins, making each cloud slime creation truly one-of-a-kind.
So, if you’re ready to embark on a slime-making adventure, delve into the world of cloud slime and discover the joy of creating your very own squishy and fluffy masterpiece!
Understanding Cloud Slime Composition

In this section, we will delve into the fascinating world of cloud slime composition and explore the key ingredients that make this unique slime so fluffy and cloud-like. We will uncover the secrets behind its airy texture and provide insights into the science of slime-making.
When it comes to cloud slime, the composition is crucial. Unlike traditional slime recipes, cloud slime requires specific ingredients to achieve its signature light and airy consistency. One of the key components is a special type of slime base that creates a more elastic and spongy texture as opposed to the usual stretchy and gooey slime.
Additionally, cloud slime typically incorporates a foaming agent, which helps to create those delightful air bubbles that give it its cloud-like appearance. This agent can be in the form of shaving cream, instant snow, or a combination of both, depending on the desired texture and effect.
Another important ingredient in cloud slime composition is a binding agent such as glue or a slime activator. This ensures that the slime maintains its shape and structure while still being soft and pliable.
Furthermore, to enhance the experience and add a touch of creativity, various additives such as colors, scents, and glitter can be incorporated into the mixture. These additives not only contribute to the aesthetic appeal of the slime but also provide sensory stimulation and a unique sensory experience.
It is important to note that the exact ratios and combinations of ingredients may vary depending on individual preferences and desired outcomes. Experimentation and fine-tuning are encouraged to achieve the perfect cloud slime consistency.
By understanding the composition of cloud slime and the role each ingredient plays, you can unlock the secrets to creating your own perfect, fluffy cloud slime at home.
Advantages of Making Cloud Slime
Making cloud slime offers numerous benefits that go beyond just the fun and satisfaction of creating your own unique sensory toy at home. The advantages of making cloud slime extend to various aspects, from its therapeutic benefits to its cost-effectiveness and eco-friendliness.
1. Therapeutic Benefits: Creating and playing with cloud slime can have a calming effect on the mind and body. The soft and stretchy texture of cloud slime can help relieve stress and anxiety, providing a sensory experience that promotes relaxation and mindfulness.
2. Creativity and Personalization: Making cloud slime allows you to unleash your creativity and personalize your slime according to your preferences. You can experiment with different colors, scents, and add-ins to create a slime that is truly unique and tailored to your individual taste.
3. Bonding Activity: Making cloud slime can be a fantastic bonding activity for families or friends. It provides an opportunity to spend quality time together, engage in a shared experience, and create lasting memories.
4. Cost-Effective: Buying pre-made slime can be expensive, especially if you regularly indulge in this sensory activity. Making your own cloud slime at home is a cost-effective alternative, as the ingredients required are affordable and readily available. Plus, you can make larger quantities of slime for the same price as a smaller store-bought container.
5. Eco-Friendly: By making cloud slime at home, you can reduce waste and contribute to a more sustainable environment. Instead of purchasing single-use slime containers, you can store and reuse your homemade slime in airtight containers, minimizing plastic waste.
Overall, making cloud slime offers a multitude of advantages, from its potential therapeutic effects to the opportunity for personal expression and cost savings. So why not give it a try and enjoy all the benefits that come with creating your own cloud slime?
Step 1: Gather Your Ingredients
In order to create your own homemade cloud slime, the first step is to gather all the necessary ingredients. This is a crucial part of the process as having the right ingredients will ensure the perfect consistency and texture of your slime.
Below is a table listing the ingredients you will need:
| Ingredient | Synonym |
|---|---|
| White glue | Clear adhesive |
| Shaving cream | Foam for shaving |
| Sodium borate | Borax powder |
| Water | H2O |
| Foam beads | Soft spheres |
| Food coloring | Colorant for food |
Make sure to gather all these ingredients before moving on to the next step. Having everything ready and easily accessible will make the process smoother and more enjoyable.
Essential Ingredients for Creating a Dreamy Cloud Slime
When it comes to crafting your very own cloud slime, you’ll need a selection of key ingredients that are crucial for achieving that perfect fluffy and ethereal texture. The masterful combination of these essential components will transport you to a realm of sensory bliss, making your slime creation an unforgettable experience.
1. Quality Glue: A fundamental ingredient, a high-quality glue serves as the base of your cloud slime. Opt for a clear or white glue that is smooth and free from clumps, as it ensures a better integration with the other ingredients.
2. Activator: To turn your glue into a cohesive and delightfully stretchy slime, an activator is essential. Common activators include borax, liquid starch, and contact lens solution. Choose the one that suits your preference and follow the guidelines carefully to achieve the perfect consistency.
3. Cornstarch: Adding cornstarch to your cloud slime recipe helps to enhance its cloud-like texture. This ingredient contributes to the fluffiness and gives your slime a satisfyingly soft and pillowy feel.
4. Baby Oil or Lotion: Incorporating a small amount of baby oil or lotion to your slime mixture can give it an additional element of squishiness and make it even more enjoyable to play with. Just remember to use only a small amount to avoid making your slime too sticky.
5. Food Coloring or Liquid Watercolor: To customize the appearance of your cloud slime, you can add a few drops of food coloring or liquid watercolor. Experiment with different hues to create captivating and mesmerizing slime creations.
6. Scented Additives (optional): For an extra sensory experience, consider incorporating scented additives such as essential oils or fragrance oils. These delightful aromas can add a pleasant fragrance to your cloud slime, making it even more enticing to play with.
By combining these essential ingredients in the right proportions and following the necessary steps, you’ll be well on your way to creating your very own dreamy and irresistible cloud slime.
Additional Materials for Customization
In this section, we will explore various options for personalizing your homemade cloud slime. By incorporating different materials and techniques, you can create a unique and customized slime experience that reflects your personal style and preferences.
One way to add a special touch to your cloud slime is by using colorants. Whether you prefer vibrant hues or subtle shades, there is a wide range of color options available, such as liquid dyes, powdered pigments, or even natural food coloring. Experiment with different combinations to achieve the desired effect.
For those looking to add a bit of sparkle, glitters are an excellent choice. From fine glitters to chunky ones, there are countless options to choose from. Whether you want a glittery explosion or a more understated shimmer, adding glitters can give your cloud slime a dazzling and eye-catching appearance.
If you enjoy experimenting with textures, consider incorporating add-ins into your cloud slime. Tiny foam beads, colorful sequins, or even small toys can be mixed in to create a unique sensory experience. These add-ins can give your slime a fun and engaging texture, adding an element of surprise and excitement to your playtime.
Scented oils offer another way to personalize your cloud slime. Choose from a variety of fragrances, such as fruity, floral, or even dessert-inspired scents. By adding a few drops of scented oil into your slime mixture, you can create an aromatic experience that enhances the overall sensory appeal of your slime.
Lastly, don’t forget about textures! Consider incorporating different materials like rubber bands, lace, or even ribbons to create a visually interesting and tactile experience. By combining various textures with your cloud slime, you can create a truly unique and personalized sensory play experience.
With these additional materials and techniques, you can take your homemade cloud slime to the next level. Get creative and have fun experimenting with different combinations to create a custom slime creation that is uniquely yours!
Step 2: Mixing the Base
In this step, we will focus on creating the base of the cloud slime by combining various ingredients. This is a crucial step as it sets the foundation for the texture and consistency of the final product. Paying attention to the mixing process and using the correct measurements will ensure a successful outcome.
Start by gathering all the necessary ingredients, such as glue, shaving cream, and contact lens solution. Strongly emphasize patience during the mixing process as rushing may lead to unfavorable results. The key is to mix the ingredients gradually while maintaining a gentle and consistent stirring motion.
As you mix, observe the transformation of the mixture. It will gradually become stretchy and fluffy, eventually forming the desired cloud-like texture. It is essential to keep in mind that the mixing time may vary depending on the specific ingredients and their quantities.
During this step, it is advisable to use an emollient, such as lotion or baby oil, to prevent the base from sticking to your hands. This will make it easier to handle the slime mixture as you continue to mix it. Remember to keep your workspace clean and free from any spills or messes.
Once you have achieved the desired consistency, your cloud slime base is ready for further customization. You can add colors, glitters, or scents at this stage to create a personalized touch. Remember to mix these additional ingredients slowly and evenly, ensuring they are well incorporated into the base.
By following these guidelines and carefully mixing the base ingredients, you are one step closer to creating the perfect cloud slime. This crucial step ensures that your cloud slime will have the desired cloud-like texture, making it satisfying to play with and enjoy.
Measuring and Preparing the Glue
In this section, we will explore the important steps you need to follow to measure and prepare the glue for making your perfect cloud slime at home. It is crucial to ensure that you have the correct measurements and that the glue is properly prepared to achieve the desired texture and consistency.
Before you begin, gather all the necessary materials, including white PVA glue, a measuring cup, and a mixing bowl. Start by choosing the amount of glue you want to use based on the desired quantity of slime you wish to make. You can use a measuring cup or a kitchen scale to accurately measure the glue.
- If you are using a measuring cup, pour the glue into the cup and level it off using a spatula or the flat edge of a knife. Make sure to read the measurements at eye level to avoid any inaccuracies.
- If you are using a kitchen scale, place a container on the scale, zero it out, and then pour the desired amount of glue into the container. Be careful not to exceed or fall short of the required amount.
Once you have the measured glue ready, transfer it to a mixing bowl. Use a spatula or a spoon to scrape off any remaining glue from the measuring cup or container to ensure you include the exact amount required.
Next, it’s time to prepare the glue by adding any desired colorings or glitters. This is where you get to add your personal touch to your cloud slime. Choose your favorite color or mix different colors to create unique variations.
If you want to add color to your slime, consider using food coloring, acrylic paint, or pigment powders. Remember to start with a small amount and gradually add more until you achieve the desired color intensity. Mix the color into the glue thoroughly to ensure even distribution.
In addition to color, you can also enhance your cloud slime with glitters or sequins. Sprinkle them into the glue and gently stir to distribute them evenly. Experiment with different types and sizes of glitters to create stunning visual effects in your slime.
After you have mixed the glue with your desired colorings or glitters, your glue is now ready to be combined with other ingredients to create the perfect cloud slime. Move on to the next section to continue the step-by-step process of making your own cloud slime at home.
Incorporating the Activator
When it comes to creating the perfect cloud slime, one crucial step is incorporating the activator. This step is essential in transforming the mixture from a gooey, liquid-like consistency into a stretchy, fluffy slime that resembles a cloud.
To successfully incorporate the activator, it is important to follow the recipe instructions carefully. The activator is typically a combination of ingredients that help bind the ingredients together and create the desired texture. These ingredients can vary depending on the recipe and personal preferences.
One common activator is a mixture of water and borax. Borax, although controversial, is widely used in slime-making due to its ability to effectively activate the slime mixture. It is important to dissolve the borax properly in water before adding it to the slime mixture, ensuring that it is thoroughly mixed.
Another popular activator is saline solution, which is a mixture of water and salt. Saline solution is often preferred by those who want a borax-free option for creating slime. It is important to choose a saline solution that does not contain any additional additives or medications, as these can affect the slime’s consistency.
- Start by adding a small amount of activator to the slime mixture.
- Slowly mix in the activator using a spoon or your hands, depending on the recipe instructions.
- Continue adding small amounts of activator until the slime begins to form and pull away from the sides of the container.
- Knead the slime with your hands to fully incorporate the activator and achieve the desired texture.
It is important to add the activator gradually to avoid over-activating the slime, which can result in a rubbery or stiff texture. Adjustments may be necessary depending on the specific recipe and desired consistency.
Remember, incorporating the activator is a crucial step in creating the perfect cloud slime. By following the recipe instructions and choosing the right activator for your slime, you can achieve a fluffy, stretchy slime that is reminiscent of a cloud.
Adding Color and Scent (Optional)
In this section, we will explore the creative possibilities of adding color and scent to your cloud slime recipe. While these additions are optional, they can elevate your slime-making experience and create a unique sensory play experience.
When it comes to adding color to your cloud slime, you have several options. One popular method is to use food coloring. You can mix a few drops of food coloring into your slime mixture during the mixing process. Another option is to use liquid watercolors, which can provide more vibrant and concentrated colors. Simply add a few drops to your slime mixture and knead it until the color is evenly distributed.
When adding scent to your cloud slime, you can let your imagination run wild. Consider using essential oils, such as lavender or peppermint, to create a calming or refreshing scent. Alternatively, you can use fragrance oils or even scented lotions. Add a few drops or a small amount of your chosen scent to your slime mixture and mix it in thoroughly.
Remember, when adding color and scent to your slime, start with a small amount and gradually increase until you achieve the desired effect. It’s important not to overpower your slime with too much color or scent, as it may affect the texture or playability.
Adding color and scent to your cloud slime is a fun and creative way to personalize your slime-making experience. Experiment with different color combinations and scents to create a sensory delight that reflects your unique style and preferences.
Step 3: Achieving the Cloudy Texture
Now that you have successfully prepared the basic ingredients for your slime, it is time to focus on achieving the desired cloudy texture. This step is crucial in creating a visually appealing cloud slime that is soft, fluffy, and mesmerizing to play with.
To achieve the perfect cloud-like consistency, there are a few techniques you can try. One method is to add a small amount of shaving cream to your slime mixture. The shaving cream helps to create air bubbles within the slime, giving it that fluffy and cloud-like appearance. Be sure to only add a small amount at a time and mix it thoroughly to avoid making the slime too sticky.
Another technique is to incorporate foam beads into your slime mixture. These tiny beads add texture and create a cloud-like effect by giving the slime a bumpy and airy feel. You can find foam beads in various colors to make your cloud slime even more visually appealing. Simply mix them into your slime and adjust the amount based on your desired texture.
Additionally, you can experiment with different types of activators, such as borax solution or liquid starch, to achieve the cloud-like texture. These activators help to bind the slime ingredients together and create a stretchy and fluffy consistency. It is important to add the activator gradually and mix it well to achieve the desired texture without making the slime too stiff or sticky.
Remember, achieving the perfect cloudy texture may require some trial and error. You may need to adjust the amount of ingredients or experiment with different techniques to find the right balance. Don’t be afraid to get creative and have fun during this step, as it will ultimately determine the final texture and appearance of your cloud slime.
- Try adding a small amount of shaving cream for a fluffy texture
- Incorporate foam beads to create a bumpy and airy feel
- Experiment with different activators to achieve the desired consistency
- Adjust the amount of ingredients and techniques based on personal preference
Questions and answers
What is cloud slime?
Cloud slime is a type of slime that has a light, fluffy texture, resembling a cloud. It is stretchy, squishy, and has a unique airy feel when played with.
What ingredients do I need to make cloud slime at home?
To make cloud slime at home, you will need glue, shaving cream, lotion, contact lens solution, baking soda, and food coloring (optional). These ingredients are easily available in most households or can be purchased at a local store.
Can I make cloud slime without using glue?
No, glue is a crucial ingredient in making cloud slime. It provides the necessary stickiness and consistency for the slime. However, if you prefer a glue-free option, there are alternative slime recipes available using other ingredients like cornstarch or laundry detergent.
What is the role of shaving cream in making cloud slime?
Shaving cream is added to the slime mixture to create the cloud-like texture. It helps to make the slime light and fluffy, giving it an airy and soft consistency. The amount of shaving cream can be adjusted to achieve the desired fluffiness.
Is it safe for children to play with cloud slime?
Cloud slime is generally safe for children to play with, but adult supervision is recommended, especially for younger children. It is important to ensure that the slime is made using non-toxic ingredients and does not contain any harmful substances. Additionally, make sure that children do not ingest the slime and wash their hands thoroughly after playing.
What ingredients do I need to make cloud slime?
To make cloud slime, you will need white glue, baking soda, contact lens solution, shaving cream, and any coloring or scent you desire.
Can I substitute the white glue with clear glue?
Yes, you can definitely use clear glue instead of white glue to make cloud slime.
How much shaving cream should I use for the perfect cloud slime?
The amount of shaving cream you need depends on the desired consistency of your cloud slime. Start with a small amount and gradually add more until you achieve the fluffy texture you desire.
What can I do if my cloud slime is too sticky?
If your cloud slime is too sticky, you can add a small amount of baking soda or contact lens solution to help reduce the stickiness. Knead the slime thoroughly until it reaches the desired consistency.
Can I store my cloud slime for later use?
Yes, you can store your cloud slime in an airtight container to keep it fresh and reusable for a longer period of time.