Unleash your creativity and embark on an exciting journey into the world of homemade sensory delights. This article will guide you through the mesmerizing process of making your very own gooey masterpiece – a substance so versatile, it can become anything your imagination desires. Dive into the fascinating realm of slime-making and explore the infinite possibilities that lie at your fingertips.
Unleash the alchemist within you with our easy-to-follow instructions. From fluffy, cloud-like slimes that will send your senses soaring, to glitter-infused glimmering concoctions that sparkle with every movement, this guide is your gateway to endless entertainment. Whether you’re a seasoned slime expert or a complete beginner, our detailed step-by-step tips will help you achieve the perfect consistency and texture for your desired creation.
Revolutionize Your Health & Lifestyle!
Dive into the world of Ketogenic Diet. Learn how to lose weight effectively while enjoying your meals. It's not just a diet; it's a lifestyle change.
Learn MoreUnleash the scientist within you as you experiment with an array of ingredients and techniques. Get ready to mix and match different slime bases, add your favorite colors, fragrances, and textures, and watch in awe as your creation takes shape. Whether you prefer the soothingly serene pastel shades or the vibrant explosions of neon hues, the possibilities are only limited by your imagination. Dive into the world of slime customization and create a one-of-a-kind sensory experience that reflects your unique personality.
How to Create an Easy DIY Slime Recipe at Home
In this section, we will explore the process of concocting a straightforward do-it-yourself slime formula within the comfort of your own home. Discover the joy of creating a uniquely textured, stretchy, and squishy substance by following this simple recipe guide. Embrace the opportunity to craft your very own slime masterpiece by experimenting with different ingredients and techniques.
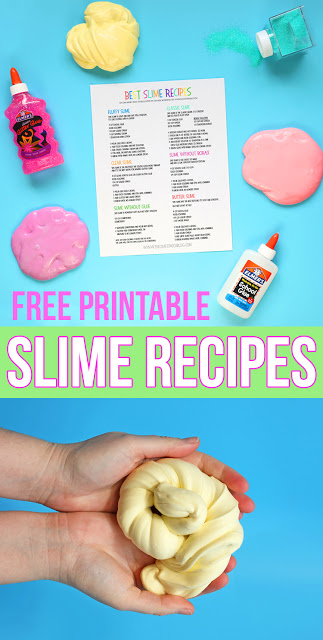
Firstly, you will need to gather the necessary ingredients and materials to bring your DIY slime to life. Start by procuring a suitable base, such as glue or a pre-made slime product. Next, consider incorporating various additives to enhance your slime’s texture and appearance. This could include items like glitter, confetti, foam beads, or even scented oils for an added sensory element.
- Start by selecting a vibrant and captivating color for your slime. Choose from a wide range of pigments or food coloring options to achieve the desired hue.
- Once you have settled on a color, it’s time to mix in your chosen base material with the appropriate amount of water. Keep in mind that different bases may require different water ratios, so be sure to carefully follow the instructions provided.
- If you desire a more stretchy and slimy texture, consider incorporating a natural thickening agent like cornstarch or tapioca starch. These additives will help give your slime that satisfyingly gooey quality.
- Now it’s time to add your selected additives. Whether you prefer a glitzy sparkle, a crunchy sensation, or a pleasant scent, sprinkle in the chosen ingredients and mix thoroughly to distribute them evenly throughout your slime mixture.
- Once all the ingredients are combined, knead the slime with your hands to achieve the desired consistency. If your slime feels too sticky, add a small amount of borax solution or contact lens solution to achieve the perfect stretchiness without creating an excess of stickiness.
Remember, the process of creating DIY slime offers endless possibilities for customization and experimentation. Don’t be afraid to get creative and try out new ingredients or techniques. Enjoy the satisfaction of making your own unique slime recipe that reflects your personal style and preferences. Let your imagination run wild as you dive into the world of DIY slime creation!
Step 1: Gathering the Necessary Ingredients
Before diving into the exciting world of slime-making, you need to gather the essential ingredients. In this step, we will explore the key components required to create your customized slime at home.
Firstly, you will need a base material, such as glue, that will act as the primary ingredient for your slime recipe. There are various types of glue available, including school glue, clear glue, or even glitter glue, which can add a touch of sparkle to your slime.
In addition to the glue, you will also need a slime activator. This ingredient is responsible for transforming the glue into a stretchy and gooey slime. One common slime activator is borax, although alternatives like liquid starch or contact lens solution can also be used.
To give your slime a vibrant and colorful appearance, you can choose to add food coloring or paint. These additives allow you to create a wide range of hues and shades, making your slime visually appealing.
Next, considering the texture of your slime, you might want to incorporate various mix-ins. These can include foam beads, glitter, confetti, or even small toys, which will add a unique touch to your slime creation.
Lastly, it is important to have containers or storage jars available to store your slime. These containers will help keep your slime fresh and maintain its desired consistency over time.
| Components | Examples |
|---|---|
| Base Material | Glue, School Glue, Clear Glue, Glitter Glue |
| Slime Activator | Borax, Liquid Starch, Contact Lens Solution |
| Color Additives | Food Coloring, Paint |
| Mix-ins | Foam Beads, Glitter, Confetti, Small Toys |
Must-Have Ingredients for Your Slime:
When it comes to creating your own slime at home, having the right ingredients is crucial. These essential components will help you achieve the perfect consistency and texture for your slime. In this section, we will explore the must-have ingredients that you will need on hand to create your very own slime masterpiece!
- Gooey Substance: The gooey substance forms the base of your slime and gives it its stretchy and squishy texture. Popular choices include glue or clear glue, which create a thick and oozy texture.
- Activator: The activator is responsible for transforming your gooey substance into a solid and moldable slime. Common activators include borax, contact lens solution, or liquid starch.
- Additives: To enhance the sensory experience and add a pop of color or sparkle to your slime, consider adding various additives. These can include food coloring, glitter, foam beads, or even scented oils.
- Mixing Tools: To ensure that all the ingredients are thoroughly combined, you will need some mixing tools. A spoon or spatula works well for stirring, while a resealable container or zip-top bag is ideal for kneading and storing your slime.
- Optional Extras: Although not essential, there are some optional extras that can take your slime-making experience to the next level. These extras can include charms, miniatures, or even glow-in-the-dark pigments, making your slime creation truly unique.
By having these must-have ingredients ready, you will be well-equipped to embark on your slime-making adventure. Remember that experimentation and creativity are key, so don’t be afraid to try different combinations and explore your own unique slime recipes!
Glue
The essential ingredient for making slime at home is glue. Glue serves as the base of the slime recipe, providing the crucial adhesive properties. It acts as a binding agent, joining the different components together to form the slimy texture that everyone loves.
When selecting glue for your DIY slime project, it’s important to choose a non-toxic and washable option. This ensures that the slime is safe to play with and easy to clean up afterward. You can find a variety of glue types in the market, including clear glue and white glue.
Clear glue is transparent and allows for the addition of various colors and glitter to create visually appealing slime. It’s perfect for those who want to experiment with different shades and effects. On the other hand, white glue is opaque and provides a solid base for adding pigments and other additives.
Once you have chosen the type of glue you want to use, the next step is to measure the right amount. Most slime recipes call for a specific ratio of glue to other ingredients, such as water or borax. It’s crucial to follow the recipe instructions carefully to ensure the perfect consistency of your slime.
Glue is the backbone of any successful slime creation and serves as the foundation upon which you can let your creativity soar. So grab your chosen glue, gather the remaining ingredients, and get ready to embark on a slime-making adventure!
Water
Water is an essential element that plays a crucial role in the process of making slime. It acts as a bonding agent, bringing together all the ingredients to create the perfect slime consistency. Without water, it would be impossible to achieve the desired texture and stretchiness that slime enthusiasts love.
Moisture
When water is added to the slime mixture, it introduces moisture which helps to activate the other ingredients and create the desired slimy consistency. This moisture is what allows the glue, borax, or other activating agents to react and form the polymer chains that give slime its unique properties.
Water acts as a catalyst for the chemical reactions that take place during the slime-making process. It facilitates the bonding of the various components, resulting in a cohesive and stretchy final product.
Proportions
It is important to add water in the correct proportions to achieve the desired slime texture. Adding too much water can make the slime too runny and less stretchy, while adding too little water can result in a dry and crumbly slime. Finding the right balance is key to creating the perfect slime.
The amount of water needed may vary depending on the specific slime recipe being used. It is important to follow the instructions carefully and make any necessary adjustments based on the consistency of the slime mixture. Experimentation may be required to find the ideal water-to-ingredient ratio for the desired slime texture.
Water Storage
It is also important to consider the source and quality of the water used in the slime-making process. Using clean, filtered water is ideal to avoid any contaminants or impurities that could affect the slime’s texture and longevity. Storing the water properly in a clean and airtight container will also help maintain its quality over time.
Water plays an essential role in the slime-making process, contributing to its consistency and texture. By understanding the importance of water and experimenting with different proportions, you can create the perfect slime that is both satisfying to play with and visually pleasing.
Borax
Borax is a crucial ingredient when it comes to making slime at home. It plays a significant role in the slime-making process, helping to create the perfect consistency and texture.
The use of borax in slime recipes often serves as a cross-linking agent, which means it forms bonds between the individual polymer chains in the glue, ultimately giving the slime its unique stretchy and squishy properties. By adding borax to your slime mixture, you can achieve a satisfyingly gooey and moldable slime that provides hours of entertainment.
Commonly known as sodium borate, borax is a versatile compound that is widely used in household cleaning products, laundry detergents, and even as a natural insecticide. However, it is important to note that the use of borax in slime should be done with caution. While borax is generally safe when used correctly, excessive exposure or ingestion can be harmful.
When incorporating borax into your slime recipe, it is essential to follow the recommended measurements to ensure the safety of yourself and others. Be sure to store your slime properly and dispose of any excess borax mixture responsibly. Additionally, if you prefer to avoid using borax, there are alternative slime recipes that utilize ingredients such as contact lens solution or liquid starch as a substitute.
In conclusion, borax is a key ingredient in creating homemade slime that is stretchy, squishy, and fun to play with. Its role as a cross-linking agent helps bind the polymer chains in the glue, resulting in the desired texture. While it is important to use borax cautiously, following the provided instructions and guidelines will allow you to enjoy the fascinating world of slime-making safely.
Optional Ingredients to Customize Your Slime:
Let’s take your slime-making skills to the next level by exploring a range of optional ingredients that you can add to truly customize your slime. These ingredients will help you achieve different textures, colors, scents, and even add some extra fizz or sparkle to your slime creations. Get ready to unleash your creativity and make your slime truly unique!
1. Texture Enhancers: Experiment with adding different materials to change the texture of your slime. You can try adding foam beads for a crunchy texture, glitter for a sparkly effect, or even baby oil for a stretchier and smoother consistency.
2. Colorants: Make your slime pop with a wide variety of colors! Use food coloring or liquid watercolors to dye your slime in vibrant hues. You can also mix different colors together to create unique combinations. Don’t forget to use a small amount at a time and mix well before adding more color to achieve your desired shade.
3. Scented Surprises: Add a delightful aroma to your slime by incorporating scented oils or extracts. Try popular scents like lavender, strawberry, or even bubblegum. Be sure to choose scents that are safe for contact with the skin and remember that a little goes a long way, so start with a few drops and adjust according to your preference.
4. Fizz Fun: If you want to add a touch of excitement to your slime, consider adding a pinch of baking soda and a few drops of vinegar. This combination will create a fizzy reaction, adding an extra element of fun to your slime-making experience.
5. Glow in the Dark: Make your slime glow by mixing in a glow-in-the-dark pigment. This will give your slime an enchanting appearance in low light conditions, perfect for playing with your slime creations during a sleepover or in a darkened room.
6. Metallic Madness: Give your slime a shiny and metallic look by adding metallic pigments or eyeshadows. This will transform your slime into a stunning masterpiece that catches the light and adds a touch of elegance to your sensory play.
Remember, these optional ingredients are meant to encourage your creativity and allow you to personalize your slime. Always follow the basic slime recipe guidelines and experiment with different ratios and combinations to find your perfect slime consistency and appearance. Let your imagination run wild and have fun customizing your slime!
Food Coloring
The use of food coloring in slime making adds an element of creativity and fun. By incorporating different colors, you can customize your slime to match your preferences and create visually stunning creations. Whether you prefer vibrant and bold colors or soft and pastel shades, food coloring allows you to experiment and express your artistic side.
When choosing food coloring for your slime, there are a few things to consider. Firstly, it is important to use food coloring that is safe for consumption, as it will come into contact with your hands. You can find a wide variety of food coloring options at your local grocery store or online.
There are two main types of food coloring: liquid and gel. Liquid food coloring is more readily available and creates a more transparent effect when added to slime. Gel food coloring, on the other hand, is more concentrated and produces vibrant and opaque colors. Both options work well, so it’s a matter of personal preference.
When adding food coloring to your slime, start with a small amount and mix it thoroughly before deciding if you want to add more. This will help you achieve the desired color without making it too overpowering. Remember that a little goes a long way, so add the food coloring gradually.
You can also mix different food coloring shades to create new colors. For example, combining blue and yellow food coloring will give you a green shade, while adding a touch of red to yellow will result in orange. Don’t be afraid to experiment and mix colors to create unique and eye-catching results.
Finally, when working with food coloring, it is important to protect your workspace and clothing from potential stains. Consider laying down a plastic tablecloth or using disposable gloves to prevent any unwanted mess. Keep in mind that some food coloring may temporarily stain your hands, so washing them thoroughly after handling the slime is recommended.
Glitter
Sparkle and shine! The glittery world of slime awaits you in this enchanting section. Discover how to add a touch of magic to your homemade slime creations with the dazzling power of glitter.
Glitter is the perfect ingredient to take your slime to the next level. With its shimmering particles reflecting light, it adds a mesmerizing effect to your slime, making it more eye-catching and captivating. Whether you prefer a subtle glimmer or an explosion of sparkle, the choice is yours!
To incorporate glitter into your slime, start by selecting the colors and sizes that appeal to you. You can choose from a vast array of options, from fine glitters to chunky glitters, and from single tones to mesmerizing mixtures. The possibilities are limitless, allowing you to customize your slime with a unique touch.
When adding glitter to your slime, remember to do so gradually. Start with a small amount, observing how it transforms the texture and appearance of your slime. Fine glitters disperse more evenly, while chunky glitters provide a bolder and more textured effect. Experiment and find the perfect balance that suits your preferences.
Pro tip: To ensure that the glitter sticks well and stays in your slime, use a clear glue as the base for your recipe. The transparency of the glue allows the glitter to shine through beautifully, giving your slime that extra shimmer.
So, get ready to create a world of sparkling slime that catches the light and dazzles everyone who sees it. Let your imagination run wild as you explore the magic of glitter in your homemade slime recipes!
Scented oils
In this section, we will explore an exciting way to enhance your slime making experience by adding scented oils. When creating your own customized slime, scent is an important factor that can elevate the sensory experience. By using different scented oils, you can create unique and pleasing aromas that add an extra dimension to your slime.
Choosing the right scented oil:
When selecting scented oils for your slime, it’s essential to consider your personal preferences and the effect you want to achieve. There are a wide variety of options available, including fruity, floral, and even seasonal scents like peppermint or pumpkin spice. Experiment with different combinations to create your signature scent.
Add the scent:
Once you have chosen your scented oil, the next step is to add it to your slime mixture. After you have mixed all the ingredients together, you can add a few drops of your chosen scented oil. Start with a small amount and gradually add more until you achieve the desired level of scent. Be careful not to overdo it, as too much oil can affect the consistency of your slime.
Enhance the experience:
Adding scented oil not only provides a pleasant aroma but can also contribute to the overall experience of playing with slime. As you stretch and mold the scented slime, the aroma will be released, creating a multisensory experience. The scent can help you relax, uplift your mood, or transport you to a specific memory or place.
Note: It’s important to remember that some people may have sensitivities or allergies to certain scents. If you are making slime for someone else or planning to share it, consider their preferences and any potential sensitivities they may have.
Step 2: Mixing and Preparing the Slime Solution
Now that you have gathered all the necessary ingredients, it’s time to dive into the exciting process of mixing and preparing the slime solution! This step is crucial in creating the perfect texture and consistency that will make your slime fun to play with.
To begin, gather your main ingredients, such as glue and water. You’ll also need a separate bowl for mixing and a stirring utensil, like a spatula or spoon. Once you have everything ready, it’s time to start!
First, measure your desired amount of glue and pour it into the mixing bowl. The glue acts as the primary ingredient for creating the slime’s stretchy and gooey properties. You can experiment with different amounts to achieve the texture you prefer.
Next, it’s time to add water to the glue. The water helps to dilute the glue and make it easier to mix. Gradually pour in the water while stirring the mixture continuously. Be sure not to pour too much water at once, as it can make the slime too runny.
As you mix the glue and water together, you’ll start to see the slime solution taking shape. Continue stirring until all the ingredients are well combined and no clumps remain. The mixture should be smooth and uniform in consistency.
If you want to add color or enhance the slime’s visual appeal, this is the perfect time to incorporate any food coloring, glitter, or other add-ins. Add a few drops of food coloring or a pinch of glitter to the mixture and stir well to distribute the color or sparkle evenly.
After you have achieved the desired consistency and added any additional elements, allow the slime solution to rest for a few minutes. This will help it properly set and reach its full potential in terms of stretchiness and pliability.
Once the slime solution has had time to rest, you are now ready to move on to the next step of the slime making process. This is where the true magic happens as you customize and personalize your slime with various textures, scents, and accessories.
| Note: | Be mindful of your workspace and make sure to clean up any spills or messes promptly. Remember to wash your hands thoroughly after handling the slime solution. |
Questions and answers
What ingredients do I need to make slime at home?
To make slime at home, you will need glue, water, borax, and food coloring (optional). Additionally, you can add glitter, beads, or other fun items to customize your slime.
Is it safe to make slime at home?
Yes, making slime at home is generally safe as long as you follow the instructions and use the ingredients properly. However, it is important to supervise young children during the process and make sure they do not ingest the slime.
Can I make slime without using borax?
Yes, there are many alternatives to using borax for making slime. You can use contact lens solution, liquid starch, or even baking soda and vinegar as substitutes. These alternatives are safer and still provide the desired slime consistency.
How long does it take for slime to set?
The time it takes for slime to set can vary depending on the recipe and the conditions. Generally, it takes about 5-10 minutes for slime to fully form after mixing the ingredients. However, some recipes may require additional time for the slime to become less sticky and more stretchy.
Can I store slime for later use?
Yes, you can store slime for later use. Keep it in an airtight container or a Ziploc bag to prevent it from drying out. Slime can last for several weeks if stored properly.
What ingredients do I need to make slime at home?
You will need glue, water, food coloring, and a slime activator such as borax or contact lens solution.
Can I use something other than borax as a slime activator?
Yes, you can use contact lens solution or liquid starch as an alternative to borax.
How long does it take to make slime?
The process of making slime usually takes around 10-15 minutes, depending on the recipe and your experience.
Can I add glitter or other decorations to my slime?
Yes, you can add glitter, sequins, or other decorations to your slime to make it more fun and colorful.
What do I do if my slime is too sticky?
If your slime is too sticky, you can add a small amount of slime activator (borax solution or contact lens solution) to the slime gradually until you reach the desired consistency.