
Unearthing the realm of fascination and endless creativity is within your grasp. Dive into the wonderful world of slime-making, and witness the magic unfold. With this comprehensive guide, we unlock the secrets of creating mesmerizing slime without the need for an activator. Prepare to embark on a captivating journey into the realm of tactile joy!
Enter a universe where science meets artistry, where imagination knows no bounds. Discover the art of concocting slime without relying on traditional activators, and embrace the beauty of experimentation. Tired of fussing over elusive ingredients? Look no further, as this step-by-step walkthrough demystifies the process, allowing you to amaze and astonish friends and family alike.
Engage your senses and let your creativity surge as you delve into the depths of tactile delight. This meticulous guide empowers you to transform ordinary household items into a gooey masterpiece. Through the careful balance of texture and color, witness the birth of enchanting creations that stretch, squish, and mold your imagination.
- Unlock the Secret: Create Slime Without Activator
- Step 1: Gather the Essentials
- Measure, Mix, and Marvel
- Step 2: Select Your Base
- From Shampoo to Starch: Endless Possibilities
- Experiment and Enhance: Add a Twist to Your Slime
- Step 3: Achieve the Ideal Texture
- Trial and Error: Finding the Optimal Ratio
- Add-Ins Galore: Creating Texture and Stretch
- Step 4: Preserve and Play
- Storage Tips: Make Your Slime Last
- Questions and answers
Unlock the Secret: Create Slime Without Activator
In this section, we will unveil the hidden technique to produce slime without the need for an activator. Prepare to be astonished as we divulge the mystical method that will leave you mesmerized!
Are you ready to unravel the enigma behind slime creation without the reliance on an activator? Brace yourself as we delve into the world of slime-making wizardry, where conventional methods are left aside, and an unconventional approach takes center stage.
Within this realm of alchemy, we will guide you through the steps of concocting a delightful slime blend without the customary activator. Prepare to be transfixed by the possibilities that lie ahead as we introduce you to the ingredients and secret techniques that will set your slime-making experience apart.
Get ready to embark on a captivating journey where conventional boundaries are shattered, and new possibilities emerge. With our secret arsenal of ingredients and techniques, you’ll unlock the door to creating magnificent slime without an activator, unraveling the mystery that has captivated enthusiasts for years.
By embracing this esoteric approach to slime-making, you break free from the conventional confines and unleash your creativity in ways you never thought possible. Prepare to astound your friends with your newfound prowess, as you confidently present your activator-free slime masterpiece.
Embrace the artistry of slime-making without limits. With our guidance, you will venture through uncharted territories, discovering the untold secrets that lie within the realm of slime creation. Get ready to unlock the secret behind creating magical slime without an activator.
Step 1: Gather the Essentials
In order to successfully create slime without the need for an activator, it is essential to gather all the necessary items. This step focuses on the initial preparations before diving into the magical slime-making process.
Firstly, make sure to assemble all the required ingredients for your slime recipe. These may vary depending on your chosen recipe, but commonly include items such as glue, water, and various additives to achieve desired texture and appearance.
Next, gather the necessary tools and containers for mixing and storing your slime. This could include bowls, spoons, measuring cups, and airtight containers to keep your slime fresh and pliable.
It is also important to have a clean and designated workspace where you can comfortably create your slime. This will help keep the area organized and prevent any unnecessary messes.
Lastly, don’t forget to have some optional additions on hand to customize your slime. These could be glitter, food coloring, or small trinkets to add an extra touch of magic and uniqueness to your creation.
Gathering all these essentials in advance will ensure a smooth and enjoyable slime-making experience, setting the stage for the subsequent steps to come. So let’s gather everything we need and get ready to unleash our creativity!
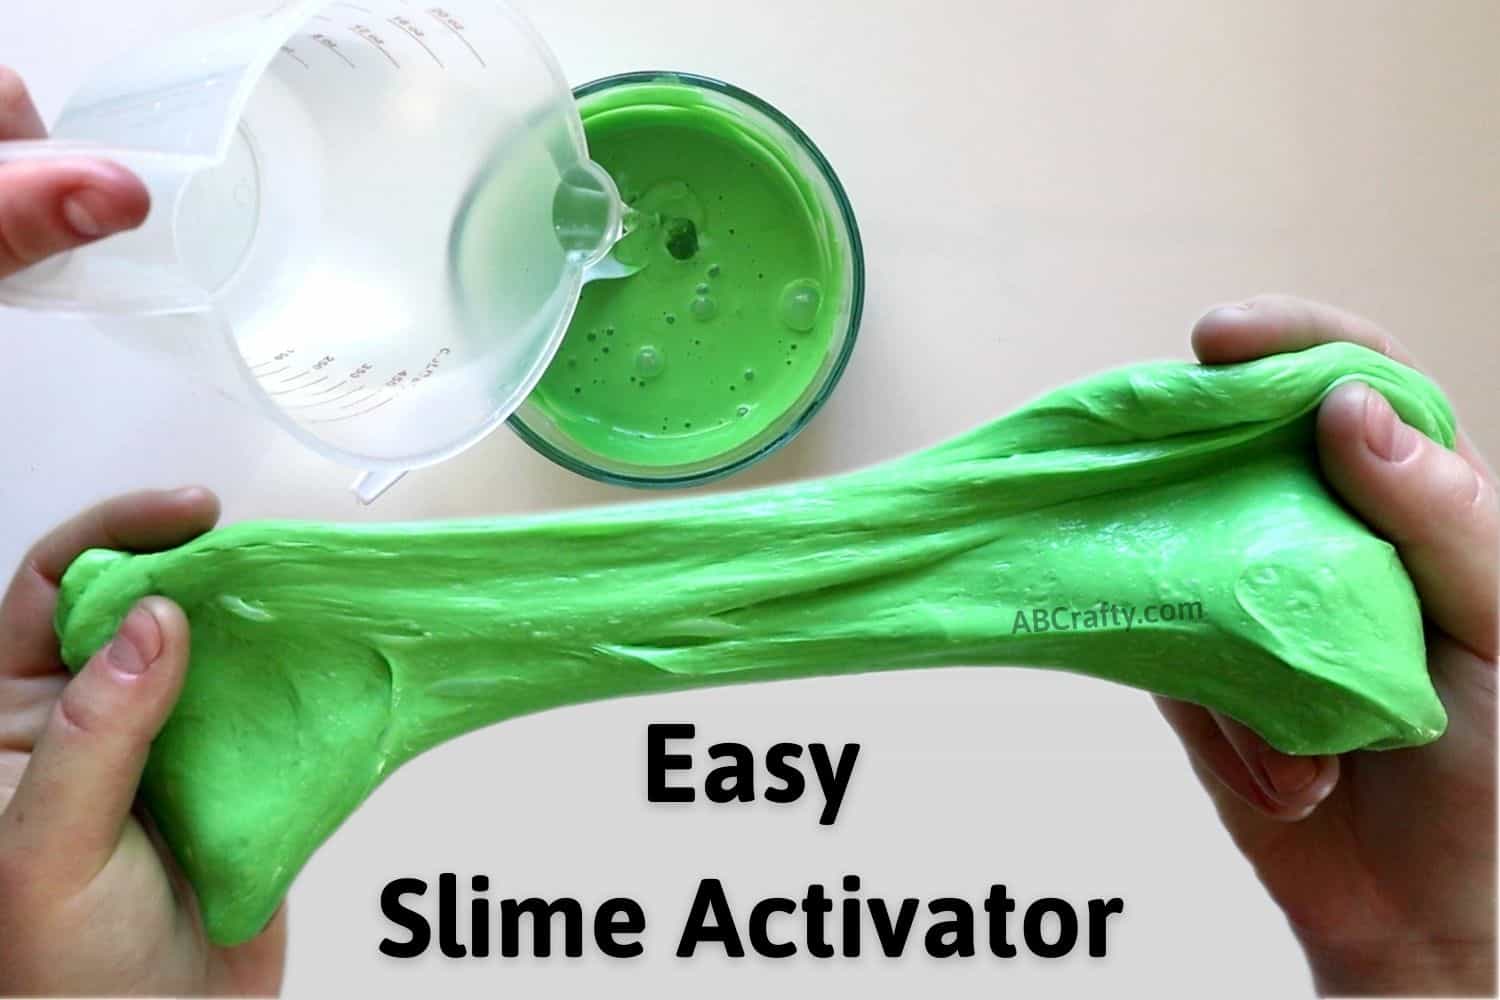
Measure, Mix, and Marvel
When it comes to creating slime without activator, the process can be broken down into three simple steps: measuring, mixing, and marvelling. Each step is crucial in achieving the perfect consistency and texture for your slime, and it’s all about finding the right balance.
Measure
The first step in making slime without activator is measuring the ingredients. It’s important to be precise and accurate with your measurements to ensure the desired outcome. You’ll need to measure out the right amount of glue, water, and other optional ingredients like food coloring or glitter. Remember, even the smallest change in measurements can alter the final result, so be meticulous!
Mix
Once you have all your ingredients measured out, it’s time to mix them together. This step is where the magic happens as the ingredients combine and transform into slime. Use a spoon or your hands to mix everything thoroughly, making sure there are no lumps or clumps. The key here is to mix slowly and evenly, allowing the ingredients to blend seamlessly.
Marvel
After mixing everything together, take a moment to marvel at your creation. Watch as the slime forms and stretches, noticing its unique texture and vibrant color. Feel the satisfaction of successfully making slime without activator and appreciate the science behind it. This is the moment where you can let your imagination run wild, exploring the endless possibilities of what you can do with your slime.
So, whether you’re a slime enthusiast looking for a new recipe or a curious beginner eager to try your hand at slime-making, following the steps of measuring, mixing, and marvelling will guide you towards a fascinating and rewarding slime-making experience.
Step 2: Select Your Base
There are several options available when it comes to selecting a base for your slime. One popular choice is using glue as the main ingredient. Glue provides a smooth and stretchy texture, perfect for creating that satisfying slime experience. Another option is using shampoo or body wash, which can give your slime a softer and more fluffy consistency. You can also experiment with different types of liquid detergent or dish soap, as they can add unique properties to your slime.
When choosing your base, consider the type of slime you want to create. If you’re aiming for a more stretchy slime, opt for a glue-based mixture. On the other hand, if you prefer a softer and fluffier slime, using shampoo or body wash as your base may be the right choice. Don’t be afraid to try out different combinations and see which one works best for you.
Additionally, you can enhance the texture and appearance of your slime by adding various other ingredients, such as food coloring, glitter, or even small beads. These additions can give your slime a playful and visually appealing touch.
Remember, the base you choose will greatly influence the final outcome of your slime. So take your time to experiment and find the perfect base that suits your preferences and creates the magical slime you’re dreaming of!
From Shampoo to Starch: Endless Possibilities
In this section, we will explore the boundless potential of various ingredients that can be used to create slime without activating agents. From everyday household items to cooking essentials, we will delve into the world of alternative slime-making options, providing you with a plethora of choices to customize your slime recipe.
Shampoo: Looking beyond its cleansing abilities, shampoo can serve as a key component in slime creation. Its texture and viscosity offer unique characteristics to your slime, allowing for a different sensory experience.
Starch: Stepping away from the traditional activator, starch can be a fantastic alternative for slime-making. Whether it’s cornstarch, potato starch, or even laundry starch, these options offer various consistencies and give your slime a distinctly different feel.
Household Oils: Exploring the oil aisle in your kitchen pantry can unveil exciting possibilities for slime creation. Oils such as olive oil, coconut oil, or even baby oil can lend their unique properties to your slime, enhancing its stretchiness and texture.
Baking Products: When it comes to slime-making alternatives, baking products prove their versatility. Items like baking soda, baking powder, and even cream of tartar can be utilized to achieve the desired slime consistency and texture.
Glue Substitutes: If you’re looking for slime-making options without using glue, fear not. There are alternatives available, such as using a combination of dish soap and toothpaste or trying out recipes that implement clear or school glue substitutes.
Sweeteners: Believe it or not, sweeteners can contribute to the slime-making process by providing unique properties and scents. Items like honey, maple syrup, or even artificial sweeteners can add a touch of creativity and aroma to your slime creation.
Natural Ingredients: Delving into the world of nature can bring unique elements to your slime recipe. From natural food coloring like beet or spinach juice to herbs and spices, there are countless possibilities to enhance your slime using organic alternatives.
In this section, we have explored a variety of ingredients that open up new avenues for slime creation. From unconventional substances found in your home to unexpected products from the kitchen, the possibilities are truly endless when it comes to making slime without activators. Experiment, have fun, and let your creativity flow as you discover the wonders of alternative slime-making ingredients!
Experiment and Enhance: Add a Twist to Your Slime
Explore the world of endless possibilities as you take your slime-making skills to the next level. In this section, we will delve into various innovative techniques and unique ingredients to add a touch of creativity and excitement to your slime creations.
Unleash your imagination and let it run wild as you experiment with different textures, colors, and scents. By incorporating a diverse range of materials and substances, you can transform your ordinary slime into something extraordinary!
Why not try adding various glitter or sequins to give your slime a mesmerizing sparkle effect? Experiment with different types of beads or foam balls to create fascinating textures and add a satisfying crunch to your slime. You can also infuse your slime with essential oils or perfumes to create a delightful aroma that will enhance your sensory experience.
Don’t limit yourself to traditional colors – explore the spectrum and mix different shades to create a stunning swirl effect. Use natural dyes derived from fruits and vegetables to achieve vibrant and unique colors. Incorporate neon pigments or glow-in-the-dark powders to create slime that shines under UV light.
Furthermore, why not take your slime to the next level by adding unexpected ingredients? Consider adding fun confetti, small toys, or even edible items like sprinkles or edible glitter for a whimsical touch. With these additions, your slime will become a truly interactive and sensory delight.
Remember to experiment cautiously and in small increments, ensuring the optimal consistency and texture of your slime is maintained. Take notes of your experiments and learn from each variation to create your own signature slime recipes.
So, get ready to elevate your slime-making game with these exciting techniques and ingredients. Let your creativity flow and enjoy the magical world of slime with a unique twist!
Step 3: Achieve the Ideal Texture
Developing the perfect consistency is a crucial step in creating slime without the need for an activator. The texture of your slime can make all the difference in its playability and overall satisfaction. In this step, we will explore various techniques to help you achieve the ideal texture for your slime.
Firstly, it is important to remember that the consistency of your slime should be smooth and stretchy, allowing for enjoyable playtime without being too sticky or stiff. To achieve this, you can experiment with different ratios of ingredients, such as glue, water, and slime enhancers, to find the perfect balance. Adjusting the measurements of these elements will enable you to achieve a consistent texture that is neither too runny nor too firm.
In addition to ingredient ratios, the mixing process plays a crucial role in perfecting the consistency of your slime. Mixing the ingredients thoroughly and evenly will ensure that all the elements are fully incorporated, resulting in a smooth and elastic texture. Remember to take your time while mixing, applying both firm pressure and gentle strokes to create a uniform mixture.
Furthermore, incorporating various additives can also help enhance the texture of your slime. Adding a few drops of baby oil or lotion can make the slime softer and more pliable, facilitating smoother stretching and shaping. Alternatively, incorporating cornstarch or baking soda can help thicken the mixture, giving it a more substantial and satisfying feeling.
Experimentation and patience are key in achieving the ideal consistency for your slime. Remember to test and tweak your recipe as needed until you find the perfect balance of ingredients and techniques that result in a satisfyingly stretchy and enjoyable slime.
Trial and Error: Finding the Optimal Ratio
Exploring the world of slime-making can be a fascinating journey of experimentation and creativity. As you embark on this magical adventure, one key element to consider is finding the optimal ratio of ingredients. The ideal ratio determines the consistency and texture of your slime, allowing you to create the perfect sensory experience.
In the quest for the optimal ratio, you may encounter a series of trials and errors. It’s an iterative process of mixing different amounts of ingredients and observing the results. By adjusting the proportions of key components, such as glue, water, and additional elements like colors or glitter, you can fine-tune the consistency and properties of your slime.
A crucial aspect of finding the perfect ratio is understanding the role of each ingredient. Glue serves as the base, providing the necessary stickiness for your slime to form. Water is added to achieve the desired stretchiness and pliability, with careful consideration to prevent the mixture from becoming too liquid. Additional elements like colors or glitter can be added in different quantities to achieve the desired visual effect.
| Ingredient | Role |
|---|---|
| Glue | Provides stickiness |
| Water | Achieves desired stretchiness |
| Colors or glitter | Enhances visual effect |
However, it’s important to note that the optimal ratio may vary depending on personal preference and the desired outcome. Some individuals may prefer a slimier texture, while others may enjoy a firmer consistency. Experimentation is key to finding the ratio that suits your unique preferences.
Remember, the process of slime-making is all about exploring and having fun. Embrace the creativity and enjoy the journey of trial and error as you discover the optimal ratio that brings your slime to life with its magical properties.
Add-Ins Galore: Creating Texture and Stretch
Embark on a journey of endless possibilities as we explore the realm of add-ins for your slime creations. In this section, we delve into the art of enhancing the texture and stretch of your slime concoctions, taking your slime-making experience to a whole new level.
Discover a wide array of options to infuse your slime with unique properties, elevating its tactile allure. From incorporating various tactile elements such as foam beads, glitter, or floam, to experimenting with different textures like fluffy, crunchy, or glossy, the possibilities of creating a personalized slime masterpiece are boundless.
Seek inspiration from nature by adding in ingredients such as dried flowers, herbs, or even crushed seashells, giving your slime an enchanting touch of whimsy. Alternatively, explore the world of scented add-ins, infusing your slime with delightful aromas that transport your senses to a different realm.
As you venture deeper into the realm of add-ins, unleash your creativity by blending different materials, colors, and textures. Dare to combine stretchy add-ins like rubber bands or mesh balls with shimmering elements such as holographic glitter, making your slime truly mesmerizing.
Expand your slime-making horizons and experiment with unconventional add-ins like kinetic sand or bouncy balls, bringing an element of surprise and excitement to your creations. Embrace the beauty of experimentation and let your imagination guide you as you explore the endless possibilities of add-ins galore.
Whether you prefer a slime with a fluffy cloud-like consistency or a super stretchy and glossy slime, the art of mastering texture and stretch lies in the perfect combination and arrangement of add-ins. Let your creativity soar and create a slime masterpiece that captures both your imagination and tactile desires.
So, gather your favorite add-ins and embark on a journey of tactile delight. With every new add-in, you uncover a world of texture and stretch that will leave you spellbound. Get ready to surprise and amaze your friends with your unique slime creations – the possibilities are truly endless!
Step 4: Preserve and Play
Preservation:
Preserving your slime is a crucial step in ensuring its longevity and continued playability. To keep your slime fresh and stretchy, store it in an airtight container such as a resealable plastic bag or a glass jar with a tight-fitting lid. This will prevent air from drying out the slime and help maintain its desired consistency.
Playtime:
Now that you have preserved your slime, it’s time to indulge in endless hours of fun. Explore the various ways to play with your slime, whether it’s squeezing, stretching, or even using it as a stress-reliever. You can also experiment with mixing different colors or adding small objects to create unique textures and effects. Let your imagination run wild and discover the joy of slime play!
Regular Maintenance:
To ensure your slime stays fresh and enjoyable, it’s important to practice regular maintenance. Make sure to wash your hands before and after playing with slime to prevent any contaminants from affecting the quality. If you notice any changes in texture or smell, it may be time to replace or make a new batch of slime.
Remember, preserving and playing with your homemade slime is all about having fun and exploring the endless possibilities. So get ready to enjoy hours of sensory delight with your very own slime creation!
Storage Tips: Make Your Slime Last
Preserving the longevity of your slime is crucial in ensuring that you can enjoy its squishy, gooey goodness for as long as possible. In this section, we will explore some useful storage tips that will help extend the life of your slime without the need for an activator.
One key factor in keeping your slime fresh is selecting the right container. Opt for an airtight and sealable container that can effectively prevent air and moisture from seeping in. This will help maintain the consistency and texture of your slime, preventing it from drying out or becoming sticky.
Another important aspect to consider is the storage temperature. Slime tends to react to extreme temperatures, so it’s best to store it at room temperature, away from direct sunlight and heat sources. Cold temperatures can cause the slime to harden, while excessive heat can cause it to become runny or even melt.
When storing your slime, it’s also crucial to keep it away from dust, dirt, and other contaminants. Ensure that the container is clean before placing your slime inside. Additionally, avoid contact with any sharp objects or rough surfaces, as they can tear or damage the slime.
Regularly inspect your slime for any signs of mold or bacterial growth. If you notice any unusual odors or discoloration, it’s best to discard the slime immediately to avoid any potential health hazards.
By following these storage tips, you can prolong the life of your slime and continue to enjoy its unique sensory experience for weeks or even months to come. Happy sliming!
Questions and answers
Is it possible to make slime without activator?
Yes, it is absolutely possible to make slime without activator. In fact, there are several alternative ingredients that can be used to achieve the same result.
What are some alternative ingredients that can be used as slime activators?
There are several alternative ingredients that can be used as slime activators. Some popular choices include contact lens solution, liquid laundry detergent, baking soda and saline solution.
How do I make slime using contact lens solution as an activator?
To make slime using contact lens solution as an activator, you will need to mix equal parts of glue and contact lens solution in a bowl. Keep stirring until the mixture reaches a slime-like consistency. If it’s still too sticky, add a few drops of contact lens solution and continue stirring.
Can I use baking soda as an activator for making slime?
Yes, baking soda can be used as an activator for making slime. To make slime with baking soda, you will need to mix equal parts of glue and baking soda in a bowl. Then, slowly add a small amount of contact lens solution while stirring until the mixture becomes slimy.
What can I do if my slime becomes too sticky?
If your slime becomes too sticky, there are a couple of things you can do. First, you can add a small amount of the activator ingredient you used (such as contact lens solution or baking soda) and continue kneading or stirring until the stickiness lessens. If that doesn’t work, you can try adding a tiny amount of lotion or baby oil to the slime and knead it in to make it less sticky.
What ingredients do I need to make slime without activator?
To make slime without activator, you will need glue, baking soda, contact lens solution, and any optional additions like food coloring or glitter.
Can I use any type of glue to make slime without activator?
No, not all glues are suitable for making slime. You should use a washable PVA glue, like Elmer’s glue, as it has the right consistency and properties for slime-making.
Why do I need contact lens solution for making slime?
Contact lens solution contains boric acid, which reacts with the baking soda and glue to create a stretchy slime texture. It acts as the activator in this slime recipe.
Is it necessary to add food coloring or glitter to the slime?
No, adding food coloring or glitter is optional. You can leave the slime plain or experiment with different colors and textures by adding these optional additions.
What should I do if my slime turns out too sticky?
If your slime is too sticky, you can add a small amount of contact lens solution and knead it into the slime until it reaches the desired consistency. Repeat if necessary, but be careful not to add too much solution, as it can make the slime too stiff.


